
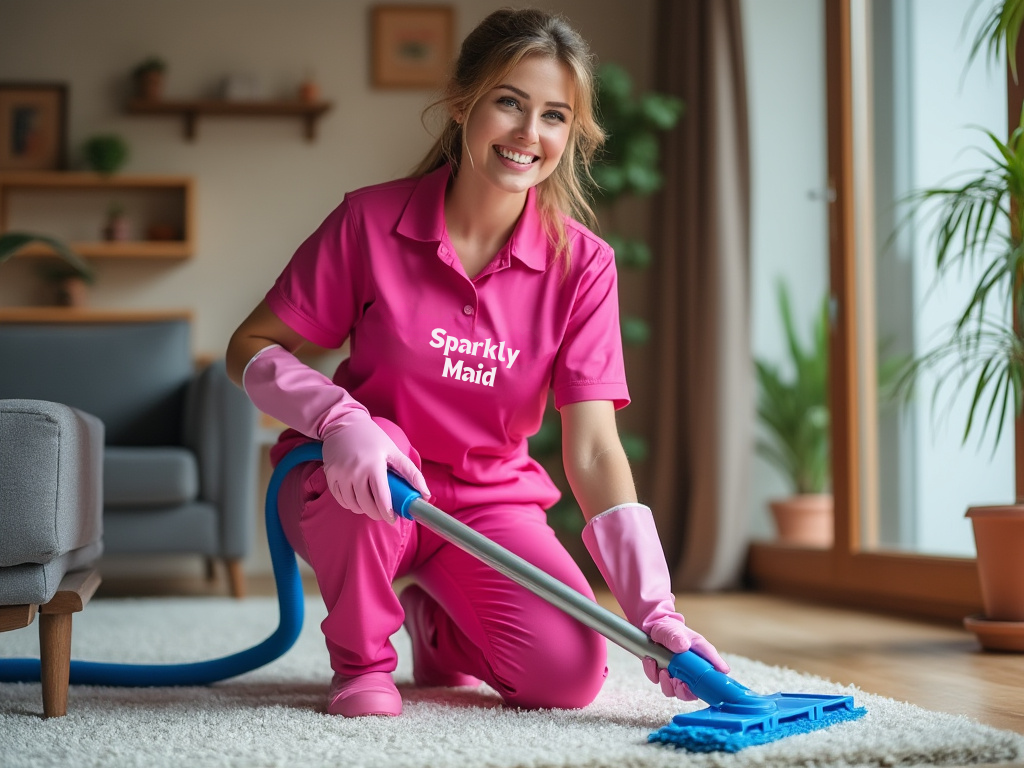
Can You Wash Dry Clean Only Curtains
Dry clean only curtains can be tricky to maintain, especially if you’re trying to avoid expensive professional services. But can you wash them at home without damaging the fabric? This guide explains how to safely clean these curtains, from the importance of following care labels to using specific laundry techniques. We’ll cover alternative cleaning options like spot cleaning or using a steamer and provide expert tips on preventing shrinkage or discoloration. Keep your curtains looking fresh and new with these easy-to-follow steps and recommendations.
Mastering the Art Of Cleaning Delicate Curtains
Essential Tools For Cleaning Curtains Safely

Understanding Dry Clean Only Labels
Dry clean only means to professionally clean to avoid shrinkage, color or distortion. For delicate fabrics like silk or velvet or to protect weaves or dyes from water.
Dry-clean only mark on curtains suggests expert washing is preferred for maintenance. It suggests that special treatment is needed by fabrics that home washing machines cannot provide. Improper treatment can cause shrinkage, fading or distortion of fabric.
Dry cleaning uses solvents instead of water; treating delicate materials is involved. Professionals use machines with unique methods to maintain fabric like silk or even velvet often present in dry clean only curtains. Solvents have fewer abrasives compared to water-based systems, hence fewer options for fabric damage.
Certain clothes with complex weavings or embroidery also require dry cleaning to preserve and maintain their length. Water might harm their look as well as their construction. Even curtains with dyes that bleed belong to this class because water tends to produce ugly stains.
Reading the care label enables you to make a decision about how to care for your curtains. Producers make these recommendations after testing fabrics and gaining experience about how fabrics behave with varying conditions. Always follow the label to prevent damage as well as increase the lifespan of your curtains.
Check with the manufacturer if you’re not sure. It will have special care instructions for their fabric. Follow the care labeling to keep your curtains looking fresh and beautiful.
Risks of Washing Dry Clean Only Curtains
It is dangerous to wash dry-clean only curtains at home because they can get damaged or destroyed. Being mindful of such risks helps you make sound choices about your window coverings.
Potential Fabric Damage
“Dry clean only” curtains are made from delicate fabrics like silk or velvet that warrant special treatment. When they fall into water, they can be subject to fabric distortion. Silk becomes limp and brittle; velvet becomes limp or acquires permanent creases. Even the fabric’s weave can come undone, destabilizing the fabric.
When fibers either bulge or decay unevenly, your curtain loses its appearance as well as lifespan. High heat, detergents and spinning from everyday washing machines enhance these risks. When you store these fabrics incorrectly, your curtains will lose their luster and get replaced even quicker.
Color Fading and Shrinkage
Washing can cause fading of color and shrinkage of dry clean only curtains. Treatments with water solvents, especially fabrics with deep or rich dyes, can fade or shed their original color. Chlorine found in water or abrasive detergents can cause uneven or darkening color. Distortion occurs where bleeds from different colors blend together, most often with multi-colored or printed cloth.
Aside from color issues, curtains may shrink if they have been mistakenly washed. Natural fibers such as wool or linen shrink a lot and also alter the curtain fit and drape. Inaccurate temperatures or drying can make this effect worst and alter the size of the curtain permanently. As a preventative to achieve stable condition and dye for cloth, follow professional cleaning instructions to preserve the appearance of the curtain.

Alternatives to Washing Dry Clean Only Curtains
Keeping dry clean only curtains un-washed can maintain their longevity and appearance. Get to know about professional treatment alternatives together with home solutions including spot cleaning to maintain fabrics within their finest condition.
Professional Dry Cleaning
Consider hiring a specialist dry cleaner to clean your curtains bearing a dry clean only tag to get the most trustworthy results. Experts, when they’re dealing with sensitive fabrics, will be using chemical solvents that are milder than water-based processes. To avoid any issues like shrinking or fading, it’s important to choose a licensed service provider that’s competent with fabric treatment. To make sure maximum treatment is applied, be sure to inquire about their experience with particular types of fabric, for example, silk or velvet.
Spot Cleaning or Steaming
Spot washing eliminates some types of stains off curtains without soaking them. Use a cloth with a soft fabric-friendly cleaning solution. To prevent having the stain spread, pat dry with a gentle hand then air dry.
Another technique to restore fabric and eliminate wrinkles is through steaming. Fabrics such as curtains can be restored and cleaned via handheld steamer. To avoid having problems with moisture, keep a safe distant while steaming.

Step-by-Step Guide to Washing Dry Clean Only Curtains
Washing dry clean only curtains by hand at home is a time-consuming activity with keen preparation and accurate procedures to be effective. These steps can help maintain the quality and look of your curtains.
Pre-Wash Preparations
Check your curtains’ colorfastness and fabric to ensure they can be cleaned. Test a discreet area with water to make sure that the color does not run. Remove any hardware such as hooks or weight to prevent washing-induced damage. Vacuum if you can to remove dust or debris to ensure dirt does not settle with the wash.
For fragile fabric such as silk or velvet, request expert advice. Mend slight holes or frayed fibers to prevent a rise in damage from washing.
Machine Washing Tips
Choose a low speed or gentle wash with cold water to prevent shrinkage and distortion. Choose a soft wash detergent for delicate fabrics; consult manufacturer’s guide to detergent dosage. Put curtains into a mesh washing sack to protect against machine action and fabric rub.
Do not overload washer to achieve even wash processing and protect against damage. Choose an extremely short wash time to prevent exposure to water as well as detergent. Hand washing is an alternate technique for extremely delicate curtains to prevent mechanical stress.
Air Drying and Ironing
Line up curtains as soon as they’re washed to prevent wrinkling and distortion. Select a spot out of direct sunlight, which causes fading. Padded hangers or a clothesline with clips for delicate fabric should be used to support curtains without creating lines or marks.
Still wrinkly after drying? A steamer or an iron with a low heat setting should be utilized; take care with a patch first to avoid fabric burn. Use a pressing cloth over curtains if ironing directly to cover fabric. Always read and stick to care labeling to achieve optimum drying and pressing.

When to Seek Professional Help
Refer to trained professionals to clean curtains with delicate fabrics, intricate ornamentation, extensive stains or wear because professionals will be capable of preventing damage, addressing ingrained odors, and preserving integrity as well as longevity.
Get professional help if you have curtains with intricately woven or old fabrics. Professionals know how to handle intricately woven fabrics and sensitive dyes so you don’t end up spoiling them. Get them to handle it if your curtains have beading or embroidery because they need to be handled with care so they don’t get warped or lost.
Professional help restores curtains looking distinctive and elegant most especially if faced with stubborn odors or stains. Spots that will not disappear with basic spot removal especially those caused by liquids such as wines or oils necessitate professional treatment. Odors deep into the fabric especially into natural fibers highly benefit with professional quality solutions.
Interlined curtains also need professional treatment. Interlining fabric cannot be cleaned effectively at home because it may shrink unevenly relative to outer fabric resulting in structural issues. Professionals know how to match the mode of cleaning with interlining fabric to preserve integrity and longevity.
In case you observe symptoms of fabric deterioration including fading or patches where the fabric is thinning, consult a professional. Professional services can assess the fabric’s condition and treat it to prevent further wear. It is important to ensure curtain longevity and appearances.
Get expert help for curtains that have been exposed directly to environmental elements like dust and sunlight. These things will gradually destroy fabric fibers and necessitate special treatment that a professional can conduct. Getting it repaired beforehand will also lengthen curtains’ longevity.
Your Final Curtain Cleaning Checklist
There is a consideration about the advantages and disadvantages associated with washing “dry clean only” curtains by yourself. It is achievable to make educated decisions if you can recognize your curtains’ unique requirements even if expert service guarantees utmost treatment to delicate fabrics.
You can reduce the risk of damage by using advisable techniques if you decide to wash them by yourself. Expert services are still the most trustworthy solution, though, for expensive or intricate curtains.
It is achievable to ensure your curtains’ longevity and elegance if you take heed to care labels and consult professionals where necessary.
Frequently Asked Questions
-
While it's possible, washing "dry clean only" curtains at home comes with risks. These fabrics often require professional care to avoid damage, such as shrinkage or loss of texture. If you choose to wash them yourself, proceed with caution, ensuring to follow specific steps like using cold water and a gentle cycle. Always check the care label and test a small area first.
-
"Dry clean only" fabrics are often delicate, such as silk or velvet, and may have dyes or weaves that water can damage. Dry cleaning uses special solvents that are gentler than water and detergent, maintaining the fabric's quality and appearance.
-
Washing can cause shrinkage, fading, or distortion, especially for delicate fabrics. Silk may lose its luster, while wool could shrink. Richly dyed colors might bleed. These issues can impact the curtains' aesthetics and durability.
-
Spot cleaning and professional dry cleaning are effective alternatives. Spot cleaning targets small stains, while professional services ensure a thorough clean without water damage. Steaming can also refresh the fabric and remove wrinkles without wetting.
-
Check the fabric type and colorfastness, remove all hardware, and vacuum the curtains to remove dust. Use a mesh laundry bag and opt for a gentle cycle with cold water and mild detergent. Ensure not to overload the washer.
-
Complex fabrics, vintage textiles, and curtains with beading or embroidery should be professionally cleaned. Seek help for severe stains, odors, or signs of fabric degradation. Curtains with interlining also require professional care to maintain their structure.
All-in-One Cleaning Guide for a Fresher, More Comfortable Home
Step-by-Step Tips to Clean, Organize, and Maintain Every Part of Your Space
Best Way To Clean Gold Earrings
Best Way To Clean MacBook Screen
Best Way To Clean Vinyl Records
Can Washing Machines Be Stopped Mid-Cycle
Can You Wash Dry Clean Only Curtains
Cleaning Comfort Room Safety Precautions To Be Observed
Cleaning Pet Urine From Carpet
Cleaning Stainless Steel Fridge
How Technology Is Remodeling The Cleaning Industry
How To Get Rid Of Cigarette Smell In Car
How To Get Self Tanner Out Of Carpets
How To Make Your House Smell Like Laundry Detergent
How To Prepare Your Home For A Deep Cleaning Service
How To Prevent Allergies With Cleaning
How To Remove Carpets DIY Guide
How To Replace Carpets By Yourself
Magic Eraser To Spot Cleaning Walls
Open Windows To Deodorize Home
Removing Bleach Smell From House

How To Replace Carpets By Yourself
Tired of outdated or worn-out carpet? Replacing it yourself is easier than you think! This DIY guide covers everything you need to know about replacing carpets step by step. Whether you’re doing a full-room carpet replacement or just tackling a section, our instructions will guide you from start to finish. Learn how to remove the old carpet, choose the right materials, and properly install the new one. Perfect for beginners and DIY enthusiasts, this guide makes carpet replacement simple and affordable. Enhance your space with fresh, new carpet today!
Easy DIY Carpet Replacement For A Brand New Look
DIY Carpet Replacement Tips For A Seamless Look

Preparing for Carpet Replacement
Planning is necessary before starting a carpet replacement project in your house. Effective preparation creates the conditions for a seamless procedure and a fulfilling outcome.
Assessing the Current Carpet
Examine the condition of the current carpet first. Take note of any wear indicators, like holes, rips, and discoloration. Look for stains that are difficult to remove with cleaning. Take into account the overall texture; excessive use is indicated by a flattened, rough surface. To calculate how much new carpet is required, take precise measurements of your room's size, taking into account any nooks and crannies. Check the quality of the subfloor beneath the carpet to make sure there aren't any damage or moisture problems that could compromise the new installation.
Gathering Necessary Tools and Materials
Get all the tools and materials you'll need before you start. A utility knife or carpet cutter works well for removing old carpet. Carpet stretchers and knee kickers ensure that the new carpet fits securely. Tape and glue are used to secure carpet seams. Pliers and staple removers are useful tools for little repairs and removing the carpet pad. A chalk line and measuring tape help ensure precise placement. To protect yourself from dust and sharp objects, wear protective gear like gloves and masks. Make sure you have any underlayment, padding, and your new carpet ready before you begin.
Safety Precautions
When working on the replacement, put safety first. To release odors and dust, open up the space. To prevent strain on your knees, use kneepads or other cushioning. To avoid mishaps, keep your tools sharp and in good operating order. Put on gloves to prevent cuts from carpet edges or sharp blades. To prevent harm, be sure that no staples or tacks are left on the floor after removing the old carpet. To shield the respiratory system from tiny particles that can irritate it, wear masks. Maintain adequate lighting in work locations to avoid blunders or mishaps.

Removing the Old Carpet
To get the space ready for new flooring, start by removing the old carpet. For efficiency and safety, use the right equipment and procedures.
Detaching from Tacks or Strips
Using pliers, begin by pulling up a corner of the carpet, then proceed down the edges. Because carpet tacks and strips are sharp, put on gloves for safety. Pull the carpet away from the tack strips after you've raised a corner. To avoid tearing, keep the carpet taut. The carpet is held in place by tack strips, which are often placed around the edge of the space. You can use them again with the new carpet if they stay in good shape. Once the carpet has been removed, fold it up into little pieces to dispose of. If pieces are too big to manage, cut them using a utility knife. Since the carpet is frequently stapled to the subfloor, remove the padding underneath it. Using pliers to pull it apart makes removal simple. To provide a flat surface for the new installation, look for any leftover staples or nails on the floor and remove them using pliers or a pry bar.
Disposal of Old Carpet and Padding
Make plans for their disposal once the padding and carpet have been removed. Many cities have rules about where or how to dispose of waste. Verify compliance by consulting the local waste management regulations. If curbside pickup isn't available in your city, you might have to transport them to a specific disposal location. As an alternative, think about hiring a dumpster for big loads or asking your neighborhood garbage collection provider about pickup choices. Carpets are occasionally accepted by nearby recycling facilities since their materials can be recycled. Examine any city carpet recycling rules prior to disposal. To keep the workstation tidy, make sure any traces and debris are removed from the space prior to installing the new carpet. In addition to following the law, proper disposal promotes environmental responsibility.
Preparing the Subfloor
Preparing the subfloor for the new installation comes next after the old carpet has been taken out and disposed of appropriately. By doing this, you may avoid future problems and provide a stable, smooth base for your new carpet.
Inspecting for Damage
Start by looking for any indications of damage on the subfloor. Examine the floor for signs of decay, mold, or water stains, as these might weaken its structural stability. If the subfloor is made of wood, look for any sagging or mushy spots since these could be signs of structural problems. The stability of the carpet may be impacted by chips and fissures in concrete subfloors, necessitating repair. To spot any flaws or inconsistencies, use a flashlight in dark areas. Repair damaged areas as soon as possible, using concrete repair for small concrete chips or wood filler for minor wood problems. To prevent jeopardizing the structural integrity of your floor in the event of significant damage, think about seeking professional advice.
Cleaning and Smoothing the Surface
Thoroughly clean the subfloor to remove any last bits of dust, debris, and carpet adhesive. Use a vacuum to get rid of any remaining little material after sweeping the entire area with a brush. Any adhesive residue should be cleaned with the proper solvent before being gently scraped with a putty knife. Check for staples or nails protruding from the subfloor after cleaning. Press-resistant staples flush with the surface using a hammer or pliers tool. Make sure the surface is level by using a straightedge. For uneven sections, apply a floor leveling compound according to the manufacturer's instructions. Allow the surface to completely dry before beginning the installation process. Because of this preparation, your new carpet will be well-supported and devoid of lumps and flaws or you can hire a professional cleaner to help you with it.

Installing New Carpet
This is after the preparation of the subfloor. Next would be the installation of the new carpet, which will later on follow into this. Precision and careful handling are needed to fit and finish at this stage.
Measuring and Cutting the Carpet
First, take a correct measurement of the room to know what size the carpet should be. For the doorways and corners, add 4-6 inches to the longest dimensions of the room.
Cut the carpet on a straight edge or T-square with a sharp utility knife for accurate cuts. Also, lay the pile in one direction so that sections appear uniform. If more than one piece is required, cut slightly larger than needed and trim to fit at placement to avoid misfits.
Securing Carpet with Tack Strips
Fastening Carpet with Tack Strips Nail tack strips around the room's perimeter about a half-inch away from the wall baseboard. Make sure that sharp points are oriented toward the wall to ensure that the carpet holds correctly. Nail the tack strips into the subfloor with spacing between nails at 6 inches. Keep the tack strips away from doorways to allow for a transition without seams in and out of the rooms. You can reuse tack strips where they are intact. Not only does this save time, it reduces your material costs as well.
Seaming and Stretching the Carpet
Seam pieces together by placing carpet edges slightly overlapping; use a carpet-seaming iron and seam tape to join them. Heat the tape and press seams down with a carpet roller. Use a knee-kick to stretch the carpet, pulling from the center toward the edges. Press carpet onto tack strips by pressing along the edges. Finish stretching by using a power stretcher over the wall for a smooth, wrinkle-free finish. All seams must be perfectly aligned to give it that professional look.

Finishing Touches
Making minor adjustments is necessary to finish your carpet installation. The procedure runs smoothly if everything fits and works as it should.
Trimming Excess Carpet
Cut off any excess carpet after it has been secured. To reduce gaps, use a carpet trimmer to press the carpet firmly against the baseboards. For an accurate cut, slide a knee kicker along edges while maintaining steady pressure. For corners and small areas, use a utility knife, making sure the edges are even. To avoid unraveling, check again for stray fibers and trim as needed. Proper trimming improves the overall aesthetics of the space by creating a tidy, polished appearance.
Reinstalling Baseboards and Doors
After trimming is finished, concentrate on doors and baseboards. Secure baseboards with finishing nails after aligning them to cover the edges of the carpet. Make sure they are flush with the wall by gently tapping them with a hammer to achieve evenness. Verify that doors can pass over the recently installed carpet. Use a circular saw to trim bottoms and remove doors if necessary. To prevent drafts and preserve uniform openings, trim and test fit gradually rather than cutting too much. In order to ensure that all parts are correctly restored and operational, reattach doors and check for smooth functioning.
Sealing the Deal on Your New Carpet Installation
Replacing your carpet can be a fulfilling do-it-yourself effort that completely changes the look of your living area. You may get a professional-looking outcome by following the instructions and being patient and precise. To guarantee a seamless installation procedure, keep in mind to put safety and preparedness first. You can fix any underlying problems, such as stains and smells, in addition to improving the aesthetics of your house with the correct equipment and careful attention to detail. Accept the challenge and relish the sense of accomplishment that comes from revitalizing your living space yourself.
Frequently Asked Questions
-
Replacing your living room carpet as a DIY project offers several benefits, including cost savings and personal satisfaction. It provides a fresh new look to your space and helps eliminate stubborn stains and odors. By doing it yourself, you gain control over the process and can customize the outcome to your liking. With the right tools and patience, it's possible to achieve a professional-quality result without the expense of hiring professionals.
-
The essential tools and materials needed for carpet replacement include a utility knife, carpet stretchers, and safety gear. You will also need tack strips, seam tape, and a seaming iron for joining pieces. Measuring tape is crucial for accurate sizing, and a carpet trimmer ensures neat edges. Safety tools like gloves and masks are important for protection during the process, especially when working with adhesives or disposing of the old carpet.
-
To prepare your subfloor, inspect it for damage such as water stains, mold, or structural issues. Repair any damage promptly to ensure a stable foundation. Clean the subfloor thoroughly to remove dust, dirt, and adhesive residue. Ensure the surface is level and free from protruding nails or staples. Proper preparation helps provide a smooth surface, leading to a successful installation and preventing future issues.
-
The key steps in carpet installation include measuring the room accurately, cutting the carpet to fit while maintaining pile direction, and installing tack strips around the room's perimeter. After preparing the subfloor, seam and stretch the carpet for a smooth finish. Join pieces using a seaming iron and seam tape, and ensure the carpet is stretched properly to avoid wrinkles. Finally, trim excess carpet, reinstall baseboards, and adjust door clearance if needed.
-
To ensure a smooth, wrinkle-free finish, carefully stretch the carpet using carpet stretchers. Start from one side and gradually work your way across the room, ensuring even tension. Proper use of a seaming iron and seam tape will ensure pieces are joined securely. Regularly check for wrinkles and adjust as necessary during installation. Proper stretching is crucial for both aesthetics and longevity of the carpet.
-
Safety precautions include ensuring proper ventilation and using protective gear such as gloves and masks. Maintain a well-lit workspace to prevent accidents and use caution when handling tools like utility knives. It's important to be mindful of sharp objects and adhere to local disposal regulations when removing the old carpet. Taking these precautions helps prevent injury and ensures a safe working environment.
All-in-One Cleaning Guide for a Fresher, More Comfortable Home
Step-by-Step Tips to Clean, Organize, and Maintain Every Part of Your Space
Best Way To Clean Gold Earrings
Best Way To Clean MacBook Screen
Best Way To Clean Vinyl Records
Can Washing Machines Be Stopped Mid-Cycle
Can You Wash Dry Clean Only Curtains
Cleaning Comfort Room Safety Precautions To Be Observed
Cleaning Pet Urine From Carpet
Cleaning Stainless Steel Fridge
How Technology Is Remodeling The Cleaning Industry
How To Get Rid Of Cigarette Smell In Car
How To Get Self Tanner Out Of Carpets
How To Make Your House Smell Like Laundry Detergent
How To Prepare Your Home For A Deep Cleaning Service
How To Prevent Allergies With Cleaning
How To Remove Carpets DIY Guide
How To Replace Carpets By Yourself
Magic Eraser To Spot Cleaning Walls
Open Windows To Deodorize Home
Removing Bleach Smell From House

How To Remove Carpets DIY Guide
Removing old carpets can seem like a daunting task, but with this DIY guide, you’ll be able to tackle it with confidence. From gathering the right tools to safely removing and disposing of the carpet, this step-by-step guide simplifies the process for you. Whether you’re renovating a room or preparing for new flooring, our practical tips will help you avoid common mistakes, save money, and get the job done efficiently. Learn how to refresh your space without needing to hire a professional, and enjoy the satisfaction of completing a home improvement project on your own.
A DIY Guide For Easy And Safe Carpet Removal
Avoiding Common Carpet Removal Mistakes

Other crucial considerations in a successful carpet removal process include installation method identification, access to basic tools including utility knives and pliers, establishment of a work area, waste management removal, as well as inspection for subfloor damage—all to ease a smooth and less expensive DIY process.
Examining how it is installed is part of the first step in carpet removal. Common carpets are held down by tack strips close to edges or glue close to center bases, typically found in aged homes. Effective removal is possible by recognizing the type of installation. While glue must be carefully stripped away to prevent subflooring from being damaged, tack strips secure the carpet with mini nails.
Equipment follows to making it an easy process. A utility knife, pliers, and knee pads are among essential tools. A utility knife is used to cut the carpet into manageable pieces. Pliers are most helpful to yank up smaller pieces, which mostly come from corners. When one is on their knees for an extensive period to tackle the floor, knee pads protect against pulling.
Preparing the work area simplifies removal and avoids mess. As you take off furniture pieces and objects from the area, vacuum the carpet to get rid of pieces of debris. Preparing early makes it safer as well as a neat work area. To commence picking up the carpet, pick out the starting edge, usually located near a corner, after preparing the area.
Order is maintained by properly disposing of eliminated carpeting material. Roll up excised pieces neatly with tight turns and fasten with tape. Other than trimming bulk for waste disposal purposes, such nicely packed handling also simplifies trucking. In some areas, carpet recycling programs take away old carpets to reduce pollution.
After you’ve lifted up the carpeting, assess the condition of the subfloor to determine if you should repair it. Moisture and nails cause subfloor damage where tack strips were placed to secure carpets. Repairing slight issues such as gouges or scratches readies the flooring to be covered again. It’s also a good moment to hire a professional house cleaning lady service to properly clean the area to remove dust, dirt, as well as lingering bits of carpet detritus so it’s spotless and ready for the next part of your flooring project.
Comprehending the nuances of removal of carpets and adhering to these protocols will allow for a more controlled and smooth do-it-yourself process. You can complete the work with confidence if you’re adequately prepared, familiar with the numerous types of installations, and armed with the right equipment. It enables avoiding expenditure on time and possibly costs that one might have to incur if they hire a professional removalist.

Tools and Materials Needed
To effectively remove carpets yourself, prepare with necessary tools and supplies. Proper preparation makes it easier to complete and increases effectiveness.
Prerequisites
Utility Knife: Highlight one sharp and retractable utility knife to cut up the carpets into workable pieces. This will allow one to be precise to portion efficiently
Pliers: These can be used to grab as much as to pull tacks or even staples holding down carpeting. They should be able to loosen the carpet enough, which may be stuck down to sub-surfaces.
Knee Pads: Use knee pads to protect your knees and also cushion them for support when you kneel for a long time. It is a guarantee of comfort upon removal.
Hammer and Pry Bar: These are utilized to pull out tack strips and baseboards effectively. These assist to apply leverage to loosen things off without damaging the walls or flooring.
Tape: Use tape to bind together cut-in rolls of carpet for easy carrying and disposing. It keeps the strips firmly together when being carried.
Carpet Puller: There is also a carpet puller available to facilitate things if one is trying to remove carpets from glue or tack strips. It simply reduces the amount of force one is applying.
DIY carpet removal success is ensured by using these required tools, simplifying each process to be done efficiently as you go.
Safety Equipment
Masks: These help protect against dust as well as the allergens that could be offset while removing. Minimizes chances of health effects induced just by through-air particles.
Gloves: Prevent injury with heavy-duty gloves that could be caused by sharp-edge tools or building supplies. They will also provide protection and traction for the job.
Eye Protection: Wear protective eyewear to keep out debris and particles that might fall off into view during the process.
Proper Shoes: Good-quality close-toe shoes with good tread will make it hard for you to fall. It will protect you from falling objects and sharp edges.
Safety gear guarantees one’s safety throughout carpet removal to facilitate successful conduct of the activity with a consideration for health and safety.

Step-By-Step Guide To Removing Carpets
It’s possible to remove carpet yourself if you do it properly. Follow this guide to help every step go smoothly.
Preparing the Room
Clear obstructions and furniture first. Danger diminishes with an obstruction-free space. For enhanced protection against cutting hazard, vacuum the carpet to eliminate dirt and dust. Look for joints, such as transitions to a different flooring or to an adjacent flooring, or seams on the carpet. Look for wires or power cords to prevent cutting hazard. Take off baseboards if needed to allow corner access. Have pliers, knee pads, and utility knives handy. Preparing a room is more efficient with removal.
Cutting and Removing Carpet
Begin with cutting the carpet into workable pieces whose width is approximately 3 feet. Use a utility knife to make effortless cuts down its length depending on the size of a room. It is comfortable to don knee pads so that you can comfortably kneel. Use a pair of pliers to lift one corner to pull away from tack strips or adhesives.
Tighten pieces into a roll to make their transport a breeze. Use duct tape to secure rolled pieces to avoid unwinding. Continue cutting and rolling remaining carpet methodically. Provide access freely to facilitate easy transport to a removal area. To finish with a pristine room enables smooth transition to addressing the underlayer.
Handling with Carpet Padding and Tack Strips
Check subfloor with exposed padding. Normally padding reaches subfloor with staples. Remove staples carefully with pliers. Padding pieces roll up and tape together just as carpet pieces do.
Tack strips are normally nailed to walls close to edges. Remove with hammer and pry bar slowly. Use caution with removal since tack strips contain sharp nails. Remove with waste bags for easy disposal.
Check subfloor for any damages that should be taken care of before new flooring installations. It ensures a smooth, secure future installation base.
Handling Carpet Disposal
Removing old carpet correctly is paramount to a successful home renovation. Start by cutting your carpet into chunks. Roll up your carpet tightly, then secure with duct tape. It keeps loose fibers together in one spot and is easier to transport.
Verify local regulations to ensure you properly dispose. Most towns take carpet rolls for curbside pickup or to waste dump areas. For bulk pick-up, some communities may charge or have a special arrangement. Call your waste removal service to confirm any special restrictions.
To reduce your impact on the environment, take advantage of any recycling opportunity available near you. There are different recycling plants that handle man-made carpets, where they give their fibers a different application. Be however sure to check if such a recycling factory receives carpet waste from homes by calling them in advance. In instances where recycling is not an option, landfills present a means to dispose.
Otherwise, if you have carpets that are still serviceable, you can also give them away to charities or non-profits. They are accepted by some non-profits to be utilized in shelters or homes. Be sure to check though their acceptance guidelines and make a drop-off as needed.
Ensuring effective removal as a frontline priority boosts your carpet removal service alongside promoting environmental responsibility and effective waste management.

Tips for Specific Carpet Types
Special care might be needed for some carpet types to ease removal. Knowing about carpet types can lead to a smooth DIY removal.
Removing Stubborn Carpets
Obstinate carpets offer a challenge with thick backing or hard glue. Break down work into smaller steps for easy management. It is easy to make quick cuts using a quality utility knife. Cutting gradually section by section helps to reduce stress to allow easy carpet lifting.
When dealing with glue, loosen it with a scraper. Heat guns also assist to loosen obstinate glues to allow easy removal. It is crucial to wear gloves and protective eyewear to be safe with sharp objects and hard substance.
Final Mop of Carpet Elimination Expertise
It is easy and cost-effective to start a do-it-yourself carpet removal job. You can transform your space with assurance if you plan ahead and take the correct steps. For a smooth-running process, also make sure to acquire relevant tools and be cautious.
Essential steps that should never be avoided are to dispose of old carpet correctly and verify subfloor for damages. You can even handle tough carpets and prepare spaces for new flooring options with help from such an extensive guide.
Experience a proud feeling that results from a successful completion and a new appearance for your space.
Frequently Asked Questions
-
Start by preparing the room: clear all furniture, and vacuum the carpet thoroughly to reduce dust and enhance safety. Determine if the carpet is installed with tack strips or adhesive before gathering essential tools such as a utility knife, pliers, and knee pads.
-
For effective carpet removal, you need a utility knife for cutting, pliers for pulling up carpet edges, and knee pads for protection. A pry bar and hammer are also helpful for removing tack strips and staples safely.
-
Cut the carpet into manageable strips, roll them up tightly, and secure them with duct tape to simplify transport. Check local regulations for disposal, recycling options, or consider donating gently used carpets to local charities.
-
Ensure the workspace is clear of furniture, use protective gear like gloves and knee pads, and handle sharp tools carefully. If dealing with adhesives, use a scraper and consider a heat gun to loosen them, always prioritizing safety.
-
Remove carpet padding by cutting it into strips, and use pliers to pull it up. Tack strips can be lifted using a pry bar and hammer. Be sure to remove all staples to prepare the subfloor for new flooring installation.
-
Inspect the subfloor for damage, including mold, moisture, or structural issues. Repairs may be necessary before installing new flooring to ensure a smooth and long-lasting finish.
-
Yes, if your carpet is still in good condition, consider donating it to local charities. Ensure it is clean and meets any specific requirements set by the donation facility.
All-in-One Cleaning Guide for a Fresher, More Comfortable Home
Step-by-Step Tips to Clean, Organize, and Maintain Every Part of Your Space
Best Way To Clean Gold Earrings
Best Way To Clean MacBook Screen
Best Way To Clean Vinyl Records
Can Washing Machines Be Stopped Mid-Cycle
Can You Wash Dry Clean Only Curtains
Cleaning Comfort Room Safety Precautions To Be Observed
Cleaning Pet Urine From Carpet
Cleaning Stainless Steel Fridge
How Technology Is Remodeling The Cleaning Industry
How To Get Rid Of Cigarette Smell In Car
How To Get Self Tanner Out Of Carpets
How To Make Your House Smell Like Laundry Detergent
How To Prepare Your Home For A Deep Cleaning Service
How To Prevent Allergies With Cleaning
How To Remove Carpets DIY Guide
How To Replace Carpets By Yourself
Magic Eraser To Spot Cleaning Walls
Open Windows To Deodorize Home
Removing Bleach Smell From House
How To Get Self Tanner Out Of Carpets
Self-tanner accidents on your carpet can be frustrating, but they don’t have to be permanent. With the right approach, you can effectively remove those stubborn stains without damaging the carpet fibers. From using baking soda and vinegar to professional-grade carpet cleaners, there are several methods to restore your carpet’s original look. Whether you’re dealing with a fresh spill or a set-in stain, this guide will help you tackle self-tanner mishaps with ease. Follow these simple steps and say goodbye to unwanted self-tanner stains on your carpets for good!
Carpet Cleaning Tips And Say Goodbye To Self Tanner Stains
Long-Term Solutions For Keeping Your Carpets Spotless

Understanding Self Tanner Stains
Self-tanning stains carpets by penetrating deep into fibers since DHA and oils found in the product bind into fibers. Fast, accurate cleanup is needed to prevent permanent stains.
When the pigment-based concoction, which is to be applied to skin, comes into contact with carpet fibers, carpet stains from a self-tanner take place. Dihydroxyacetone (DHA), which is the central ingredient contained within self-tanners, is a transparent chemical that darkens skin — and sadly, carpets — in a brown hue. As the mixture itself is a combination of either natural or synthetic dyes, if it drips down, it will immediately settle into fibers.
Self-tanning remedy typically contains oils and perfumes, whose addition causes stain to be more durable. When they are not immediately cleaned off, they can stain carpet by penetrating. Since time causes DHA to stick more permanently, early action stops stain propagation.
Additionally, carpet fabric construction has an effect on perceived stains from self-tanning products. Thicker fibers may absorb the substance compared to thinner fibers. Therefore, knowledge about carpet types — e.g., cut pile or loop pile — allows you to choose a practical method to clean.
Self-tanner oxidizes and dries, so stains are harder to remove, thus you should respond immediately. Instead of rubbing, you should blot to help contain the stain. To create a removal strategy for self-tanner stains, you should be aware of these influences and elements.
Tools And Materials Needed
Try to amass some requisite pieces of apparatus and supplies to clean the carpet with self-tanner more efficiently now. These supplies will help to facilitate efficient cleaning and faster stain removal.
White Towels and Paper Towels
White paper towels or cloth are utilized to avoid transferring colors. Absorb excess water to blot stain.
Cold Water
Pre-wash with cold water. It prevents the stain from completely setting.
Mild Dish Soap
Mild dish soap is a neutral cleaner. It has the ability to break down oils and perfumes found in the self-tanning solution.
White Vinegar
White vinegar is used to eliminate a stain. It is essentially a bleaching solution; it is harmless and thus cannot harm carpet fibers.
Hydrogen Peroxide
Stubborn stains can be removed with hydrogen peroxide. Always first test a tiny inconspicuous area to avoid discoloring.
Baking Soda
It soaks up odors and oils. As a cleaner that is more natural, it complements dish soap as well as vinegar.
Vacuum Cleaner
Vacuum the area after you’ve treated the stain. It removes any remaining particles and leaves the finish flawless.
It’s a good idea to have these products on hand so stains from self-tanners are a breeze to handle. The sooner you take advantage of these products, the better your odds of recovering your carpet to its pre-existing look with less professional help — or even none whatsoever.

Step-by-Step Process
To effectively remove self-tanning stains with common household items, follow these steps. It is necessary to act quickly so stains don’t set.
Blotting Excess
First, remove as much of the self-tanning solution as possible. For this step, you will need to use a paper towel or a white cloth to prevent further staining. Press down gently with a cloth on the stain to absorb excess fluid. Replace with a new cloth if it becomes saturated to prevent further distribution of stain. Be careful to not rub because that will push stain deeper into carpet fibers. Continue to blot until no more tanner migrates to cloth.
Applying Cleaning Solution
To remove stains, make a cleaning solution. In a spray bottle mix one teaspoon mild soap dish soap with two cups cold water. Add one tablespoon white vinegar to increase the solution’s strength. Spray solution onto stained area but don’t soak carpet. Use a new white cloth to blot solution into fibers.
Continue to repeat this process with changing cloths as needed until the stain slowly comes up. For tough stains, pretest an inconspicuous area with a dilute hydrogen peroxide solution before applying to stain.
Rinsing and Drying
Remove any lingering residue from the cleaner after effectively treating the stain. Get rid of soap and vinegar from the treatment area by dipping a fresh cloth into cold water and lightly patting it. Avoid soaking the carpet to avoid accumulation of mildew when rinsing. Excess water should then be patted off with a dry cloth.
To remove any remaining moisture and odors, dust baking soda into the wet area and let it remain for about 15 minutes. Make sure the carpet is completely dry before vacuuming the area to get rid of the baking soda. It guarantees a non-residue finish without defeating the carpet.

Homemade Cleaning Solutions
Remove self-tanner stains from carpets easily with home remedies. These remedies use common household items to battle stubborn stains and restore your carpet’s appearance.
Vinegar and Baking Soda Approach
Baking soda and vinegar constitute a strong stain-fighting solution. When you need to lift additional tanner but don’t want to spread it further, start by blotting damaged area with a new white cloth. In a tiny basin, mix together equal parts white vinegar and baking soda to create a paste.
Spread a thin layer of the paste evenly over the stained area. Allow the solution to work into the stain for five to ten minutes. The bubbling properties of baking soda lift stains from carpet fibers.
Once waiting time has elapsed, rinse area softly with a soft-bristled brush in a circular pattern. This breaks down even further any remaining residue that may have been trapped in fibers. To rinse off remaining vinegar and baking soda solution, rinse with cold water and blot with a fresh cloth. For persistent stains, repeat if necessary, then pat dry with a towel.
Dish Soap and Warm Water Method
A tad bit of warm water and dish soap may be able to rub off the self-tanning stains. Try to gently blot off the area first with a piece of white cloth and soak up as much of the problematic liquid as you’re able.
In a bucket, mix together 1 teaspoon of mild dish soap with 2 warm cups of water. Soak a clean cloth or sponge into your soapy solution and thoroughly cover your stain evenly. Gently blot with a cloth action starting from the outside to work your way to avoid having a chance to spread the stain deeper. Gently continue to blot with a cloth action to remove stain until you’ve eliminated it.
When you have lightened the stain enough, rinse with cold water to remove any soap residue. Wipe off excess droplets with a dry towel and let carpet air dry.

Tips For Preventing Future Stains
Simply select a designated area to tan, wear old clothing or mats or towels to drip upon, store tanner where pets and young children can’t access to keep it away, apply with mitts, and ventilate area to a maximum to contain spillages and mess.
A pre-emptive strike is a good idea with self-tanning carpet stains. Designate an area as a tanning zone to be able to contain a potential mess; a tile or easy-clean surface will be enough. Preparing your skin to take the colour nicely is a good idea by exfoliating to remove dead skin cells. This, of course, will minimize the amount of product being deposited and minimize drips.
Wearing loose dark clothes is ideal to be able to self-tan without marking carpets with drips. It should be worn until it is dry after application.
Set out old towels or protective mats ahead of where you stand or will be passing to. These will catch spills and may save your carpet.
Keep your self-tanning lotion beyond your reach. It will not leak and stain if stored in an airtight container or bag.
Consider using self-tanning mitts, a more restrained execution but one that limits spill possibilities. A good quality mitt will be the make-or-break here to ensure even distribution of the product with no spillage.
Ventilate the region after application for a quicker dry. It reduces the chances to accidentally stain carpets with wet self-tanner.
If you take preventative steps, then you will effectively reduce the risk of carpet stains from self-tanners and respond to accidents with confidence.
Clean Carpet Victory
Self-tanner stains on your carpet don’t have to be difficult to remove. You will be able to efficiently get rid of pesky stains if you react promptly and have the necessary supplies.
In order to get your carpet looking its absolute best again, don’t hesitate to act quickly and to read instructions for how to clean. You can avoid subsequent accidents as well as keep your area tidy and stain-free by taking advantage of the preventative tips given.
With these solutions available to you, you will be ready to conquer any self-tanner problem that comes your way.
Frequently Asked Questions
-
To remove self-tanner stains, promptly blot the area with a clean white cloth to absorb excess product. Prepare a cleaning solution with cold water, mild dish soap, and white vinegar. Apply the solution to the stain, blot again, rinse with water, and dry thoroughly. Sprinkle baking soda on the area, let it sit, then vacuum. Acting quickly is crucial for successful stain removal.
-
Self-tanner contains dihydroxyacetone (DHA), which binds firmly to surfaces, causing discoloration. Oils and fragrances in the product can penetrate carpet fibers, making stains stubborn. Prompt action and the right cleaning materials help mitigate these challenges.
-
You can use a combination of cold water, mild dish soap, white vinegar, baking soda, and hydrogen peroxide for a DIY cleaning solution. These items work effectively in loosening and removing stains without professional help.
-
Yes, the carpet structure influences stain visibility and cleaning methods. Loop pile carpets may hide stains better but can hold more product, while cut pile carpets can make stains more prominent. Tailor your cleaning approach to your carpet type for best results.
-
To prevent stains, apply self-tanner in a designated area with washable flooring. Use old towels or mats to catch spills, and wear loose, dark clothing during application. Exfoliate beforehand to minimize excess product and store self-tanner securely to prevent leaks. Ventilate the area post-application to reduce transfer risk.
All-in-One Cleaning Guide for a Fresher, More Comfortable Home
Step-by-Step Tips to Clean, Organize, and Maintain Every Part of Your Space
Best Way To Clean Gold Earrings
Best Way To Clean MacBook Screen
Best Way To Clean Vinyl Records
Can Washing Machines Be Stopped Mid-Cycle
Can You Wash Dry Clean Only Curtains
Cleaning Comfort Room Safety Precautions To Be Observed
Cleaning Pet Urine From Carpet
Cleaning Stainless Steel Fridge
How Technology Is Remodeling The Cleaning Industry
How To Get Rid Of Cigarette Smell In Car
How To Get Self Tanner Out Of Carpets
How To Make Your House Smell Like Laundry Detergent
How To Prepare Your Home For A Deep Cleaning Service
How To Prevent Allergies With Cleaning
How To Remove Carpets DIY Guide
How To Replace Carpets By Yourself
Magic Eraser To Spot Cleaning Walls
Open Windows To Deodorize Home
Removing Bleach Smell From House
How To Clean A Tie At Home
Ties can easily get dirty, especially after a long day at the office or during special events. Instead of rushing to a dry cleaner, you can clean your tie at home with just a few simple steps. Whether it’s a silk, cotton, or wool tie, knowing how to safely clean it can save you money and prolong its lifespan. This guide will walk you through the process of removing stains, washing, and refreshing your tie at home without causing any damage. Learn the best methods to keep your ties looking brand new with our easy-to-follow instructions.
Freshen Up Your Ties With These Easy Cleaning Tips
Why Ties Need Special Cleaning Care

Understanding Tie Fabrics
Knowing the fabric of a tie is crucial for effective cleaning. Each fabric type has distinct care requirements.
Common Materials Used in Ties
Silk: Common for luxury ties, silk is delicate and shines with a natural luster. It stains easily, requiring gentle treatment.
Polyester: Often used for more affordable ties, polyester is resilient and stain-resistant but requires specific care to avoid heat damage.
Wool: Offers warmth and texture. Wool is sensitive to water and heat, demanding careful handling.
Cotton: Versatile and breathable, cotton can shrink or wrinkle when exposed to moisture, requiring attention when cleaning.
Linen: Lightweight and textured, linen ties can wrinkle easily and need precise laundering to maintain form.
Importance of Fabric-Specific Cleaning
Fabric-specific care preserves a tie's appearance and longevity. Ignoring these needs could lead to damaging the tie.
Silk Care: Hand wash with mild detergent in cold water. Dab not rub to avoid blemishes.
Polyester Treatment: Machine washable on gentle settings. Use a protective mesh bag and mild detergent.
Wool Maintenance: Dry clean only. Home cleaning risks shrinking and distorting shape.
Cotton Cleaning: Spot clean or hand wash in lukewarm water. Avoid twisting or wringing to retain form.
Linen Care: Hand wash with cool water and air dry flat. Iron on low for smoothness.
Understanding tie fabrics and their specific needs ensures you maintain them beautifully for years.

Preparing to Clean Your Tie
Before cleaning a tie at home, ensure you're prepped with the right materials and knowledge of the specific stain types. Taking the appropriate steps can help preserve your tie's quality and appearance.
Gathering Necessary Supplies
Put together the materials you'll need to properly clean your tie. Use a mild laundry detergent that is appropriate for the fabric first. Products containing bleach should be avoided as they may harm delicate textiles. A fresh white cloth or sponge should then be used because colored materials may bleed onto the tie. To make a spot cleaning solution, secure a bowl or basin.
Think about using a specific silk detergent for silk ties. A gentle detergent will do if you have a polyester tie. Professional dry cleaning is necessary for wool ties; they should not be washed at home. In order to preserve the tie's smoothness and shape after cleaning, make sure you have a cool iron or steamer available for finishing.
Identifying Stains and Spots
Before beginning the cleaning procedure, check your tie for any stains or spots. Examine the tie in a well-lit area for any stains, spills, or dirt accumulations. Food, oils, and ink are examples of common stains that need for certain techniques of treatment.
For food stains, blot gently with a damp cloth instead of rubbing to avoid spreading. For oily stains, use cornstarch or talcum powder to absorb excess oils by applying it onto the stain and letting it sit for a few hours before brushing off. Ink stains need a more delicate approach; gently dab with rubbing alcohol using a cotton swab.
To make sure cleaning solutions don't alter the texture or color, always do a spot test on a discreet tie area. The fabric integrity and design of the tie can be maintained, maintaining its immaculate appearance, by precisely detecting and treating stains.

Step-by-Step Cleaning Methods
When cleaning ties at home, using the correct methods ensures you preserve both the fabric and design. Follow these instructions tailored to specific materials.
Cleaning Silk Ties
Silk ties, known for their delicate texture, require gentle care. Begin by laying your silk tie flat on a clean, dry surface. If the tie has a fresh stain, gently blot it with a white cloth. Avoid rubbing as this may spread the stain. For grease or oil stains, sprinkle a small amount of cornstarch on the spot and let it absorb the oil for several hours before brushing it off.
Mix a gentle laundry detergent with lukewarm water in a bowl for more persistent stains. Dampen a clean cloth with the solution and dab the stained area. Rinse the cloth with cool water and gently dab the spot again to remove any detergent residue. Always air-dry your silk tie, avoiding direct sunlight and never wring or twist the fabric.
Washing Polyester Ties
Polyester ties can endure washing machines but require diligence. Start by placing your polyester tie inside a mesh laundry bag. Use a gentle cycle with cold water to prevent any shrinkage or deformation. Non-chlorine bleach may be suitable for polyester but check the care label first.
After washing, remove the tie promptly to prevent creases. Smooth out any wrinkles with your hands while the tie is still damp. Lay it flat on a towel to air dry. If the tie is wrinkled after drying, use a steam iron on the lowest setting. Place a clean cloth on the tie before ironing to protect its surface.
Handling Wool and Cotton Ties
Wool ties benefit from professional cleaning services to prevent distortion. However, if you prefer home care, use a fabric-specific mild detergent. Gently blot any stains with a damp cloth. Avoid using heat, as it can shrink the wool fibers.
Cotton ties offer slightly more flexibility. Spot treat stains using a gentle detergent diluted in water. Rinse the area with a clean, damp cloth. Hand-wash if necessary, using cold water and mild detergent. Lay the tie flat on a towel to dry, reshaping it as needed. Iron on a low setting with steam, placing a cloth between the tie and the iron for protection.

Removing Stubborn Stains
Stubborn stains can ruin the appearance of your tie if not addressed promptly. Effective removal helps restore your tie and maintain its elegance.
Using Household Cleaning Solutions
Household cleaning solutions can effectively tackle tie stains with precision. Use white vinegar, water, and dish soap for food or drink stains. Mix 1 tablespoon of vinegar and 1 tablespoon of dish soap with 2 cups of cold water. Dab the stain gently with a soft cloth dipped in the solution, then blot with a dry cloth to absorb moisture.
Cornstarch is effective for oily stains like grease. Sprinkle a small amount on the stain and let it sit for 15-20 minutes to absorb the oil. Gently brush off the cornstarch with a soft, clean brush.
For ink stains, rubbing alcohol can provide relief. Dampen a cotton ball with rubbing alcohol and dab the stain without rubbing, which prevents spreading. Repeat until the ink lifts.
Always test cleaning solutions on an inconspicuous part of the tie first to avoid fabric discoloration.
When to Seek Professional Help
In certain circumstances, professional assistance should be taken into consideration. Professionals have the equipment and know-how for thorough cleaning if a stain persists despite attempts at home treatment.
To avoid damage and discoloration, it is best to have an expert handle cleaning when working with pricey or historical ties. To preserve their integrity, delicate textiles like silk or wool frequently need expert care.
If you are unclear of the makeup of a stain, think about getting professional help. Expert cleaners are able to evaluate the stain and choose the best treatment without endangering the cloth.
Furthermore, in order to guarantee complete and secure cleaning without running the danger of causing tie damage, stains that are persistent or that cover big areas can require expert assistance.
Maintenance and Care Tips
Caring for your tie involves consistent maintenance to ensure it lasts for years, maintaining its appearance. Follow these methods and tips to preserve your tie collection effectively.
Proper Storage Techniques
Store ties correctly to prevent wrinkles and distortions. Hanging is the ideal method. Use a specialized tie rack that keeps them straight without creases. Place ties in a cool, dry area to avoid humidity damage, which could warp the fabric.
For silk ties, avoid direct sunlight as it can fade colors over time. Roll ties gently when storing them in drawers. This prevents folds and maintains the tie's structure. Keep them in protective covers or wrapped in acid-free tissue if they're rarely used, especially if they're delicate or expensive.
Regular Maintenance Strategies
To keep ties looking their best, perform routine maintenance. To get rid of dust and lint, gently brush ties with a soft clothes brush. As previously said, spot-clean any new stains right away using the techniques suggested for the particular materials.
Rotate your ties frequently. This prolongs their beauty and lessens wear from frequent use. Hang your tie up to rest after every wear. This lessens the need for frequent ironing and lets wrinkles fall out naturally.
Use a steamer at a safe distance for ties that wrinkle slightly. Another option is to hang the tie in a hot bathroom. Without using heat or pressure, the steam from a hot shower helps ease wrinkles and lowers the possibility of fabric damage.
Watch for any loose threads or fraying edges. Instead of tugging, use sharp scissors to rapidly clip any loose strands. By doing this, additional harm is prevented and a neat, polished appearance is preserved.
The Last Bow in Tie Care
You can make sure that your ties will continue to add elegance and style to your wardrobe by learning how to clean and maintain them at home. Preserving the quality and appearance of each type of cloth requires an understanding of its particular requirements. You may successfully remove stains and maintain the perfect appearance of your ties with the correct methods and a little attention. Keep in mind that using the right cleaning supplies and acting quickly might have a big impact. Never be afraid to seek expert assistance when in doubt, particularly when dealing with delicate or valuable relationships. Your necktie will continue to be a chic accent for any event if you follow these tips.
Frequently Asked Questions
-
To clean a silk tie, use a mild detergent solution and gently blot the stain with a clean white cloth. Avoid scrubbing to prevent fabric damage. Spot-clean using a bowl of lukewarm water mixed with a small amount of detergent. Always test the solution on an inconspicuous area first. Rinse with a damp cloth and lay the tie flat to dry, away from direct sunlight. Avoid twisting or wringing the tie to maintain its shape.
-
Yes, polyester ties can be machine washed, but it’s crucial to use a gentle cycle. Place the tie in a mesh laundry bag to protect it during the wash. Use cold water and a gentle detergent, avoiding bleach-based products to preserve the fabric’s color and integrity. After washing, lay the tie flat or hang it to air dry, ensuring it maintains its shape and appearance.
-
To remove ink stains, gently dab the affected area with rubbing alcohol using a clean white cloth. Avoid rubbing, as it may spread the ink. For stubborn stains, repeat the dabbing process until the stain lifts. Ensure to test the rubbing alcohol on an inconspicuous area first to prevent discoloration or damage to the fabric.
-
Wool ties should ideally be dry cleaned to prevent damage and distortion. If you choose to clean at home, avoid water exposure and use a specialized wool detergent for spot cleaning. Dab gently with a damp cloth, avoiding excessive moisture. Lay the tie flat to dry, reshaping it if needed, to maintain its form and appearance.
-
Consider professional cleaning when home treatments fail, when dealing with expensive or vintage ties, or when handling delicate fabrics like silk and wool. Professionals have the expertise to remove tough stains and maintain the fabric’s integrity without risking damage. Opt for professional services if you’re unsure about the cleaning process or facing persistent stains.
-
To maintain ties, hang them on specialized racks to prevent wrinkles and distortions. Store in a cool, dry area, away from direct sunlight. Regularly brush ties to remove dust and spot-clean new stains immediately. Rotate ties to minimize wear and use a steamer or hang them in a steamy bathroom to relax mild wrinkles. Inspect for fraying edges or loose threads to ensure a neat appearance.
All-in-One Cleaning Guide for a Fresher, More Comfortable Home
Step-by-Step Tips to Clean, Organize, and Maintain Every Part of Your Space
Best Way To Clean Gold Earrings
Best Way To Clean MacBook Screen
Best Way To Clean Vinyl Records
Can Washing Machines Be Stopped Mid-Cycle
Can You Wash Dry Clean Only Curtains
Cleaning Comfort Room Safety Precautions To Be Observed
Cleaning Pet Urine From Carpet
Cleaning Stainless Steel Fridge
How Technology Is Remodeling The Cleaning Industry
How To Get Rid Of Cigarette Smell In Car
How To Get Self Tanner Out Of Carpets
How To Make Your House Smell Like Laundry Detergent
How To Prepare Your Home For A Deep Cleaning Service
How To Prevent Allergies With Cleaning
How To Remove Carpets DIY Guide
How To Replace Carpets By Yourself
Magic Eraser To Spot Cleaning Walls
Open Windows To Deodorize Home
Removing Bleach Smell From House
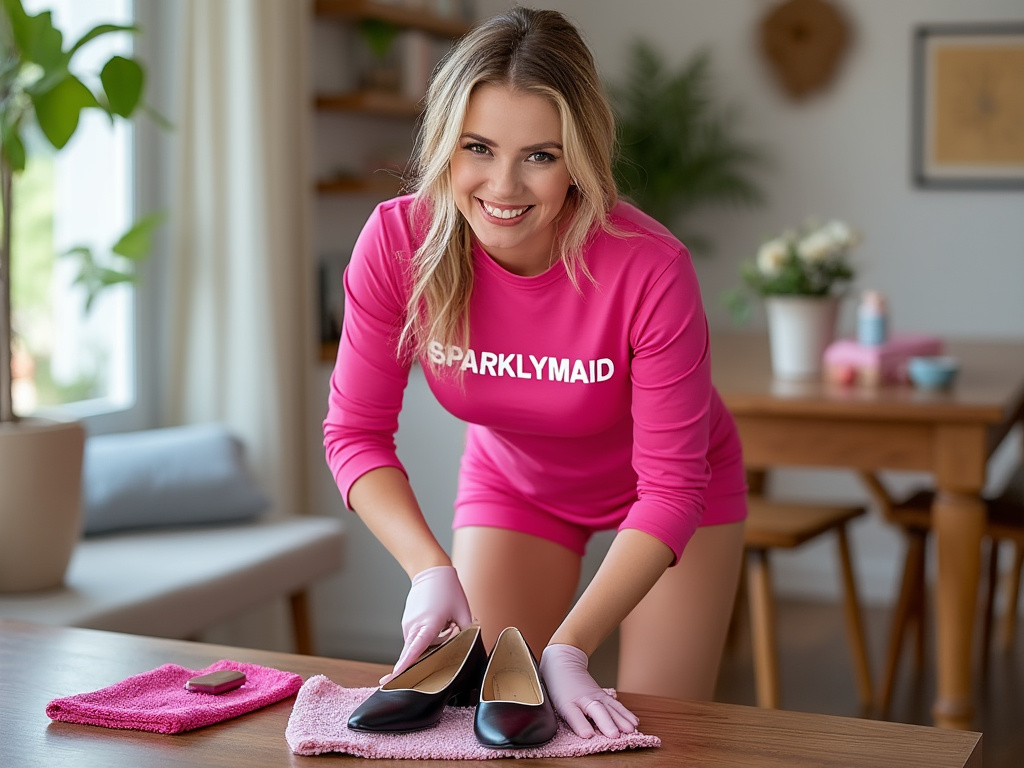
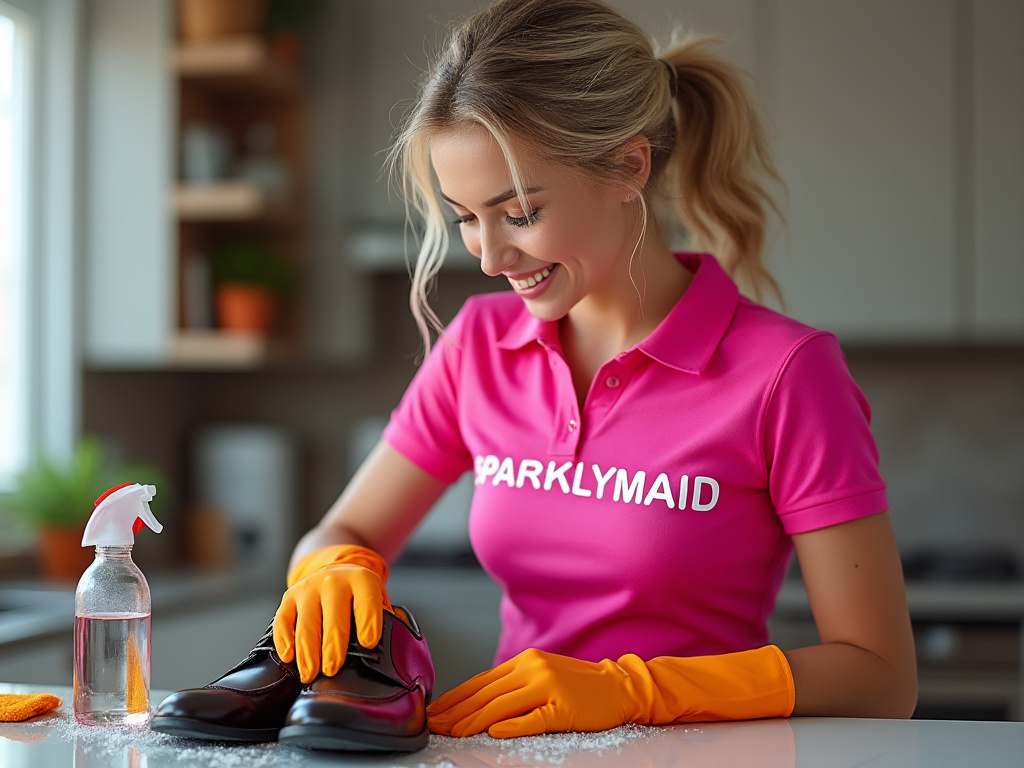
How To Clean Dress Shoes
Keeping your dress shoes clean is essential for maintaining their appearance and longevity. Whether made of leather, suede, or patent materials, dress shoes require special care to stay polished and professional. In this guide, we’ll walk you through simple, step-by-step methods to clean different types of dress shoes, including tips on removing scuffs, polishing, and proper storage. Learn which products work best for different shoe materials and how to protect your shoes from future wear and tear. With these expert cleaning tips, your dress shoes will always look their best.
Dress Shoe Cleaning Hacks You Need To Know
Essential Tools You’ll Need For Dress Shoe Care

Importance of Clean Dress Shoes
Clean dress shoes enhance your appearance, project professionalism, extend their lifespan, and reflect attention to detail, making them a vital aspect of personal grooming and style.
Clean dress shoes can make all the difference in your look. In professional environments, they speak to attention to detail and respect for whatever environment one finds themselves in. First impressions can be crucial, and clean shoes reveal an individual who is well-organized and confident in themselves. A well-maintained pair helps complement your attire outside while personalizing your brand for professionalism and care in grooming.
Well-cared-for shoes also last longer. The regular cleaning prevents deterioration of materials and further damages. Dirt, moisture, and salt create unseemly blemishes and lessen durability. By keeping your shoes clean, you are protecting your investment and lessening how often you need to replace them. For instance, leather and suede are prone to damage if they are neglected. Consistent care will preserve their condition over time.
It is a fact that in formal settings, the condition of his or her shoes dictates a person's perception. Showing up with scuffed or dull shoes can offset even the sharpest outfit. Clean shoes exude good preparation and attention to detail. They show pride in one's appearance and give confidence both at personal and professional levels. Well-polished shoes project the image of command and efficiency.
Regular cleaning does not need much time and effort. In the case of proper tools and products, taking care of the dress shoes becomes a minor and undemanding part of your routine. A few minutes spent on polishing and buffing considerably raise their appearance. Preventive care means that shoes are always prepared for any occasion and save one from stress and hectic last-minute preparation for special occasions.
Realize that clean dress shoes are important and a priority when it comes to taking care of, no matter how busy your schedule gets. Apply simple, efficient ways of cleaning to preserve the attractiveness and integrity of the shoes.
Materials Needed
To keep dress shoes in top condition, certain products are needed for cleaning. Cleaning and preservation are made easier with the right products and supplies.
Cleaning Supplies
Soft Brush
Use a soft-bristle brush to remove dirt and dust. This tool's gentle bristles prevent scratches on delicate surfaces like leather and suede.Microfiber Cloth
A microfiber cloth helps in wiping down surfaces and removing leftover dirt. Its fibers pick up finer particles, ensuring a thorough clean without damage.Saddle Soap or Mild Cleanser
Saddle soap or a mild leather cleaner eliminates tough stains on leather shoes. Apply this cleaner using a damp cloth for best results, following product instructions.Suede Cleaner
For suede shoes, a dedicated suede cleaner is essential. It's formulated to tackle stains without compromising the texture of suede.Waterproof Spray
Waterproof spray protects shoes from moisture and stains. Apply a layer after cleaning to maintain shoe integrity and prolong wearability.
Leather Conditioner
Leather conditioner hydrates and maintains the flexibility of leather. Choose a product compatible with your shoe type and apply it periodically.Shoe Cream
Use shoe cream to restore color and luster. It's important for renewing vibrancy and covering scuffs or blemishes on colored leather.Beeswax Polish
Beeswax polish provides a protective barrier while adding shine. Layer it on top of shoe cream for enhanced protection and a polished finish.Suede Conditioner
Suede conditioner keeps suede fibers soft and prevents dryness. It's crucial for maintaining the suede's natural look and feel.Cedar Shoe Trees
Insert cedar shoe trees to preserve shape and absorb moisture. They work best during storage, ensuring shoes retain their form when not in use.

Step-by-Step Cleaning Guide
Properly cleaning dress shoes enhances their appearance and extends their lifespan. A systematic approach ensures your footwear remains in excellent condition.
Preparing the Shoes
Remove any laces before cleaning. This prevents potential damage and allows thorough access to the shoe's surface. Use a dry, soft brush to eliminate loose dirt or debris. Pay attention to seams and crevices, as dirt accumulates there. Place a cedar shoe tree inside each shoe to maintain shape and absorb moisture during cleaning.
Cleaning Leather Shoes
Dampen a microfiber cloth slightly. Apply saddle soap or a leather cleaner, then work in circular motions to remove dirt and stains. Avoid excess moisture as it harms leather. After cleaning, wipe the shoe with a dry cloth to remove residue. Apply a leather conditioner to rehydrate the material, maintaining its suppleness. Polish with shoe cream matching the shoe color for enhanced shine. Allow drying naturally, avoiding direct heat sources.
Cleaning Suede Shoes
Pick up a suede brush to lift dirt and restore the nap's texture. Gently brush in one direction, avoiding excessive pressure. Address stains using a suede eraser or white vinegar on a soft cloth; dab the area lightly. Avoid using water directly, as it can discolor suede. Once stains are treated, brush lightly to smooth the fabric. Consider a suede protector spray for additional water resistance.
Cleaning Patent Leather Shoes
Grab a damp microfiber cloth to wipe the shoes' surface, targeting scuffs and smudges. Patent leather requires less moisture, so ensure the cloth is barely damp. For tough scuffs, apply mineral oil with a cotton swab. Avoid using products designed for other types of leather. Polish with a microfiber cloth for a glossy finish, then store in a dust bag to prevent scratches. Maintain their shine with periodic light buffing.

Conditioning and Polishing
Conditioning and polishing play critical roles in keeping dress shoes looking their best. Regular care helps maintain appearance and prolongs shoe lifespan.
Conditioning Leather Shoes
Leather shoe conditioning replenishes the moisture and suppleness that are lost with regular use. First, choose a leather conditioner that is appropriate for the sort of shoes you own. Spread a tiny bit of conditioner evenly on the shoe's surface with a clean cloth. Before removing any excess, let the conditioner soak into the leather for approximately fifteen minutes. By doing this, the leather is kept from drying out and breaking over time.
Being aware of the frequency is an important part of conditioning. Depending on usage and environmental conditions, you may need to condition your shoes every three to six months. More regular conditioning can be required in arid areas. If you're using a new conditioner, make sure it doesn't change the color of your shoes by first testing a tiny, discrete area.
Polishing Techniques
Polishing adds shine and protects shoes from external elements. Begin by choosing the right polish: cream polish for moisturizing and shine, wax polish for superior protection and gloss. Apply polish with a soft cloth or applicator brush in small, circular motions to cover the entire shoe evenly. Let the polish sit for 10-15 minutes, allowing it to bond with the leather.
Buff shoes using a horsehair brush or soft cloth to enhance shine. Use quick, brisk strokes for the best luster. For extra gleam, you might perform a spit-shine: lightly dampen the cloth, apply a small amount of wax polish, and buff with precise, circular movements. Pay attention to detailing such as brogueing or seams to ensure consistent coverage.
Incorporating proper polishing techniques into your shoe care routine ensures your dress shoes remain clean and elegant, ready to complement any outfit.
Maintenance Tips
Dress shoes can be properly maintained by implementing easy, routine routines. To stop material deterioration, keep shoes in a cool, dry place. Steer clear of damp, humid areas since they might harbor mold and mildew.
After every wear, insert cedar shoe trees. They absorb excess moisture and keep their shape. They are very helpful in prolonging the life of leather and maintaining its condition.
To allow your dress shoes to relax, rotate them. Shoes can quickly lose their structure if they are worn frequently without breaks. This keeps them looking brand new and prolongs their lifespan.
After every use, give your shoes a quick brush. Dust and debris on the surface can be removed with a soft brush, avoiding accumulation and possible discoloration. Frequent brushing guarantees that the materials in your shoes stay pristine and keeps them looking new.
Once a month, use a protective spray. To keep stains and moisture away from leather, apply a waterproofing spray. The same is true for suede, which guarantees that it will stay immaculate even when exposed to weather conditions.
Regularly check soles and heels for wear. Resole or fix them right away to stop additional harm. Early problem solving preserves the shoe's comfort and integrity while also saving money.
Every few weeks, clean the interior and insoles. To get rid of bacteria and smells, use a moist cloth soaked in mild soap. This keeps the shoes pleasant and fresh for the following wear in addition to extending their lifespan.
Dress shoes stay immaculate when you incorporate these upkeep practices into your routine, which improves your appearance and self-assurance in business environments.
The Shine-Ready Moment
Keeping your dress shoes in good condition doesn't have to be difficult. You can make sure they continue to be an essential part of your wardrobe by including routine cleaning and care into your regimen. In addition to maintaining their quality, the appropriate instruments and methods improve your confidence and general attractiveness. Keep in mind that putting a little effort into your shoes will help you come off as professional and detail-oriented. You can maintain your dress shoes in top condition and be prepared to turn heads wherever you go by following these easy steps and advice.
Frequently Asked Questions
-
Clean dress shoes enhance personal appearance and project professionalism. Maintaining their cleanliness not only reflects attention to detail but also preserves the shoes' quality and longevity. Regular cleaning can prevent material degradation and extend the lifespan of the footwear, ensuring they always complement your attire.
-
Clean dress shoes convey attention to detail and respect for the environment, which are crucial in making positive first impressions. They demonstrate thorough preparation and boost confidence, projecting an image of authority and competence in both personal and professional settings.
-
Essential materials include a soft brush, microfiber cloth, saddle soap, and specific cleaners for suede. Additional items, like waterproof spray, leather conditioner, shoe cream, beeswax polish, suede conditioner, and cedar shoe trees, help protect and maintain the shoes' integrity and appearance.
-
Begin by removing the laces and dry brushing away dirt. Insert cedar shoe trees, use a damp microfiber cloth with saddle soap, and condition the leather. Polish the shoes for shine, ensuring you use suitable products for the specific leather type to maintain their appearance.
-
For suede shoes, start with a suede brush to remove dirt, followed by a suede eraser for any stains. This method helps preserve the material's texture and appearance, maintaining the shoes’ visual appeal and longevity.
-
Condition leather shoes based on usage and environmental factors. Typically, conditioning every 1-3 months is advisable. Regular conditioning restores the shoes' moisture and flexibility, preventing cracks and damage.
-
Cedar shoe trees absorb moisture and maintain the shape of the shoes, preventing creases and odors. They help dry out shoes after wear and extend their lifespan by preserving their structure and freshness.
-
Store shoes in a cool, dry environment and use cedar shoe trees after wear. Rotate shoes to allow them to recover, brush regularly, apply protective sprays monthly, and check heels and soles for wear. Regular interior cleaning helps maintain comfort and freshness.
-
Not at all. With the right tools and products, maintaining dress shoes can easily fit into a regular routine. Spending just a few minutes on cleaning and polishing can make a noticeable difference, ensuring the shoes are always ready for any occasion.
All-in-One Cleaning Guide for a Fresher, More Comfortable Home
Step-by-Step Tips to Clean, Organize, and Maintain Every Part of Your Space
Best Way To Clean Gold Earrings
Best Way To Clean MacBook Screen
Best Way To Clean Vinyl Records
Can Washing Machines Be Stopped Mid-Cycle
Can You Wash Dry Clean Only Curtains
Cleaning Comfort Room Safety Precautions To Be Observed
Cleaning Pet Urine From Carpet
Cleaning Stainless Steel Fridge
How Technology Is Remodeling The Cleaning Industry
How To Get Rid Of Cigarette Smell In Car
How To Get Self Tanner Out Of Carpets
How To Make Your House Smell Like Laundry Detergent
How To Prepare Your Home For A Deep Cleaning Service
How To Prevent Allergies With Cleaning
How To Remove Carpets DIY Guide
How To Replace Carpets By Yourself
Magic Eraser To Spot Cleaning Walls
Open Windows To Deodorize Home
Removing Bleach Smell From House

How To Clean A Ceramic Iron
Cleaning a ceramic iron might seem daunting, but with the right steps, it’s a simple process. Regular cleaning not only improves its performance but also extends the iron’s lifespan. In this guide, we provide clear, step-by-step instructions on how to effectively remove residue, mineral deposits, and stains from your ceramic iron. From using safe, household products to prevent damage, to tips on keeping the ceramic surface smooth and spotless, you’ll find everything you need. Follow these simple techniques to ensure your ceramic iron stays in top shape and functions flawlessly for years to come.
Quick Fixes For Common Ceramic Iron Problems
The Dos And Don’ts Of Ceramic Iron Care

Understanding Your Ceramic Iron
A ceramic iron is a customers’ favorite because it is a blend between high-quality technology and usability. Reducing friction and decreasing fabric’s opportunity to be harmed enables a soleplate with a ceramic covering to provide a gliding effect. It glides best over delicate clothing due to that feature.
Even distribution of heat by the soleplate assists effectively to reduce wrinkles. To make it impossible for you to burn your garments inadvertently as a result of having hot spots, even heat prevents such hot spots. Even distribution of heat is necessary to get maximum ironing effects.
Steam functions are often available with ceramic irons to enhance their usability. Ironing out stubborn wrinkles is facilitated by steam, which softens cloth fibers. It is possible to utilize the function of steam especially with thick cloth or with a number of cloth layers.
Because built-up residue is a possibility from an array of factors such as fabric softeners or mineral deposits, frequent upkeep is necessary. It is simple to cleanse to maintain the integrity of the ceramic finish with non-abrasive methods. Tender care to ensure your iron’s longevity as well as to ensure it is still able to provide you with the benefits you’re looking for with a good device is with gentle cleansing.
You can ease your ironing if you own a ceramic iron. Long service life and smooth functioning are guaranteed if you know how to take good care of it alongside utilizing its functions.
Preparing for Cleaning
Get your ceramic iron ready for a deep clean to maximize its performance. Highlight acquiring the right materials for doing it and adhering to precautionary guidelines.
Gathering Necessary Supplies
Preparing with the correct supplies helps make for an effortless cleaning process. Begin with a soft dry cloth to ensure that you don’t scratch the ceramic soleplate. Procure some white vinegar; it’s a wonderful non-toxic cleaners that effectively dissolves mineral deposits. Get some baking soda to assist with loosening hard residue but doing no harm. Be sure to have cotton swabs to access your steam vents and a bowl or small cup to mix cleaning solutions. Finally, be ready with distilled water, which you can use for rinsing purposes as well as to access the iron’s steam features without introducing new mineral deposits.

Safety Precautions
Be safe first by unplugging the iron and letting it fully cool down prior to beginning any cleaning process. Avoid burns and electric shocks with this first precaution. Avoid exposing the iron’s power cord to water or cleaning products to preclude possible electric shocks. Clean in a well-ventilated space or area, especially if you’re utilizing a substance such as vinegar, to be sure that you don’t inhale any kind of fumes. Use gloves if you’ve sensitive skin to guard your skin against cleaning solutions or residues. Test any new cleaner on an inconspicuous area of the soleplate to ensure it’s safe to be used with the ceramic finish.

Cleaning Methods
How to efficiently clean a ceramic iron is to utilize effective products and procedures. Routine maintenance ensures that your soleplate is smooth and your iron is running efficiently with your clothes maintaining excellent condition.
Vinegar and Water Mixture Solution
A water and vinegar solution removes scum from a ceramic iron. Mix equal parts white vinegar and distilled water in a basin. Ensure the iron is turned off and cool. Soak a soft cloth with the solution and remove soleplate with a soft cloth being gentle where a lot of build-up is present.
In case you still get a build-up of residue, turn over the iron upside down, soak a cloth with solution, cover soleplate with it for a few minutes. Use cotton swabs soaked with solution to remove mineral deposits to scrape out steam holes. When cleaned off, wipe soleplate with a cloth soaked with plain water to remove vinegar scum.
Utilizing Baking Soda Paste
Baking soda paste is a gentle abrasive cleaner. Make a paste with one part water to two parts baking soda. Rub into soleplate with a soft cloth where dirt is stubborn. Rub lightly with a circular motion to loosen dirt. Clear off bits of paste with a soft damp cloth before paste dries.
Be sure to leave some steam holes open so none are clogged with baking soda. Wash cloth frequently during the cleaning process. Finish with a cloth dampened with distilled water to prevent streaks or mineral deposit.
Commercial Ironing Products
There is a variety of commercial cleaner products available to make easy work even of tough residue. Be sure to read manufacturer’s instructions for usage to make sure they’re safe to use on ceramic iron soleplates. Such products contain stick or liquid forms.
To use a stick cleaner, preheat the iron slightly to open up the residue so you can introduce it. Gently rub it over the face. To take it off, use a soft, damp cloth.
When using a liquid cleaner, spray it directly into the soleplate using a cloth to ensure coverage. These products are design-friendly since they eliminate residue non-abrasively.
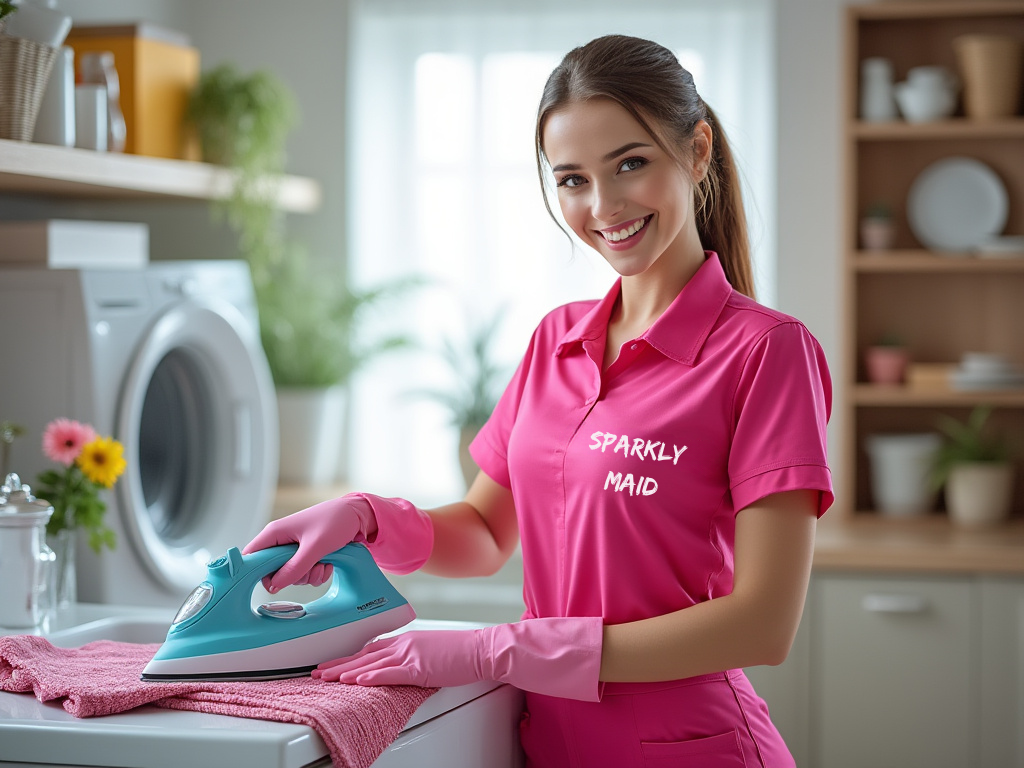
Cleaning the Iron Soleplate
Keeping your ceramic iron’s soleplate clean ensures maximum effectiveness and smooth running on fabric. Good practices preserve the integrity of the soleplate as well as prevent residue building up.
Removing Residue and Stains
Always ensure your iron is cold and disconnected. Mix an equal proportion of water to white vinegar as a solution. Soak a soft cloth with this solution and begin to gently rub with a circular stroke. It will loosen light stains and build-ups but will not scratch off the ceramic finish.
For persistent stains, make a baking soda paste: 2 tbsp baking soda, blended with a few drops of water. Rub into stained spot with a non-abrasive sponge and apply it on, washing off softly. Wipe soleplate off with a smooth cloth moderately wet with water to wash off excess paste.
Clean out steam holes with vinegar solution-soaked cotton swabs. Put a swab into a hole and rotate to loosen particles in. Then fill your iron with distilled water and a steam burst to rinse dirt particles left behind.
In real life, one should use commercial products with the manufacturer’s guidelines to avoid hurting them. They have designated cleaning agents for their ceramic coating products. Regular usage would maintain the efficiency of their iron and contribute to its longevity.
These habits will keep your soleplate spotless with your ceramic iron, glide efficiently across garments, and be kept in top condition.
Maintaining Your Ceramic Iron
Routine maintenance of your ceramic iron ensures long-term efficiency and maintains your clothes looking pristine. Regular maintenance prevents accumulation of residues and guarantees the appliance’s efficiency.
Regular Cleaning Tips
Keep your ironing board ceramic iron running effectively by incorporating weekly cleaning into your routine. It prevents build-ups to protect the soleplate from degrading cloth quality.
Vinegar and Water Solution: Mix equal parts white vinegar with distilled water. Soak a soft cloth with the solution and clean off deposits by wiping the soleplate. In cases where you have steam holes, use cotton swabs with a solution to remove blockages.
Baking Soda Paste: For harder stains, make a paste by mixing baking soda with a drop or two of water. Rub it onto the soleplate and massage with a soft cloth. Remove the paste with a damp cloth to avoid leaving a trail behind.
Distilled Water: Fill the water tank with distilled water to prevent mineral deposits. Drain off the tank after each use to prevent stagnant water that could lead to odors or residue.
Gliding abilities rise with cleaning procedures to maintain heat distribution with smooth finishes.
Avoiding Common Mistakes
Poor maintenance might destroy your ceramic iron or decrease its longevity. Operating it properly ensures maximum effectiveness.
Avoid Harsh Materials: avoid using harsh materials. Metal scouring pads or aggressive cleaners can scratch off the ceramic coating off your iron. You will want soft solutions and gentle cloths that will retain integrity within the soleplate.
Proper Iron Handling: Do not dip the iron into the water. Wash the exterior part individually but should never come into contact with electric parts within.
Check Manufacturer Instructions: Be sure to consult your manufacturer’s instructions for how to properly care for your iron. Inappropriate cleaning procedures may void the warranty or destroy the appliance.
Cool Down Before Cleaning: Always allow the iron to cool down before cleaning. Heat can react with the solutions for cleaning and burn or even alter the face of the iron.
Addressing these common issues helps you get off to a good beginning to keep your ceramic iron effective and long-lasting so it can last you however long you desire.

Completing the Sparkle Full Circle
Regular maintenance will help achieve good performance and long lifespan of your ceramic iron. Simple maintenance practices and use of correct materials will go a long way to help keep your iron in good pristine state. Regular maintenance is good not only to increase your iron’s efficiency but also to be cautious enough when handling sensitive clothes.
Shun pitfalls that will make you fail to properly maintain your irons and fail to take protective measures especially when maintaining their ceramic finish.
Experimenting with everything will make your ceramic iron move effortlessly with reduced struggling, so your clothes end up being smooth.
Frequently Asked Questions
-
Ceramic irons offer several advantages due to their advanced technology and user-friendly design. The ceramic coating on the soleplate ensures smooth gliding with reduced friction, minimizing fabric damage. This is particularly beneficial for delicate materials. Consistent heat distribution across the soleplate prevents scorching and delivers optimal ironing results. Additionally, the steam capabilities of ceramic irons help relax fabric fibers, making it easier to remove wrinkles effectively.
-
Regular cleaning of a ceramic iron is advisable to prevent residue buildup and maintain optimal performance. Ideally, you should clean the iron once a month or more frequently if you notice any residue on the soleplate. Consistent maintenance will help prolong the iron's lifespan, improve efficiency, and ensure smooth operation, keeping your clothes wrinkle-free.
-
To effectively clean a ceramic iron, gather soft materials and homemade solutions that won't damage the coating. Essential supplies include a soft cloth, white vinegar, baking soda, cotton swabs, and distilled water. These items help remove residue while preserving the ceramic soleplate's condition. For tougher stains, a gentle baking soda paste can be used as an abrasive option. Commercial cleaning products are also available, but ensure you follow the manufacturer's instructions.
-
Safety is key when cleaning a ceramic iron. Start by unplugging the iron and allowing it to cool completely. Ensure you're working in a well-ventilated area. Use a solution of vinegar and water for cleaning the soleplate, and employ cotton swabs dipped in this solution for steam holes. For persistent residue, gently apply a baking soda paste. Avoid using abrasive materials or submerging the iron in water to prevent damage to the ceramic coating.
-
Regular maintenance is crucial to prevent residue buildup, which can hinder performance and damage the ceramic coating. Clean irons provide smoother gliding over fabrics and enhance efficiency, reducing the effort required for effective ironing. Proper maintenance extends the appliance’s lifespan, ensuring that it consistently delivers optimal results without damaging your clothes. Understanding how to care for your ceramic iron helps simplify the ironing process and keeps the iron in excellent condition.
All-in-One Cleaning Guide for a Fresher, More Comfortable Home
Step-by-Step Tips to Clean, Organize, and Maintain Every Part of Your Space
Best Way To Clean Gold Earrings
Best Way To Clean MacBook Screen
Best Way To Clean Vinyl Records
Can Washing Machines Be Stopped Mid-Cycle
Can You Wash Dry Clean Only Curtains
Cleaning Comfort Room Safety Precautions To Be Observed
Cleaning Pet Urine From Carpet
Cleaning Stainless Steel Fridge
How Technology Is Remodeling The Cleaning Industry
How To Get Rid Of Cigarette Smell In Car
How To Get Self Tanner Out Of Carpets
How To Make Your House Smell Like Laundry Detergent
How To Prepare Your Home For A Deep Cleaning Service
How To Prevent Allergies With Cleaning
How To Remove Carpets DIY Guide
How To Replace Carpets By Yourself
Magic Eraser To Spot Cleaning Walls
Open Windows To Deodorize Home
Removing Bleach Smell From House
Cleaning Comfort Room Safety Precautions To Be Observed
Cleaning a comfort room can be a challenging task, but with the right safety precautions, it can be done efficiently and safely. Ensuring that cleaners are equipped with protective gear such as gloves and masks is the first step in preventing exposure to harmful chemicals. Additionally, proper ventilation is essential to avoid inhaling toxic fumes from cleaning agents. This guide outlines the necessary steps for maintaining cleanliness while keeping safety at the forefront, from choosing the right products to employing safe cleaning techniques. Prioritize hygiene and safety by following these comfort room cleaning safety tips to keep your space spotless and risk-free.
A Sparkling Clean Comfort Room Without The Risks And Safety Guide
Step-By-Step Guide To Comfort Room Cleaning Safety

Importance of Cleaning Comfort Room Safety Precautions
Observing safety precautions in cleaning the comfort room involves the use of protective gears, proper ventilation, following instructions on the product, prevention of falls, and equipment checks to avoid accidents and health risks hazardous to the environment but can maintain hygiene efficiently.
Safety first when cleaning the comfort room. Cleaning products contain bleach or ammonia, which can cause respiratory issues and skin irritation if not handled properly. Wearing gloves, masks and goggles minimizes the risks by creating a barrier between your skin and the nasty stuff. Proper ventilation also reduces inhalation dangers by getting the fumes out quickly.
Slippery surfaces increase the risk of falls when cleaning. To keep yourself safe, wear non-slip shoes and put up warning signs to alert others to wet floors. These will prevent accidents for the cleaner and anyone who enters the area during maintenance.
Proper cleaning techniques will give you a thorough clean and keep you safe. Always follow the instructions on the product label to use it without unnecessary exposure. Organizing the cleaning process with a plan reduces the time spent in hazardous conditions and increases efficiency and safety.
Regular equipment checks are important to ensure tools are working properly. Defective mops, buckets, or cleaning appliances can cause accidents or ineffective cleaning. Check your equipment before each use to avoid problems.
Remember, proper disposal of waste, including chemical containment, keeps the environment safe. Use the right containers for waste storage and dispose of them according to local regulations. This will prevent chemical spills and harm to sanitation workers who handle waste materials.
By following these safety guidelines, you will have a safe cleaning environment. By being mindful of these, you will have a safer school, workplace or home and a clean comfort room.

Identifying Potential Hazards
Cleaning a comfort room involves various risks, making it crucial to recognize potential hazards before starting the task. Awareness of these dangers helps ensure effective cleaning while maintaining safety.
Slippery Floors
When cleaning, wet and slick surfaces present serious risks. Utilize drying equipment and absorbent materials to control water and cleaning agents. To reduce the chance of someone slipping, post warning signs to let people know about places that are damp. Even on wet conditions, keep your footing steady by wearing non-slip shoes.
When water is applied carefully, it becomes less slippery. When cleaning, only use what is required to avoid too much pooling. As the area dries, keep an eye on it and clean up any spills right away. Identify and address possible slip hazards by conducting routine floor inspections.
Use of Chemicals
Exposure to hazardous compounds can be avoided by using and handling chemicals properly. To protect your skin and respiratory system, wear gloves and a mask. Reduce the danger of inhalation by utilizing exhaust fans or opening windows to ensure enough ventilation.
Pay close attention to chemical labels. Toxic gasses may be released if mixing is done incorrectly, therefore follow the directions. To avoid misunderstandings and mishaps, keep chemicals in their original containers. To stay up to date on chemical properties and hazards, schedule routine inspections of safety data sheets.
Electrical Risks
Cleaning may present electrical hazards, especially when water or electronic devices are used close to outlets. Utilize gear that has been built with safety features like water-resistant casings and insulated wires. When a device is not in use, unplug it to prevent electrocution.
Electrical outlets should be kept dry and away from water. Place equipment as far away from damp locations as you can. To avoid electrical dangers, dry surfaces right once if there is any water exposure. To maintain safety, check electrical tools for damage on a regular basis and replace or repair any defective parts.

Essential Safety Gear
Safety gear plays a crucial role in protecting yourself while cleaning a comfort room. Proper equipment ensures not only thorough cleaning but also guards against potential hazards.
Personal Protective Equipment
Using personal protective equipment (PPE) reduces the risk of injury or illness. Essential PPE components include gloves, masks, and goggles.
Gloves: Essential for protecting your hands from irritants in cleaning chemicals like bleach or ammonia. Disposable nitrile gloves offer both chemical resistance and durability.
Masks: Necessary for filtering out fumes from cleaning agents, preventing respiratory issues. A mask with a good filtration capability reduces inhalation risks.
Goggles: Protect your eyes from splashes and harmful chemical exposure. Opt for goggles with an anti-fog feature for better clarity during cleaning tasks.
Wearing this equipment safeguards your health, prevents direct skin and eye contact with harmful substances, and minimizes inhalation of toxic fumes.
Proper Footwear
Slips and falls on damp surfaces can be avoided by wearing appropriate footwear. Secure footing is provided by non-slip shoes made for cleaning situations.
Non-Slip Soles: For traction on damp, slick surfaces, non-slip soles are crucial. Rubber-soled shoes offer superior traction.
Closed-Toe Design: Reduces the chance of harm by shielding your feet from spills and fallen objects.
Waterproof Material: Provides comfort and dryness for your feet while cleaning. This lessens the chance of slipping because of moisture.
Wearing the right shoes keeps you comfortable, lowers your chance of accidents, and facilitates effective cleaning procedures. You may concentrate on cleaning duties instead of worrying about slipping when you have a firm foothold.
Safe Cleaning Practices
Implementing safe cleaning practices protects your health and enhances the effectiveness of comfort room cleaning. These practices reduce the risks associated with cleaning tasks.
Ventilation and Air Quality
Cleaning of the comfort room should not be without proper ventilation. Open the windows and/or doors for fresh air circulation that helps dissipate the fumes brought by cleaning agents. When natural ventilation isn't available, fans or an exhaust system are used to improve the air quality. This lessens respiratory irritants and chemical fumes that are inhaled.
Regular air quality monitoring will guarantee safety during cleaning. Installing air quality monitors and carbon monoxide alarms can help people stay informed about potentially dangerous substances in the atmosphere. Once more, after cleaning, avoid closing your windows and doors right once. This allows any remaining pollutants to be safely released.
Correct Handling of Cleaning Agents
Proper handling of cleaning agents protects your safety by preventing dangerous substances from coming into contact with the body. Always read and follow product labels and instructions before use; make sure the area in which you are cleaning is well-lit so you can better see what materials you are handling.
Store cleaning chemicals in their original containers to help avoid mix-ups and to ensure that users have safety information available to them. Incompatible chemicals are stored in separate locations, second, to avoid chance hazardous reactions. Clean up spills immediately using absorbent material in addition to prevent slipping hazards and exposure.
Cleaning agents should be mixed in the correct proportions, and a product containing bleach is never to be mixed with another product containing ammonia. It generates dangerous toxic gases by mixing these two elements. Empty containers must be disposed of in accordance with the local authorities' rules. A container should be tightly sealed and properly labeled before disposing of it on a bench. Continuous education about safe handling practices among all cleaning teams makes a safer cleaning environment.

Training and Protocols
Understanding how training and protocols enhance safety when cleaning a comfort room is crucial to minimizing risks and ensuring a secure work environment.
Staff Training Programs
Training programs give staff members the fundamental abilities and information needed to clean comfort rooms safely. These courses emphasize product handling, safety precautions, and cleaning techniques. Employees with training are better able to identify possible risks, which lowers the number of occurrences.
Identifying Hazards: Workers are trained to recognize dangers like chemical exposure and slick surfaces. Being aware of these risks facilitates the implementation of appropriate preventative measures.
Equipment Handling: It's important to handle equipment properly. Training places a strong emphasis on using tools correctly to avoid mishaps and preserve productivity.
Chemical Safety: Using the right PPE, reading labels, and making sure that chemicals are stored properly are all part of handling chemicals safely. Additionally, knowledge of Material Safety Data Sheets (MSDS) is strengthened.
Practical Demonstrations: Interactive seminars that incorporate real-world examples enhance participants' comprehension and memory of cleaning procedures.
Frequent refresher trainings guarantee that employees are knowledgeable of the most recent safety protocols, preserving a clean and safe workplace.
Emergency Procedures
Having well-defined emergency procedures minimizes injury and damage during accidents. Employees should know the immediate steps to take in various emergency scenarios.
Chemical Spills: It's critical to act quickly. Workers should alert supervisors or safety staff, utilize spill kits if available, and leave the area.
Slip and Fall Incidents: In the event of a slip or fall, make sure that everyone who falls gets help right away. Evaluate injuries, administer first assistance, and record the occurrence for future reporting.
Electrical Hazards: To reduce further risk, workers should secure the area and turn off power sources if there are electrical risks.
First Aid Training: Employees with first aid training are able to treat patients right away in an emergency, lessening the severity of injuries.
Emergency Contacts: Keep a list of contacts for emergencies prominently displayed in the cleaning area. When assistance is required, staff members can get it fast.
Regular exercises and updated emergency protocols enable staff to respond quickly and efficiently in an emergency protecting their health and safety.
Final Cleaning
Both your health and the effectiveness of your cleaning depend on you staying safe while cleaning a comfort room. Adhering to recommended safety practices such as wearing personal protection equipment and using the proper cleaning techniques, can significantly reduce your risk of accidents and health issues. It is crucial to keep an eye out for potential hazards and implement safeguards like regular equipment inspections and adequate ventilation. Recognize the importance of emergency protocols and training in order to increase safety and preparedness. Prioritizing these measures not only protects you but also contributes to a clean and safe environment.
All-in-One Cleaning Guide for a Fresher, More Comfortable Home
Step-by-Step Tips to Clean, Organize, and Maintain Every Part of Your Space
Best Way To Clean Gold Earrings
Best Way To Clean MacBook Screen
Best Way To Clean Vinyl Records
Can Washing Machines Be Stopped Mid-Cycle
Can You Wash Dry Clean Only Curtains
Cleaning Comfort Room Safety Precautions To Be Observed
Cleaning Pet Urine From Carpet
Cleaning Stainless Steel Fridge
How Technology Is Remodeling The Cleaning Industry
How To Get Rid Of Cigarette Smell In Car
How To Get Self Tanner Out Of Carpets
How To Make Your House Smell Like Laundry Detergent
How To Prepare Your Home For A Deep Cleaning Service
How To Prevent Allergies With Cleaning
How To Remove Carpets DIY Guide
How To Replace Carpets By Yourself
Magic Eraser To Spot Cleaning Walls
Open Windows To Deodorize Home
Removing Bleach Smell From House

Can Washing Machines Be Stopped Mid-Cycle
Ever wondered if you can hit pause on your wash cycle? This blog dives into the nitty-gritty of whether stopping your washing machine mid-cycle is a myth or a legit move. From tech talk to troubleshooting, we'll cover why you might want to pause, how to do it without turning your laundry into a science experiment, and the implications for your machine's health. Let's unravel the spin cycle mystery together!
Is It Bad To Stop Washing Machine Mid Cycle?
Halting Your Wash Cycle In Progress - Can You Really Stop Mid-Wash?

Has your washing machine ever been interrupted part-way through a cycle? It’s a problem that anyone can have, either because they need to grab something right away or because they didn’t pack an individual sock. Is stopping the wash cycle a good idea? It’s good to know about the possible effects of turning off your washing machine to avoid unwanted problems and preserve your routine efficiently.
You may be worried about interrupting a washing machine part-way round a cycle because you’re worried about how it will affect your clothes or your machine. Even though machines these days can cope with an occasional interruption, frequent stopping can cause wear and tear or even cause a wash to fail. Keeping your machine’s longevity and usability high can be directly related to a consideration of whether or not it is safe to interrupt a machine and whether or not it is safer to let a cycle finish. To assist with making educated decisions about interrupting a washing machine, let’s take a look at this subject.
Understanding Washing Machine Cycles
There are steps to clean clothes in washing machine cycles. There’s a purpose for each pre-wash to rinse to spin cycle.
Pre-wash is to soak clothes in water to loosen dirt.
Wash clothes with soap to remove stains.
Rinse is to remove soap to avoid irritating skin or to be refreshed.
Spin is to remove excess water to shorten dry time.
Different clothes demand different cycles, delicates demand soft wash and heavy duty clothes demand harder wash. High efficiency machines take less energy and water and contain different cycles for different clothes. There are machines with a temperature setting so that you can choose warm or cold wash as per the load.
Step by step progress ensures maximum washing efficiency. Stripping cycles to add or modify settings can affect quality of wash or leave garments partially cleaned. It pays to be familiar with such cycles to make the most of your washing machine as much as your garments. Check cycle requirements for maximum results.

Reasons to Stop a Washing Machine Mid Cycle
Occasionally you will be asked to interrupt a washing machine in progress, although you should keep interfering with it to a minimum.
Common Situations That Require Stopping
You will be prompted to stop your washer in standard scenarios.
If you did not add something that you would like to be cleaned you stop it to be cleaned.
If you mistakenly or accidentally added something non washable or fragile you will want to remove it to avoid being damaged.
If weight is off balance such as a huge clump of clothes that will cause vibration you should stop and redistribute clothes.
Scenarios such as leakages or clothes being accidentally exposed require stopping right away for caution.
Knowing these scenarios will allow you to make quick actions to stop a cycle.
Safety Precautions to Consider
Be careful whenever you interrupt a washing sequence. As a safety precaution against harm, be sure your computer has a pause setting before turning off. For units with none, consult the manual to set up good interrupting procedures. Always disconnect power before manual adjustments, and if door locks are engaged, wait for a good signal before release.
To avoid possible machine wear or breakdown, don’t interrupt the machine constantly. To avoid odors or mildew, be sure contents within stay submerged if restart of cycle is a hazard. You and your washing machine are protected with these procedures.
Potential Risks of Interrupting a Wash Cycle
Stopping a spinning washing machine mid-wash might cause some harm to clothes as well as to itself. Be mindful of these facts beforehand.
Effects on Attire and Fabric
Clothes that were interrupted partway through their cycle may not be cleaned correctly. It is possible that dirt will not be rinsed out completely, depositing a residue that stiffens clothing or irritates skin. Incomplete cycles contribute most to water retention and to the growth of mildew throughout rinse and spin.
Delicate clothes like silk or wool require unique washing conditions and spacing. Interruption of a cycle can affect such setting, resulting in issues including color migration, stretching, or shrinkage. Permanent press cycles to minimize wrinkling may not work effectively. To avoid any damages, make sure to minimize interruptions as much as you can and refer to the care instructions of fabric—or consider having clothes professionally cleaned.
Damage to the Machine Possible
Regular cycle interruptions might stress your washer. Mid-cycle stops disrupt balance and can cause inner parts like the agitator or drum to wear unevenly. Over time, this creates problems with maintenance.
A machine’s efficiency might be disrupted by pauses that change the temperature or water volume. These might cause increased energy usage or mechanical stress. Fault code or breakdowns could be induced by some machines being incapable of tolerating sudden stops because they have digital controllers. Inspect your PC’s capabilities and features to reduce these dangers.
Steps to Safely Stop a Washing Machine Mid Cycle
How to stop a washing machine:
To stop a washing machine mid-cycle, take these steps to protect your appliance as well as your clothing.
How to end the cycle properly
First look to see if you have a “Pause” key on the control panel of your machine; most newer machines include one. If you find a “Pause” key press it to stop your machine from running without stressing it. If you don’t have a “Pause” key read your machine’s manual to make sure you’re correctly stopping it. Incorrect ways can cause problems such as leaking or not washing properly.
Then don’t open the door even a crack with the machine running, this can cause spills or breakdowns. Wait until your machine has fully stopped running then try to open it. Be sure to make sure the water level is within restrictions and the machine is stopped spinning or draining.
Resuming the Cycle Without Issues
When you open the door of the machine remove any clothes you’ve added or taken out. Inspect that the load is balanced before beginning again by spacing clothes to avoid vibrations or noises. Close the door correctly to ensure it seals and does not leak water whilst you’re beginning again.
Press “Start” or “Resume” and the machine will pick up where it left off. Inspect the load for a minute or so to allow it to get up to speed nicely and the machine doesn’t make any unusual noises or movements. If needed reset the machine to restart the part that’s been stopped, make sure detergents and fabric softener dispense properly.
Alternative Solutions to Consider
Finding ways to handle laundry efficiently helps reduce having to disrupt your washing machine halfway through a cycle. These ways optimize efficiency with exclusions of potential dangers that come with interruptions.
Planning Your Laundry More Effectively
Another method to minimize mid cycle stops is preparing early.
Start with sorting according to fabric kind and color to prevent color running or fabric damage.
Set aside days to heavier loads such as towels or bed linens to maximize machine loading.
Check individual needs for each load, washing cycle and water temperature.
Wash delicates in cold water to preserve them.
Check the care tag to make sure you’re treating clothes right.
Get everything ready beforehand so you’re good to go when you start.
Check pockets or zippers that might disrupt the wash.
That helps you organize your washer and minimize disruptions.
And create a laundry schedule so you’re on a routine. If you know which load is being washed at a time you can schedule your day better and avoid forgetting to pick something up. You will then be using your washing machine more effectively and less likely to have to stop a cycle.
Reality Of Stopping A Washing Machine Halfway Through A Wash Cycle
Interupting your washing machine half-way through a cycle is okay but should be done with caution. Interupting is permissible occasionally with newer machines but frequent stopping will wear down to inefficiencies.
Acquiring an idea about your machine’s cycles and planning your laundry will minimize interupting and have your laundry cleaned with your machine purring. Always be mindful of your own safety and refer to your machine’s booklet about interupting and continuing cycles with caution. In doing so you’ll also maximize the lifespan of your washing machine and make your laundry smooth and effortless.
Frequently Asked Questions
Can I open my washing machine mid-cycle to add clothes?
Yes, most newer machines have a “pause” setting. Look in your owner’s manual for instructions for your machine. Wait until after the drum has stopped spinning and after the machine beeps to signal it’s safe to open. Interruptions should be avoided regularly because they can lead to inefficient cleaning as well as to problems with your machine.
What are some risks associated with stopping the wash cycle often?
Frequency of interruptions might cause clothes to be cleaned unevenly, build-up of detergent scum and mold growth. It can also cause stress to parts of your machine, alter water levels and induce mechanical stress. To avoid such issues, don’t open it frequently but schedule your laundry.
One should be cognizant about different washing machine cycles.
Being aware of washing machine cycles ensures your clothes get properly cleaned with intact fabric. There’s a specific fabric a particular cycle is meant for; selecting the correct one enhances cleaning effectiveness as well as inhibiting harm such as shrinkage or colour running. High efficiency machines consume reduced water as well as energy.
How can I safely stop a washing machine from running?
To safely stop, find “Stop” or “Pause” on your machine’s control panel. In uncertainty, consult the user guide. Be absolutely positive that the drum has stopped completely before you open the door to avoid any spills. Always restart by checking the load balance and shutting down the door firmly before restart.
Is it advisable to schedule laundry operations to minimize interruptions during mid-cycle?
Yes, it can help with mid cycle interruptions. Pre sorting clothes by fabric type and colour can prevent damage and colour transfer. A regular wash schedule and checking each load can be easier and help reduce interruptions.

All-in-One Cleaning Guide for a Fresher, More Comfortable Home
Step-by-Step Tips to Clean, Organize, and Maintain Every Part of Your Space
Best Way To Clean Gold Earrings
Best Way To Clean MacBook Screen
Best Way To Clean Vinyl Records
Can Washing Machines Be Stopped Mid-Cycle
Can You Wash Dry Clean Only Curtains
Cleaning Comfort Room Safety Precautions To Be Observed
Cleaning Pet Urine From Carpet
Cleaning Stainless Steel Fridge
How Technology Is Remodeling The Cleaning Industry
How To Get Rid Of Cigarette Smell In Car
How To Get Self Tanner Out Of Carpets
How To Make Your House Smell Like Laundry Detergent
How To Prepare Your Home For A Deep Cleaning Service
How To Prevent Allergies With Cleaning
How To Remove Carpets DIY Guide
How To Replace Carpets By Yourself
Magic Eraser To Spot Cleaning Walls
Open Windows To Deodorize Home
Removing Bleach Smell From House

Spring Cleaning VS Deep Cleaning Services
Spring cleaning or deep cleaning—choose your battle. Think of spring cleaning as your home's annual refresh, hitting the highlights. Deep cleaning? That's like sending your home to spa rehab, tackling grime you didn't know existed. From decluttering to disinfecting, dive into this guide to decide which clean crusade fits your castle. Whether it's a seasonal spruce or a thorough therapeutic cleanse, let's find your home's cleaning sweet spot.
Spring Cleaning vs. Deep Cleaning A Homeowner's Guide
Choosing The Best For Your Home Spring Cleaning Or Deep Clean?
The approach of spring frequently stimulates a new beginning, so now is the ideal time to do those cleaning projects you've been putting off. However, you may be wondering whether a deep cleaning or spring cleaning is better for freshening up your house. Although each has advantages, knowing the distinctions can help you select the best strategy for your area.
Usually, spring cleaning is a comprehensive tidying up, with an emphasis on areas that might be missed during routine cleaning. It's all about giving your house a makeover after the long winter. Deep cleaning, on the other hand, targets dirt and grime that build up over time by getting deeper into the cracks and crevices. This service guarantees a thorough cleaning, including frequently overlooked places.
You can make an informed choice and make sure your house feels refreshed and prepared for the new season by being aware of what each service includes.

Understanding Spring Cleaning Services
A refreshing approach to welcome the new season into your home is with spring cleaning services. These services, which focus on clearing clutter and refreshing living areas, get your house ready for the warmer months.
What Is Included in Spring Cleaning?
A spring cleaning usually consists of scouring the entire house. Additional tasks include cleaning windows, wiping down counters, and dusting baseboards and shelves. Living rooms and corridors that are used frequently should be mopped, cleaned, and maintained in a clean appearance.
Rearranging furniture and concentrating on cleaning closets and other storage spaces could be additional spring cleaning tasks. Now is a good time to move furniture around to improve flow. Light switches and door handles are among the fixtures that are also maintained to improve their aesthetics.
When to Consider Spring Cleaning
Since spring cleaning prepares your home for the beautiful days ahead, it is ideal to undertake it right after winter. When the emphasis is on rejuvenation rather than total dirt removal, it works effectively during seasonal changes.
When you see collected dust and debris from closed winter windows, spring cleaning is ideal. It is appropriate before to hosting parties because it gives the impression that it is immaculate to guests.
For smaller areas that need routine maintenance but don't need frequent intensive cleaning, think about spring cleaning. By using these services, you may maintain a tidy and orderly space while embracing the rejuvenating spirit of spring.
Exploring Deep Cleaning Services
Deep cleaning services target hidden dirt, focusing on neglected areas in your home. Unlike regular tidying, these services address accumulated grime and allergens.
Key Components of Deep Cleaning
Deep cleaning services encompass a thorough scrubbing process, including challenging-to-reach spaces and high-use areas. Services typically involve:
Baseboards and Moldings: Wiping dust and grime from surfaces, enhancing wall cleanliness.
Kitchen Appliances: Deep cleaning areas like ovens and refrigerators where grease accumulates.
Bathrooms: Scrubbing tiles and grout, ensuring mold and mildew removal.
Carpet and Upholstery: Agitating and steam cleaning to remove embedded dirt and dust mites from fabrics.
Air Vents and Ducts: Clearing dust buildup, improving air quality.
To create a healthy living environment, each part focuses on getting rid of allergies and infections.
Ideal Situations for Deep Cleaning
In situations where complete sanitation is required, deep cleaning becomes especially advantageous. Think about setting up services in the following circumstances:
Moving In/Out: Make sure the area is spotless by clearing away any filth that has been left behind or getting ready for new tenants.
Post-Renovation: After renovation, efficiently get rid of building debris and tiny dust that routine cleaning might overlook.
Pre-Event Preparation: Present a spotless home with extensive cleaning before hosting significant events.
Allergy Management: Reduce allergens by deeply cleaning areas prone to dust accumulation.
For homes that haven't been comprehensively cleaned in a while, deep cleaning offers an intensive refresh, leaving spaces pristine and hygienic.

Comparing Costs and Time Commitment
Understanding the costs and time required for spring cleaning and deep cleaning services helps in planning and budgeting for maintaining a tidy home. These factors often influence the decision to opt for one service over the other.
Average Pricing for Spring Cleaning
Typically, spring cleaning services include a number of chores aimed at removing clutter and maintaining surface-level order. Generally speaking, these services cost between $100 and $300, depending on your home's size and the level of cleaning needed. While larger properties or extra service requests, such window cleaning or carpet shampooing, can raise rates, smaller flats might be at the lower end of this spectrum. Since sessions typically last two to four hours, they are appropriate for a brief redesign of living areas. With a focus on revitalizing spaces after winter, these services can effectively prepare homes for events or seasonal shifts.
Cost Breakdown for Deep Cleaning
Deep cleaning services focus on thorough cleaning procedures that remove allergens and hidden dirt from neglected areas. Depending on the size of the house, the areas that need special care, and any specialist treatments required, thorough cleaning can cost anywhere from $200 to $600 or more. For example, deep cleaning furniture, ovens, or carpets frequently raises the cost because these jobs require specialized equipment and supplies. Deep cleaning takes a significant amount of time; 5 to 8 hours are usually needed for thorough coverage. This service is perfect if you're dealing with health issues like allergies or if your house hasn't had any thorough attention recently.
Assessing the Impact on Home Health
Professional cleaning impacts home health by addressing allergens and improving air quality. Both spring and deep cleaning services contribute to a healthier living environment but achieve it through different methods and frequencies.
Benefits of Regular Spring Cleaning
Spring cleaning can improve the living conditions in your house and offer a number of health advantages. Air quality is enhanced by spring cleaning, which continuously eliminates dust and allergens. In order to decrease clutter and improve airflow, this yearly clean-up includes chores like dusting surfaces, washing windows, and rearranging spaces. Keeping your home pest-free is another benefit of routine cleaning, which disturbs insect-attracting conditions. Furthermore, keeping a clean workplace helps lower stress levels by establishing a smoothly functioning setting that encourages rest. Regular cleaning can reduce an allergy sufferer's exposure to allergens like pollen and dust mites, which will lessen their symptoms.
Long-term Advantages of Deep Cleaning
Over time, deep cleaning services are essential to keeping your house healthy. Deep cleaning reduces the allergy burden in your home by addressing buried debris and lingering allergens that build up in ignored areas, in contrast to surface tidying. Comprehensive sanitation is achieved by doing things like polishing kitchen equipment, washing baseboards, deep cleaning upholstery, and sanitizing restrooms. Better interior hygiene can be promoted by this methodical approach, which can help stop the growth of mold and germs. Deep cleaning improves general health by ensuring a clean and safe atmosphere for families with small children or pets. By eliminating impurities that lead to wear and tear, a comprehensive cleaning procedure also prolongs the life of furniture, appliances, and carpets.

Choosing the Right Service for Your Needs
Depending on your unique needs, you can choose between deep cleaning and spring cleaning. It's critical to assess the state of your house and the results you hope to achieve.
Factors to Consider Before Deciding
Make a decision based on the size and condition of your house. Spring cleaning is appropriate if you have gathered dust and clutter during the winter. It concentrates on simple chores like dusting surfaces and organizing spaces. Deep cleaning works better for bigger homes or those that need a more thorough approach. This kind entails labor-intensive duties including disinfecting spaces and cleaning appliances. Make a decision based on your budget and timetable. While deep cleaning, which is more comprehensive, requires more time and resources, spring cleaning services usually cost less and take less hours.
Customizing Cleaning Plans
Adapt cleaning schedules to your particular tastes and house needs. Whether choosing deep or spring cleaning, services frequently provide adjustable choices. For instance, include or exclude chores like shampooing the carpet or washing the windows. Inform the cleaning crew of any special requirements or places that need attention. Whether you require routine maintenance or a one-time comprehensive cleaning, schedule flexibility lets you set up sessions whenever it's most convenient for you. You may make sure that your areas effectively satisfy your functional requirements and standards by customizing the cleaning procedure.
Spring Cleaning VS Deep Cleaning: Concluding Your Cleaning Service Choice
The necessities of your house and your own tastes will ultimately determine whether you choose spring cleaning or deep cleaning services. Spring cleaning is a quick and effective way to update your space after winter and take care of simple chores. Deep cleaning, on the other hand, offers a comprehensive cleaning, making it perfect for houses that need close attention or have been neglected for some time. You may make an informed choice that supports your objectives and ensures a welcoming and healthy living space by being aware of the advantages and distinctions of each service. Whether you need a thorough cleaning or a seasonal update, expert services can help you keep your house neat and stress-free.

Frequently Asked Questions
What is the main difference between spring cleaning and deep cleaning?
Spring cleaning focuses on refreshing and tidying up the home after winter with tasks like dusting and window cleaning. Deep cleaning, on the other hand, targets neglected areas, tackling hidden dirt and grime, such as scrubbing baseboards and sanitizing bathrooms.
When is the best time for spring cleaning?
Spring cleaning is best performed just after winter. This timing helps refresh the home, making it ideal for hosting events and addressing accumulated dust and clutter, preparing the space for the warmer months.
What are the typical costs for spring and deep cleaning services?
Spring cleaning services generally range from $100 to $300, requiring 2 to 4 hours. Deep cleaning services cost between $200 and $600 or more, needing 5 to 8 hours due to the intensive nature of the tasks involved.
How does professional cleaning improve home health?
By lowering stress, increasing air quality, and minimizing allergens, spring and deep cleaning services both improve household health. Frequent cleaning helps improve airflow and pest management by reducing exposure to allergens like dust mites.
Is deep cleaning necessary for every home?
Deep cleaning is particularly beneficial for homes that haven't been comprehensively cleaned in a while, or in situations like moving, post-renovation, and for allergy management. It provides an intensive refresh, promoting a healthier living environment.
Can cleaning services be customized?
Yes, a lot of cleaning firms provide plans that can be customized. In order to ensure a satisfying cleaning procedure, homeowners can customize services to meet their own needs and preferences, taking into account variables such property size, condition, schedule, and budget.
Everything You Need to Know About Cleaning and Home Care
From Quick Daily Fixes to Full Deep Clean Guides, All in One Place
House Cleaning Made Simple With These Must-Know Tips
The Smart Way to Deep Clean Your Home and Save Money
How to Deep Clean Your Home One Room at a Time
New Year’s Eve Cleaning Superstitions and Facts
Street Cleaning Efforts That Make a Big Impact
Simple Ways to Cleanse Negative Vibes From Your Space
The Truth Behind the Egg Ritual for Aura Cleansing
Cleaning Routines Designed for Your Busy Life
Can Rain Really Help Clean City Streets
How an Egg Cleanse May Affect You Spiritually and Physically
Time-Saving House Cleaning Tips That Actually Work
Daily Cleaning Habits That Keep Your Home Looking Great
Why Cleaning Your Home May Help You Sleep Better
The Mental Health Benefits of a Clean and Clutter-Free Space
How Quezon City Measures Up in Cleanliness
Is the Philippines Taking Steps Toward a Cleaner Future
How to Maintain a Clean Home Without Harsh Chemicals
Keep Your Home Sparkling All Year With These Simple Tricks
What’s the Difference Between Spring Cleaning and Deep Cleaning
The Benefits of Regular Strata Cleaning for Property Management
Why Disinfecting High-Touch Surfaces Is Key to a Healthy Home
How Deep Cleaning Improves Your Health and Home Environment
The Link Between Deep Cleaning and Fewer Allergy Symptoms
Why Cleaning Can Help You Feel Calmer and Happier
The Best Way to Keep Your Home Clean Week After Week
Everything You Need to Know About Spring Cleaning

Who Can Benefit From Extreme Cleaning Services?
Ever feel like your space is more disaster than domicile? Extreme cleaning services are the lifeline for those in a clutter catastrophe. Whether you're a college grad facing a post-party mess or a family buried under baby belongings, these pros tackle the chaos. Curious who qualifies for this deep-clean drama? Let's explore the heroes of the cleaning world and who desperately needs their transformative touch.
Who Truly Needs Extreme Cleaning?
Lets Identify The Right Beneficiaries
Extreme cleaning is worth it when the dirt of life is more than a mop and broom are capable of taking on.These professional services are open to a variety of needs and are not even limited to the dirty rooms of hoarding homes. Extreme cleaning might balance out and restore your peace of mind for you regardless of whether you are working with the remains of a natural disaster, getting a piece of property ready to list, or taking care of the needs of a hectic lifestyle.
Just imagine entering an impeccably clean room after it was thoroughly cleared and spruced up. That is what extreme cleaners are all about. They are ideal for families wrapped up in daily messes, businesses that require a sterile environment, and homeowners prepping their home for lease. When the heavy lifting is left with experts, you get to relax and do what is most important. Find out who is eligible for such services and why they may be the answer you never knew you needed.

Understanding Extreme Cleaning Services
Extreme cleaners provide professional responses to special and greedy situations. Often including heavy neglect, infection, or mess beyond the ability of regular cleaning. These normally-outrageously-harsh measures are to be taken after calamitous events and in an effort to clean up locations that are contaminated by scenes of crime, hoarding situations, or abandoned deaths. It is as much about safety as it is about sanitizing, considering the sensitivities at play.
These services train professionals in the handling of on-the-job biohazards, including bloodborne pathogens, and in the cleaning, disinfecting, and disposing of all unsafe materials. These services permit protection of all current and future occupants. Extreme cleaning also aids landlords in preparing buildings for new occupancy through total resetting of environments contaminated with previous occupant issues.
These services allow for mass cleanups with property with efficiency in removals of debris, heavy cleaning, and removals of wastes. It will encompass methods for households managing estates or corporations requiring extreme cleaning after some events. Extreme cleaning is used in returning houses and offices back to habitable conditions soon and quick after natural disasters have left chaotic wreckage.
Expert knowledge and extreme cleaning methods render the site safe, hygienically clean, and fit for reoccupation.
Who Benefits with Extreme Makeovers?
Extreme cleaners are offering services for various individuals and occasions that require work other than regular cleaning. This part discusses who might require the services as a need and what they do regarding special needs.
Hoarders And Collectors
Collectors and hoarders usually have over-crowded spaces. Thorough cleaning services professionally eliminate and reposition unnecessary items in an effort to re-establish balance. The services ensure personal possessions are dealt with delicacy as tough issues are taken care of professionally and sensitively. Hiring certified professionals ensures spaces are functional and inhabitable once again, providing a clean slate.
Individuals With Limited Mobility
For people with mobility issues like arthritis or injury, maintaining the home clean is a challenge. Extreme cleaning services provide safe and clean conditions throughout the living quarters. These cleaners provide complete cleaning services specifically suited to your requirements so that not an inch is left untouched. Your living quarters are clean and comfortable all the time, improving your quality of life.
End Of Tenancy Situations
It is beneficial for both tenants and landlords to have extensive cleaning services so houses are thoroughly clean at the expiration of a lease. In getting the property ready for incoming tenants, professionals are liable for handling extensive cleaning duties including shampooing the rug and cleaning the appliances. By ensuring that you are one hundred percent in agreement with all lease stipulations, the service helps you avoid conflict or added cost. All concerned receive an easy transfer and the property is left completely clean.

Trauma And Crime Scene Recovery
With biohazard cleanups, extreme cleaners offer invaluable assistance in trauma and crime scene recovery. Trained technicians are subject to strict protocols of safety while sanitizing locations exposed to body fluids or other dangerous chemicals. With the cleanups, potential health hazards are lessened and locations are restored as safe zones for traumatized people while providing a respectful and kind demeanor. It is comforting to recognize that technicians work on your property in tough times.
Benefits of Extreme Power Washing
Extreme cleaning services offer multiple benefits that ensure the best quality of life and standards of living for individuals who choose to utilize the services.
Health And Safety Improvements
Using extreme cleaning services makes your home safer and healthier substantially. These services get your rooms clean and sanitized up to a hospital level by treating serious dirt, allergic conditions, and infections. Professionals lower the risk of injury or illness by treating biohazards with caution and according to strict removal guidelines. Such intensive cleaning is very useful in handling bugs and eliminating deadly residues from areas where infestation has occurred. Because it keeps the home clean and safer, extreme cleaning is very useful for people who are asthmatic, allergic, or have other medical conditions. It encourages healthy living because it decreases the amount of exposure you get to poisonous chemicals.
Stress And Anxiety Reduction
With extreme cleaning services, stress and anxiety that are part and parcel of dealing with filthy or messy rooms are reduced significantly. The immense pressure that hard clean-ups may cause is alleviated as they are professionally taken care of. With seasoned pros taking care of the hard work of cleaning, you get to relax and let out a sigh knowing spaces are going to thoroughly get back on track. Seeing previously chaotic spaces turned into clean, tidy spaces is a huge emotional relief for slob-prone families and individuals. In addition, people going through life upsets, including moving or undergoing a devastating experience, usually get comfort knowing their environs are thoroughly taken care of.
Choosing The Right Cleaning Service
Choosing an appropriate cleaning service for extreme cleaning requirements requires knowledge of certain criteria to be efficacious. Two considerations are key while evaluating a cleaning service’s credibility and capacity.
Evaluating Experience And Expertise
Assess the extreme cleaning experience and capability of the provider first and foremost. Assess their level of service and range of conditions with which they have worked. A seasoned service should have experience with working with difficult cleaning jobs, such as treating biohazards and conducting large-scale cleanouts. To confirm that they do have the required skills, watch their experience with cases similar to yours, such as hoarding cases or post-trauma cleans. Get a better understanding of their dependability and ability in upholding strict safety and hygienic demands via reading comments and reviews left about their services by clients beforehand.

Checking Certifications And Insurance
Review insurance coverage and needs prior to selecting an extreme cleaning firm. Certified services are usually OSHA-certified with the requirements, meaning that they comply with quality procedures and safety standards. Make sure technicians are specially trained with handling biohazards and chemicals. Make sure they have the right insurance coverage as a safeguard against liability as well. Assurances that the company prides themselves on professional liability and personal responsibility while upholding rigid safety guidelines are attained with insurance against potential property and worker injury.
Extreme Cleaning’s Broad Appeal
Besides the usual cleaning challenges, extreme cleaning services provides priceless solutions for a variety of needs. These services get your space safe and clean, if you are getting rid of much trash, prepping your house for sale, or rebounding from a disgusting incident. With tough cleanups handled by seasoned pros, you can relax and concentrate on what matters most. Choosing the best party is taking advantage of their knowledge and passion to restore sanitation and order to your space. Reap the life-changing potential of extreme cleaning to improve your protection, emotional equilibrium, and general health.
Frequently Asked Questions
What are extreme clean services?
Apart from the domain of regular cleaning techniques, extreme cleaning services manage difficult cleaning challenges. They are appropriate for a variety of instances, including the sale of property, hoarding, neglect, and disasters. Trained experts thoroughly and securely clean and restore such an environment using special methods and tools.
Who is eligible for extreme cleaning services?
Benefits include those for hoarders, individuals with mobility restrictions, landlords, renters, and families undergoing trauma recovery or property modifications. They are helpful in re-establishing order, maintaining clean space, and lessening tension in challenged situations.
How do extreme cleaning services conduct biohazard cleanups?
Experts manage biohazards with stringent protective measures, safe cleaning of rooms with proper equipment and means of elimination. They guarantee rooms are kept clean and safe for health.
What should I consider when choosing an extreme cleaning service?
In consideration of the insurance coverage of the provider, qualifications, customer references, and experience with complicated cleanups, confirm that they adhere to safety specifications and have a track record of addressing a variety of cleaning issues.
What are the health benefits of hiring extreme cleaning services?
Eliminating heavy dirt, allergens, and germs, such services are beneficial in offering sanitized conditions that meet medical requirements. To encourage safe living conditions for people with allergies, asthma, or other conditions, it is indispensable.
What services do extreme cleaners not provide?
In fact, the services ease pressure brought about by busy spots via handling of difficult cleanups. They allow individuals peace amidst transitions so that individuals concentrate on changes in lives rather than worrying about the neatness of their surroundings.

Everything You Need to Know About Cleaning and Home Care
From Quick Daily Fixes to Full Deep Clean Guides, All in One Place
House Cleaning Made Simple With These Must-Know Tips
The Smart Way to Deep Clean Your Home and Save Money
How to Deep Clean Your Home One Room at a Time
New Year’s Eve Cleaning Superstitions and Facts
Street Cleaning Efforts That Make a Big Impact
Simple Ways to Cleanse Negative Vibes From Your Space
The Truth Behind the Egg Ritual for Aura Cleansing
Cleaning Routines Designed for Your Busy Life
Can Rain Really Help Clean City Streets
How an Egg Cleanse May Affect You Spiritually and Physically
Time-Saving House Cleaning Tips That Actually Work
Daily Cleaning Habits That Keep Your Home Looking Great
Why Cleaning Your Home May Help You Sleep Better
The Mental Health Benefits of a Clean and Clutter-Free Space
How Quezon City Measures Up in Cleanliness
Is the Philippines Taking Steps Toward a Cleaner Future
How to Maintain a Clean Home Without Harsh Chemicals
Keep Your Home Sparkling All Year With These Simple Tricks
What’s the Difference Between Spring Cleaning and Deep Cleaning
The Benefits of Regular Strata Cleaning for Property Management
Why Disinfecting High-Touch Surfaces Is Key to a Healthy Home
How Deep Cleaning Improves Your Health and Home Environment
The Link Between Deep Cleaning and Fewer Allergy Symptoms
Why Cleaning Can Help You Feel Calmer and Happier
The Best Way to Keep Your Home Clean Week After Week
Everything You Need to Know About Spring Cleaning

What Is Spring Cleaning?
Spring cleaning isn't just about tidying up; it's a ritual rebirth for your home. This comprehensive guide delves into the essence of spring cleaning, exploring its historical roots, benefits for mental health, and practical tips to rejuvenate every nook and cranny. From eco-friendly methods to organizing chaos, discover how to transform your living space into a sanctuary of freshness. Ready to embrace the season with a clean slate? Dive into what spring cleaning truly means.
The Ultimate Guide To Spring Cleaning
Clean, Organize, And Refresh Your Home.
Longer days may have you feeling as though your living quarters need a clean up as the chill of winter is leaving. This tradition, at times referred to as spring cleaning, is much deeper than cleaning; it is defined as reviving your home and your soul. What is spring cleaning, and why would so many do it every year?
Spring cleaning is so much greater than the usual cleaning, it is a deep clean to get your home ready for the rest of the year. It is the ideal time to get your life in order, get rid of unnecessary stuff, and finish those catch all spaces that are so rarely addressed. It positively impacts your mental health as much as it does your space. In getting rid of the physical mess, you are making room for what is new and cleaning out your head.
So, if you are ready for a different turn of transforming the home and welcoming the new season with renewed vigor, then an understanding of what spring cleaning is would be the ideal beginning. Just discover how with the practice you are able to introduce your ambiance with a fresh lease of life.

Understanding Spring Cleaning
It is an annual activity and is more than occasional maintenance. It is time to clean spaces deeply and get your home back into that neat order. Deep cleaning, reorganizing, and household items inventory are all part of the activity. Projects might include window cleaning, carpet shampooing, and sorting out storage spaces that, very honestly, are neglected.
Each activity is one that is intended to freshen up the home surroundings for greater comfort and clarity. Even spring cleaning is an opportunity for you to inspect issues in your life that you no longer need and decide their fate. You might donate the goods or find uses for them in an effort to clear space most efficaciously. In so doing, you will freshen up not merely the physical space, but you also clear the ways for a freer mind for the new season.
The History Of Spring Cleaning
Spring-cleaning traditions are centuries old. It is an activity that is traced back to ritual and need-based reasons that are associated with changing seasons.
Origins And Traditions
Spring cleaning actually began as a ritual literally for most societies. In the Jewish tradition, at Passover the house was obliged to be cleansed thoroughly of all remnants of leavened bread. “Khaneh Tekani,” or “shaking the house,” is the Iranian tradition that is performed before Nowruz, the Persian New Year, and is a symbol of renewal and purification. In Chinese traditions, eradication of ill fortune precedes the Lunar New Year. In blending cultural traditions with seasonal changes, those traditions frequently connect cleaning with the spring spirit of renewal.
Modern Interpretations
Today’s spring cleaning transcends cultural references. It is today understood as the time for intensive cleaning work that is otherwise neglected over the course of a year. Most prepare their homes and lives as a season of renewal of physical and mental conditions. A few integrate green chemicals and recycling as part of sustainable operations. Electronic cleaning, as viewed from modern lenses, is as much about removing inboxes and organizing computer files. Spring cleaning still embodies the meaning of cleaning and renewal, but it is today applied according to modern ways of living.
Key Elements Of Spring Cleaning
Spring cleaning is an opportunity to deeply revamp your living quarters. It consists of strategic sections that are designed to relieve congestion and promote home sanitation.
Deep Cleaning Tasks
Deep cleaning targets areas usually taken for granted. Approach carpets shampooing so as to remove dirt and allergens that build up over time. Clean windows inside and out so as to allow sunlight in and brighten up your house. Clean ovens and refrigerators as ways of keeping them functional and spotless. Wash baseboards and ceiling fans usually dust accumulators. Employ non-toxic cleaners so as to ensure you are protecting your house while keeping it clean. Even ventilation systems are not spared; clean air filters and replace so as to improve indoor air quality.
Organization And Decluttering
As one piles up stuff, spaces get crowded. Donate clothes you do not wear through sorting out wardrobes. Dispose of outdated pieces in order to reorganize pantries. Organize items in cupboards with storage containers for ease of access. Evaluate decoration pieces and get rid of ones that are not appealing or carry emotional value. Sort out paperwork through shredding unnecessary documents and digitizing ones that are needed. To have a serene space that is aligned with contemporary designs, get minimalist with décor.
Wardrobe Organization: Eliminate unnecessary attire
Pantry Organization: Remove expired items
Cabinet Categorization: Storage container usage
Decoration Review: Highlight emotional pieces
Simplifying Paperwork: Digitalize and shred on demand
This spring-cleaning approach is equally about reviving physical spaces as it is about supporting mental concentration.

Benefits Of Spring Cleaning
Spring cleaning is an integral practice for one’s overall health since it helps in numerous ways. It boosts your physical and mental health and recharges your environment
Physical Health Benefits
Spring housecleaning is a great way of improving physical health. It removes dust and allergens from your living space, lowering your risk for respiratory conditions, often provoked by dust accumulation. Dusting furniture, vacuuming carpets, and cleaning air filter vents all work to create a healthier home. With proper cleaning techniques, mildew and mold—most specifically in humid bath sections—dissipate, lessening exposure to these potentially poisonous materials.
Deep housecleaning is also a great physical work out; exercise such as scrubbing flooring, lifting boxes, and stretching up and down to clean windows strengthen muscle and cardiovascular ability. These exercises promote better physical condition while keeping your home space in perfect condition.
Mental Health Benefits
In fostering a sense of control and an alleviation of stress, spring cleaning is advantageous for mental health. Straightening out messy rooms makes it simpler to determine what needs doing and helps ease the tension that a messy room usually breeds.
Inasmuch as neater space is able to promote concentration and efficiency, spring cleaning makes people better able to concentrate. When work is accomplished, the process provides a sense of accomplishment and this boosts psychological health. Every space that is neat and clean provides mental and visual satisfaction.
Moreover, spring cleaning is enlightenment-enhancing. You are temporarily relieved of daily tensions while you are occupied with the job in hand, and it promotes a sense of relaxing and clear thinking in general.
Tips For Effective Spring Cleaning
It might be too much of an expense to hire maid services because there are laundry services that are very convenient and very reasonably-priced.

Planning And Preparation
Draw up a checklist to direct you as you organize your spring cleaning. Divide the work into small bites, such as rooms or jobs. Assign a certain time for each work so that you maintain pace and focus. Prepare the materials you require in advance so that there are no hold-ups.
You may require cleaning supplies, dustbins, microfiber cloths, and sorting equipment such as pails or stickers. You can get the family involved and promote teamwork and efficiency through delegating each one of them certain jobs.
You may begin with the busiest parts of the house because there is normally the most dirt and debris accumulated there. Ensure each location gets the attention it needs through keeping track of progress and readjusting the schedule as need dictates.
Eco-Friendly Cleaning Solutions
Clean using materials that reduce your environmental footprint. Select household cleansers with natural constituents in them like vinegar, baking soda, or lemon juice instead of chemicals. Vinegar and water solution will best cater for multi-purpose cleaning of surfaces and glasses.
Select non-poisonous or biodegradable cleaning materials, as using those would be less harmful. Reusable cleaning materials including microfiber mop head and cleaning cloths will also reduce wastage.
Sorting materials into respective recycling bins or donation bins will be helpful in the recycling process in the midst of the cleaning. Spring cleaning is a renewal mentality, and it goes with the advocacy of hygiene in an environmentally friendly manner.
Final Thoughts On Spring Cleaning
A second chance to revitalize your home and psyche is provided with spring cleaning. It will do you some good to develop an annual ritual with this. It will help you update your house, clear out items you do not need, and promote a renewal.
Both your physical and emotional space are improved with this activity, along with making you a healthier and clearer person. To make spring cleaning less of a chore and enjoyable, try using green techniques and involving your family.
In the end, spring cleaning is an opportunity for your home and yourself to start the season with a fresh mindset and a neater house, and not a chore.
Frequently Asked Questions
What is the main purpose of spring cleaning?
With complete reorganization and spring cleaning, living spaces and mental health are revitalized. It is not just regular housecleaning; it is a time of cleaning houses thoroughly, becoming cozier, and uplifting spirits. With the spring season’s renewal philosophy, the method accommodates making an uncluttered and rejuvenated space.
What are the advantages of spring cleaning?
By getting spaces tidy and uncluttered, spring cleaning boosts mental focus and decreases tension. It increases focus and efficiency by providing a feeling of accomplishment and empowerment. The process allows individuals to shift focus and get their minds refocused by inducing mental awareness and providing a psychologic lift.
What are the origins of spring cleaning historically?
There are numerous traditions with cultural roots in spring cleaning. It consists of Chinese customs in the run-up to the Lunar New Year, Iranian “Khaneh Tekani” in the run-up to Nowruz, and the Jewish holiday of Passover. They are traditions regarding changes of season and correlating cleaning with the renewal concept.
How do I find a beach house owner?
Make a checklist and divide work into accomplishable sections so that spring cleaning is less overwhelming. Plan materials required in advance and involve the individuals in your house in working on joint chores. Prioritize busy areas first, use green cleaning products so as to reduce your footprints on the earth, and document work so as to stay on track.
What are the physical health benefits of spring cleaning?
A clean and healthier atmosphere is promoted with spring cleaning, keeping dust and allergens down and supporting respiratory problems. Moreover, cleaning is physical exercise, providing higher fitness levels. People can improve total physical health with spring cleaning and housework.
Which regions do I need to prioritize while spring cleaning?
Be certain to thoroughly clean neglected areas such as baseboards, windows, appliances, carpets, and air filtration systems. To improve physical spaces as well as mental concentrations, thoughtfully arrange and tidy spaces through reorganization of pantry spaces, sorting cupboard items, organizing attire, and simplifying papers.
What ways can sustainable practices be integrated with spring cleaning?
Use green cleaning products like vinegar and baking soda in order to implement sustainable practices. Think about recycling and donating items that are no longer needed, as well as electronic decluttering. These methods reduce the environmentally harmful effect of cleaning practices and smoothly coexist with renewal.

Everything You Need to Know About Cleaning and Home Care
From Quick Daily Fixes to Full Deep Clean Guides, All in One Place
House Cleaning Made Simple With These Must-Know Tips
The Smart Way to Deep Clean Your Home and Save Money
How to Deep Clean Your Home One Room at a Time
New Year’s Eve Cleaning Superstitions and Facts
Street Cleaning Efforts That Make a Big Impact
Simple Ways to Cleanse Negative Vibes From Your Space
The Truth Behind the Egg Ritual for Aura Cleansing
Cleaning Routines Designed for Your Busy Life
Can Rain Really Help Clean City Streets
How an Egg Cleanse May Affect You Spiritually and Physically
Time-Saving House Cleaning Tips That Actually Work
Daily Cleaning Habits That Keep Your Home Looking Great
Why Cleaning Your Home May Help You Sleep Better
The Mental Health Benefits of a Clean and Clutter-Free Space
How Quezon City Measures Up in Cleanliness
Is the Philippines Taking Steps Toward a Cleaner Future
How to Maintain a Clean Home Without Harsh Chemicals
Keep Your Home Sparkling All Year With These Simple Tricks
What’s the Difference Between Spring Cleaning and Deep Cleaning
The Benefits of Regular Strata Cleaning for Property Management
Why Disinfecting High-Touch Surfaces Is Key to a Healthy Home
How Deep Cleaning Improves Your Health and Home Environment
The Link Between Deep Cleaning and Fewer Allergy Symptoms
Why Cleaning Can Help You Feel Calmer and Happier
The Best Way to Keep Your Home Clean Week After Week
Everything You Need to Know About Spring Cleaning