
Clean Laptop Screen
Cleaning the laptop screen is vital to both its functionality and durability. Besides visibility through dust, fingerprints, and smudges removal, it creates a healthy working place by eradicating the allergens from your gadget. Herein we consider how you can properly and safely clean your laptop screen.
The Ultimate Guide To Cleaning Your Laptop Screen
Understanding The Importance Of A Clean Laptop Screen
Laptops are many of the essential computing devices employed for work, school, and leisure in the virtual age. The laptop display can accumulate dust, fingerprints, and smudges with more use which not only reduces the status quo but may even affect how well the computer performs. Learning how to safely and effectively clean your laptop screen will keep it sharp and will extend the life of your device. This paper is proposed in order to share the best practices for cleaning the laptop screen safely and efficiently.

How Important It Is to Clean Your Laptop Screen
Increased Visibility
A clean laptop screen enriches your view. Prints and powders can divert attention from either the tasks or the exhibitions. When the screen is clear, you see images and text so sharp, your eyes get strained not as quickly, and you're able to go longer without discomfort. It is a fact that is especially relevant for individuals who work for several hours in front of the screen or on studies.
Health Benefits
Over time they can accumulate on a surface and lead to respiratory symptoms or allergic reactions. By keeping the laptop clean this reduces the chances of you inhaling the particles of dust and other bits and bobs inside it. In addition, a sterile screen contains fewer bacteria thereby reducing the risk of contagious diseases particularly in group settings like offices or classrooms.
Long Device Lifespan
That is, a cleaning schedule ensures that quality is maintained and the laptop has a long-term life.

Cleaning Your Laptop Screen: Essential Supplies
Just prior to cleaning, it is important that you do have these items to use:.
Microfiber cloth: The most effective thing available in stores to do its job without damaging the surface in the form of scratches or pulled threads. Microfiber fibers hold dust and oil that does not scratch on sensitive surfaces.
Distilled Water: You'll want to use distilled water since tap water contains minerals that could cause a small number of spots on your screen.
White vinegar or isopropyl alcohol can be employed as cleaning agents for persistent stains. If you mix them with water, it will give you an effective solution that won't damage your screen.
Screen Cleaning Spray: If you encounter a more commercially viable solution, then use electronic/screen compatible.
Cotton swabs: This can be used for places you cannot easily clean like in the areas surrounding the screen or keyboard.
Safely Cleaning Your Laptop Screen: Step-by-Step
You need not be anxious about cleaning your laptop screen. Just adhere to these steps, and you shall achieve a glossy finish.
1. Shut Down and Unplug Your Laptop
Power off your laptop and disconnect it from the wall AC power source. You wish to evade electrical interruptions; and, interestingly, smudges are highly visible on a black background.
2. Reduce dust accumulation on the screen
Gently remove any loose dust or other particles that might be present on the surface by utilizing a dry microfiber cloth. Wiping in a single direction rather than in circles is advisable to avoid speckles.
3. Prepare Your Cleaner
If necessary, create a cleaning solution by mixing distilled water and white vinegar (or isopropyl alcohol) in equal proportions in a spray bottle and such. That is to say, distilled water should ideally be capable of cleaning the screen without vigorous scrubbing when the screen is not heavily soiled.
4. Wet the Cloth
Moisten one corner of the microfiber cloth with distilled water or your preferred cleaning agent. The fabric should be damp, but not saturated.
5. Screen Wipe
Gently clean the screen in rectangular patterns using the wet cloths. Please avoid pressing the display too firmly, as it may sustain damage.
6. Drying the Screen
Now wipe the entire display area. By using a clean section of the microfiber cloth, buff off the excess moisture to prevent streaks.
7. Clean Surroundings
Additionally, do not overlook other applicable areas, such as the bezel—a frame surrounding the screen—and keyboard.If necessary, cotton swabs dipped in a cleaning agent, based on your cleaning solution, may be used in tight spaces without harming the internal components.

Common mistakes to avoid when cleaning your laptop screen
Apply cleaning solution first to a lint-free cloth rather than applying it directly to the screen to prevent liquid drips from finding their way between the gaps and possibly damaging internal components.
Never Use Harsh Chemicals: Household cleaners containing ammonia will damage the screen since they strip away its coatings.
Avoid paper towels and abrasive cloths because they may scratch or leave lint.
Precaution to prevent smudges and streaks in the future These are preventive measures to maintain the laptop screen clean for a long time.
Utilize the keyboard cover: This gadget can prevent oil and dust from reaching the screen when the laptop is closed.
Cleaning procedure: Clean every two weeks as part of a routine.
Precaution to prevent smudges and streaks in the future
Rinse your hands first before sitting down at the computer so as not to increase the quantity of oil transferred onto the screen.
Store Your Laptop Correctly: Do not allow dust to accumulate in your laptop by storing it in a protective case or sleeve when not in use.
Clean laptop screen, but specifically focusing on the materials and equipment involved in the cleaning process.

The Complete Guide to Laptop Screen Cleaning for Strength and Function.
For the laptop display to remain functional and long-lasting, upkeep is essential. The following details can help you maintain your device's accessibility without being hampered by dirt or residual blemishes. This routine maintenance will improve your appearance and simultaneously support greater health by removing various allergens from your environment. With a few simple steps and diligent use, you may support a laptop that runs smoothly for many years.
All-in-One Cleaning Guide for a Fresher, More Comfortable Home
Step-by-Step Tips to Clean, Organize, and Maintain Every Part of Your Space
Best Way To Clean Gold Earrings
Best Way To Clean MacBook Screen
Best Way To Clean Vinyl Records
Can Washing Machines Be Stopped Mid-Cycle
Can You Wash Dry Clean Only Curtains
Cleaning Comfort Room Safety Precautions To Be Observed
Cleaning Pet Urine From Carpet
Cleaning Stainless Steel Fridge
How Technology Is Remodeling The Cleaning Industry
How To Get Rid Of Cigarette Smell In Car
How To Get Self Tanner Out Of Carpets
How To Make Your House Smell Like Laundry Detergent
How To Prepare Your Home For A Deep Cleaning Service
How To Prevent Allergies With Cleaning
How To Remove Carpets DIY Guide
How To Replace Carpets By Yourself
Magic Eraser To Spot Cleaning Walls
Open Windows To Deodorize Home
Removing Bleach Smell From House

Best Way To Clean MacBook Screen
Keeping your MacBook screen spotless is essential for both aesthetics and functionality. As an important part of our digital lives, MacBooks contain cherished memories and important documents. However, regular use leads to the accumulation of dust and fingerprints that may obscure your view. The good news is that cleaning your MacBook is simple and effective. With the right supplies and techniques, you can restore its elegance, enhance your viewing experience, and ensure your creativity flows uninterrupted.
Say Hello To Clarity With Best Ways To Keep Your MacBook Screen Spotless
Enjoy The Joy Of Cleaning Your MacBook Screen The Right Way
MacBooks are key devices in the virtual lives of the people. They are a device that keep very many things, ranging from the adorable faces and memorable videos, crucial papers and projects. However, with frequent usage, they get to pick up spots of dirt and smudges that have fingerprints making them less beautiful. But luckily, cleaning a MacBook is not that daunting. By care and concern, it can appear refined and new such that your creativity can emerge without any interrution.

To Comprehend the Meaning of Cleaning
One should be able to clean his or her MacBook to enhance its looks as well as to be able to keep it operating effectively. Dusting assists in preventing the formation of dust within the vents of your MacBook and can cause overheating and even destroy your hardware.
It will make your life easier to operate or play because cleaning the screen will make you be able to see better with ease of eye strain. It assists in preventing the formation of grime, which can damage your equipment in the future.
A clean workspace enables you to comfortably concentrate and get innovative ideas to effectively work. It is best to not only clean your virtual space but to clean your physical device too to prepare you to get better results.
Get Ready
Before washing, assemble all the materials together:
Microfiber Cloths: Screen and surface gentle.
Distilled Water: Do not tap water as minerals found in tap water can cause spots.
Isopropyl Alcohol: The disinfection will call for a solution of 70%.
Compressed Air: Good to blow out the duny corners.
Cotton Swabs: Efficient cleaning on edged-in areas and on the keyboard.
Starting From the Beginning
First, turn off your MacBook, remove it from its power source, with the purpose of securing during cleaning and not having any unintentional input. Utilize a microfiber cloth that is lightly misted with distilled water to clean the exterior surfaces. Tact with ports and hinges to not get moisture into the appliance.
For stubborn stains or adhesives, employ half part isopropyl alcohol and half part distilled water soaked by cloth. Such solution will sanitize and clean up for you to safely put it back on this healthy-aware device.

Exterior Cleaning Reminders
Dribbles and Drips: Keep the cloth dry not to wet to prevent leakage to go into the machine.
Apply Different Cloths: Try to apply separate cloths to different areas (one to the body, another to the screen) to prevent cross-pollution of grime.
Wipe the Screen
The screen sometimes needs extra care. A soft microfiber cloth sprayed very lightly with distilled water or your solution of alcohol. Do not spray onto the screen to avoid moisture getting into edges or into any crack.
Carefully wipe off the screen with circular motions to eliminate fingerprints and smudges. Do this gradually; a clean screen by itself better your viewing experience.
More Screen Care Tips
Put a screen protector on to avoid future smudges.
Avoid touching the screen; employ a stylus or trackpad when you can.
Cleaning the Keyboard
One of the hardest-working sections of your MacBook is the keyboard, to which crumbs, powder, and oils from your fingertips seem to cling with ease. The right way to clean it:
Flip Your MacBook Over: Simply shake it hard to dislodge any free particle matter.
Compressed Air: Shake canister and spray between keys while holding upright.
Wipe Down Keys: Wet a microfiber cloth with your cleaning solution and wipe each key off.
For those keys that not being easily cleaned, then they should be cleaned by using cotton swabs and cleaning solution and cleaned without any part being touched.
Keyboard Care Tips
Shake it out every week to dislodge loose junk.
Do not eat over your computer screen to keep crumbs off of it.

Don’t Forget Your Ports
The ports can get dusty over time and that can affect the connectivity. Blow out the dirt using compressed air in USB ports, headphone jacks, and charging ports. For hard dirt, softly massage the area around these with a dry cotton swab without forcing it in.
It will be a good idea to inspect it regularly and prevent the dust buildup and using dust plugs to keep them clean.
Create a Digital Home
Although keeping your space physically cleaned is key, don’t forget about your digital area. A disorganized desktop can be busy and decrease productivity.
Set aside a minute or two to set files into folders or remove files that you don’t want anymore.
Label the folder by category or by project.
Store backups by using cloud storage.
This reduces the hassle of looking to find papers and gives a feeling of satisfaction.
Maintain Habits of Regular Cleaning
To keep your MacBook fresh Cly this rigorous cleaning session, make a practice that is performed frequently:
Weekly clean the exterior case.
Remove the screen twice weekly.
Regularly deep clean the equipment with the keyboard and ports monthly.
Regular maintenance will ensure that your device remains looking new and runs at its best.
The Benefits of a Clean Device
Increased Performance
A clean gadget runs better as if the dusts clog the airflow, then overheating might result. Cleaning it effectively will make the cooling system clean and optimal functionality anticipated.
Increased Lifes
Ensure that the parts are healthy to prevent overheating and potential hardware issues. Thus, you avoided potential issues and saved your cash as well.
Improved Health Habits
Dusts and dirt can bear germs and allergens that can impair an individual’s health. Regular cleaning of the equipment lowers exposure to these irritants and quality improvement of indoor air. Hence, establishing a healthier indoor.

Enjoy Yourself with Your Shiny New MacBook
So now that you completed this really straightforward cleaning regimen, take a step back for just a moment and be blown away by what you just achieved.
Your MacBook should now be looking great and be a better enjoyable piece of equipment to deal with. A clean device makes life better. Cleaning not only reinstalls aesthetics but it will contribute to better functionality and higher longevity of your MacBook. It avoids issues that might arise due to lack of cleanliness over a prolonged period of time.
Invest a little time keeping your MacBook clean and you will be overjoyed all over again with this valuable companion to your day-by-day life.
All-in-One Cleaning Guide for a Fresher, More Comfortable Home
Step-by-Step Tips to Clean, Organize, and Maintain Every Part of Your Space
Best Way To Clean Gold Earrings
Best Way To Clean MacBook Screen
Best Way To Clean Vinyl Records
Can Washing Machines Be Stopped Mid-Cycle
Can You Wash Dry Clean Only Curtains
Cleaning Comfort Room Safety Precautions To Be Observed
Cleaning Pet Urine From Carpet
Cleaning Stainless Steel Fridge
How Technology Is Remodeling The Cleaning Industry
How To Get Rid Of Cigarette Smell In Car
How To Get Self Tanner Out Of Carpets
How To Make Your House Smell Like Laundry Detergent
How To Prepare Your Home For A Deep Cleaning Service
How To Prevent Allergies With Cleaning
How To Remove Carpets DIY Guide
How To Replace Carpets By Yourself
Magic Eraser To Spot Cleaning Walls
Open Windows To Deodorize Home
Removing Bleach Smell From House

Cleaning Inside Windshield
Cleaning your interior windshield is essential for visibility while driving. First, remove all dust and debris from the dashboard and edges of the windshield. Spray the glass cleaner on the cloth, not on the glass, and wipe circularly. Pay special attention to corners and edges where grime accumulates. Furthermore, you should also make it a habit of cleaning your windshield regularly, especially during the change of seasons when there is an increased amount of dust and pollen in the air. A clean windshield minimizes haze produced by the sun or car lights at night making the trip safer. Also, check your windshield wipers as well since old blades can smear grime and dirt and defeat your purpose. A well-maintained allows you to see the road clearly and improves your overall driving experience.
Achieve Crystal Clarity For Safer Driving
Safety Hacks For Streak-Free Windshield
A clear inside windshield is crucial to safer driving. Not only will this contribute to better visibility, but driving in general will be a whole lot sweeter. Here, we share the best effective methods, equipment, and advice on how to handle a spotlessly clean windshield on the inside of your car.

Why Cleaning Inside of Your Windshield Is Important
Increased Recognition
The front windshield is a component that requires a lot of attention because with a dirty one while driving, the visibility can be significantly compromised during adverse weather conditions, such as rain or fog. The dust, fingerprints, and smudges will cause light to scatter and make the eye glary and thus difficult to make out. By keeping the windshield clean, you will be able to make out clearly in front of the road.
Increased Security
A clear windshield is not only an aesthetic pleasant but can be a security issue. In fact, poor visibility, according to various studies, is among the highest causes of various accidents. By cleaning your windshield frequently, you eliminate the danger posed by a accident that can be triggered by impaired vision. Such a basic maintenance practice can make all the difference between a safe situation and a risky situation while driving.
A Sooner Than Later Experience
Driving can be fun; a cloudy windshield is that distracting and obnoxious. Clear glass enables a better comfortable atmosphere within your car, contributing to the whole driving experience.
Tools and Materials Needed
Prior to heading into the cleaning process, identify the tools and materials to be utilized to make the process efficient and productive.

Essential Cleaning Supplies
Essential Cleaning Supplies
Glass cleaner: The highest quality glass cleaner made by automaker will not contain any ammonia to prevent burning or marring any tint or film found on your windows
Microfiber cloths: Very effective to clean glasses with without any lint being left or any scratch on the surface area
Squeegee: A tiny squeegee is extremely useful to get rid of too much cleaner and avoid streaks
Water: Regular water should be fine for diluted cleaning
Cotton swaps or foam applicators: These are convenient in terms of corner and edge tight spots
Alternative Tools
Vacuum cleaner: To be utilized to clean dirt and dust on the dashboard and elsewhere before cleaning the glass
Detailing brush: It is used to loosen up the grime out of those hard times by the windshield
Step-by-Step Instructions to Cleaning Your Windshield
So, if your equipment is in preparation to be used, we can now go through a step-by-step procedure of properly cleaning the inside of a windshield.
Step 1: Accommodate Your Car
One of the ways to begin with is to park the car into a shadowy spot such that the cleaner will not dry too soon and, in the process, create many streaks all over the car body. Wash the inside such that you can access the windshield with ease.
Step 2: Dusting and Vacuuming
Dust the dashboard’s face and broom the areas adjacent to its edges, such as the windshield frame, so that dirt will not scratch the glass while wiping.
Step 3: Mop with the Glass Cleaner
Soak the favorite glass cleaner within a microfiber cloth without having to wet it against the windshield. It will further reduce sprinkling other car internal surfaces aside from the dashboard and help make the sprinkling process hence performed to be within control.
Step 4: Mopping in Circulating Motions
Next, with the microfiber cloth that you have rinsed lightly, remove the windshield with a circular motion. Start with one corner and move across, buffing from side to side so that each area of the glass is cleaned. Even pressure is necessary to prevent streaking.
Step 5: Squee
To make this a bit clearer, go to the squeegee on the wipedown. Straight strokes down the windshield from the top. Go through a clean piece of cloth with the blade after each pass to get the cleaner and the dirt that has adhered to the blade off.
Step 6: Sharpening Edges and Corners
For the remotest edges, you will have some foam applicators or cotton swabs with the glass cleaner. This ensures areas that don’t appear to be serviced by cleaning companies remain kept very clean.
Step 7: Final Inspection
Once you have washed the whole area, go over your handiwork again observing particularly where streaks or even possibly skipped areas may exist and then just stroke those areas with a gentle hand.

Ways of Ensuring the Windshield Stays Clean
To keep your windshield looking pristine between cleanings, consider these helpful tips:
Regular Maintenance
Be sure to rinse your windshield frequently times a day or as soon as you notice the windshield getting dusty. Care and maintenance will additionally make each cleaning process smooth, swift, and fruitful.
Do Not Eat Within Your Car
The car particles hold deposits of petroleum that can stick your car screen and make it all greasy. In terms of eating, it is good to avoid eating within your car because this can cause splashing.
Use Sunshades
A case of basic car accessories is sunshades while parking to reduce the impacts of dust on the internal components such as the dashboard and the impacts of direct sunlight on the internal components such as dashboard discoloration and dirt buildup.

A Clear Image of Every Voyage
Cleaning the inner part of your windshield is among the most basic car maintenance functions that cannot be neglected. Improved visibility translates into greater safety and comfort during driving. Through this detailed walkthrough, coupled with proper utilization of tools and methods, you will be able to maintain your windshield clean and properly set up for each trip.
Be proud of keeping your car—what is after all not solely transporting oneself here and there but enjoying each mile of the way.
All-in-One Cleaning Guide for a Fresher, More Comfortable Home
Step-by-Step Tips to Clean, Organize, and Maintain Every Part of Your Space
Best Way To Clean Gold Earrings
Best Way To Clean MacBook Screen
Best Way To Clean Vinyl Records
Can Washing Machines Be Stopped Mid-Cycle
Can You Wash Dry Clean Only Curtains
Cleaning Comfort Room Safety Precautions To Be Observed
Cleaning Pet Urine From Carpet
Cleaning Stainless Steel Fridge
How Technology Is Remodeling The Cleaning Industry
How To Get Rid Of Cigarette Smell In Car
How To Get Self Tanner Out Of Carpets
How To Make Your House Smell Like Laundry Detergent
How To Prepare Your Home For A Deep Cleaning Service
How To Prevent Allergies With Cleaning
How To Remove Carpets DIY Guide
How To Replace Carpets By Yourself
Magic Eraser To Spot Cleaning Walls
Open Windows To Deodorize Home
Removing Bleach Smell From House

Designing Your Ideal Cleaning Schedule A Customized Approach For Every Lifestyle
Creating a customized cleaning schedule can transform the overwhelming task of maintaining a clean home into a manageable and stress-free routine. By assessing your specific cleaning needs, such as the size of your home and the number of occupants, you can tailor a schedule that fits your lifestyle.
How To Make A Cleaning Schedule That Actually Works For You
Create A Personal Cleaning Schedule
Maintaining a clean home can be challenging given our hectic schedules, and it might seem overwhelming. But the task becomes much easier after you have figured out a cleaning routine that suits you. In order to assist you make cleaning less daunting and unpleasant, this blog will guide you through the process of creating a customized cleaning schedule that fits your lifestyle.

Assess Your Cleaning Needs
Before you make a cleaning schedule, you need to analyze your cleaning requirements. Consider the following:
Size of Your Home: Larger homes may require more time and effort to clean than smaller apartments.
Number of Occupants: More people in the house mean more mess, so adjust your estimate accordingly.
Pets: If you have pets, add in extra cleaning for pet hair and their accidents.
Personal Preferences: Identify areas that bother you the most when they are dirty. This will help you prioritize tasks.
Establish Daily Cleaning Tasks
Keeping your home at least somewhat tidy requires these everyday cleaning chores. The following are some things you could do daily:
Make Your Bed: Making your bed at the start of the day gives a positive start to the day.
Wipe down surfaces: Quick wipe of the kitchen counters and bathroom sinks, to prevent buildups.
Do a load of laundry: A little each day will help avoid huge piles of it.
Clean living rooms or entryways: pick up clutter, 10-15 minutes.

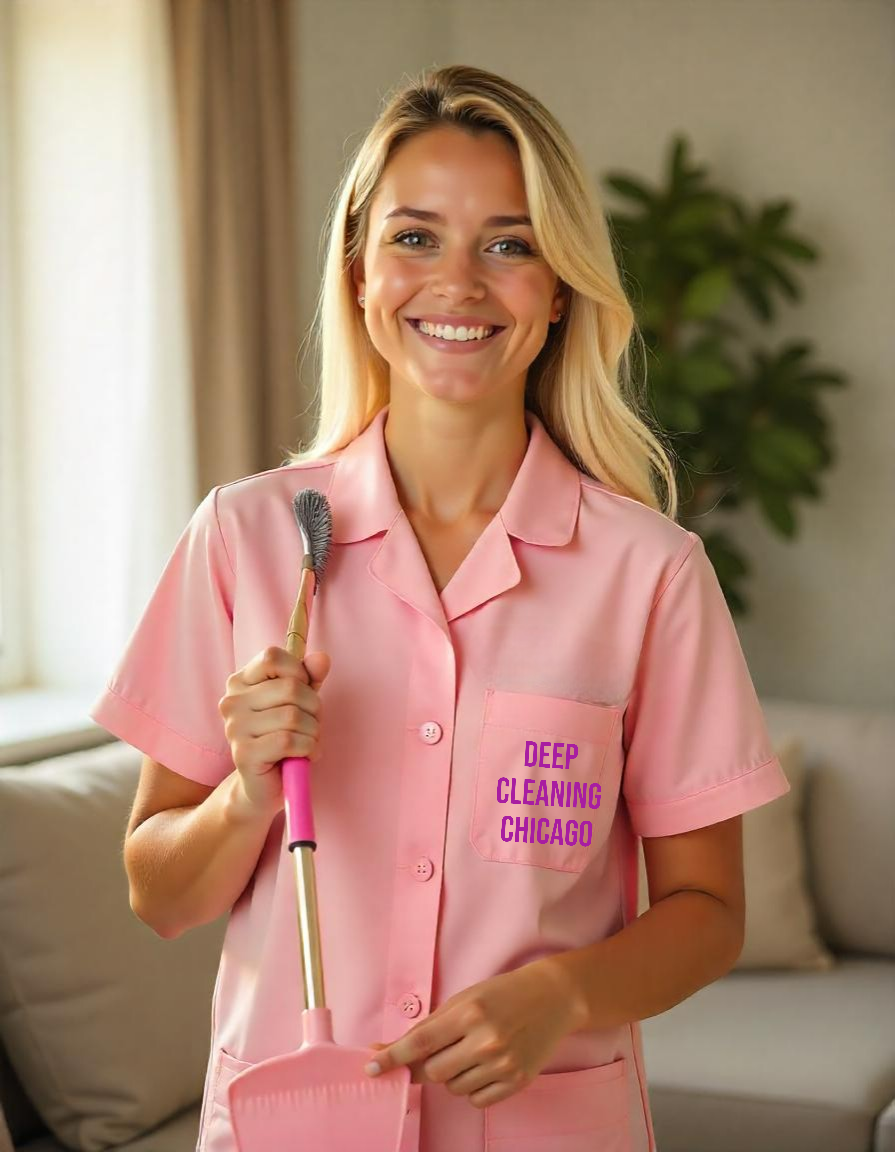
Deep Cleaning Chicago-Weekly Schedule
How to Create a Weekly Cleaning Schedule
After you have established your daily tasks, the next step will be to make a weekly cleaning schedule. Give specific days to different cleaning tasks to have every part of your house cleaned. Here is an example of a weekly cleaning schedule:
Monday: Clean bathrooms (toilets, sinks, mirrors).
Tuesday: Dust surfaces (furniture, shelves, baseboards).
Wednesday: Vacuum carpets and rugs.
Thursday: Mop hard floors (kitchen, dining area).
Friday: Focus on the kitchen (wipe down appliances, clean out the fridge).
Saturday: Change bed linens and do laundry.
Sunday: Catch-up day for any missed tasks or organized clutter.
This structured approach ensures you do not neglect any area but are focusing on one thing at a time.
Include Monthly Deep Cleaning Activities
The monthly deep clean, which is necessary to keep a home healthy, would arrive along with all the daily and weekly chores. Although the procedures involved may seem time-consuming, they are important for maintaining hygiene and minimizing dirt buildup. Make the following additions to your monthly calendar:
Clean windows and mirrors.
Dust ceiling fans and light fixtures.
Deep cleaning of carpets/rugs.
Make sure the pantry and kitchen cabinets are clean. Along with the extra benefit of keeping your house in excellent condition, you won't feel overburdened when these bigger jobs are divided up into smaller, monthly objectives.

Use Tools and Resources
The following are some of the tools and resources you could try to find, which help in making cleaning both effective and efficient:
Cleaning Lists: Complete lists of things to be done daily, weekly, and monthly to maintain records.
Timers: The setting of the timer for about 15-30 minutes keeps an individual focused on only what he is working on, excluding all kinds of distractions.
Cleaning supplies caddy: This is a convenient area where all cleaning supplies would be stored for easy access as needed.
Apps or Planners: Allow you to highlight in computer applications or planners where, when, and what cleaning needs to be done, and/or allow you to set your reminders.
Involve Your Family
Cleaning doesn't have to be done alone. The procedure will go more quickly and be less irritating if more individuals are helping to clean. Here's how to involve the whole family in cleaning up:
Chore Assignments: Household chores should be assigned to the family members based on ability and schedules
Chore Chart: A chore chart ensures responsibility for all in things assigned to them
Make It Fun: The experience can be made more pleasurable by playing music or turning cleaning into a game.

The cleaning schedule needs to be flexible.
Be Flexible and Adapt Life is unpredictable, and so should your cleaning schedule be flexible. And if one day something catcher catches you up and won't let you finish some task on this or another day, well, just rearranging your schedule matters is not perfection but consistency: even missing for a few days, but then just getting back is what matters.
A Personal Touch on Home Maintenance
The easiest method to maintain a clean and orderly home without feeling overburdened is to establish a cleaning routine that suits your needs. You may develop a customized cleaning schedule that will easily fit into your lifestyle by evaluating your needs, establishing daily routines, adding weekly activities, adding monthly thorough cleans, employing useful tools, enrolling the family, and being flexible.
Everything You Need to Know About Cleaning and Home Care
From Quick Daily Fixes to Full Deep Clean Guides, All in One Place
House Cleaning Made Simple With These Must-Know Tips
The Smart Way to Deep Clean Your Home and Save Money
How to Deep Clean Your Home One Room at a Time
New Year’s Eve Cleaning Superstitions and Facts
Street Cleaning Efforts That Make a Big Impact
Simple Ways to Cleanse Negative Vibes From Your Space
The Truth Behind the Egg Ritual for Aura Cleansing
Cleaning Routines Designed for Your Busy Life
Can Rain Really Help Clean City Streets
How an Egg Cleanse May Affect You Spiritually and Physically
Time-Saving House Cleaning Tips That Actually Work
Daily Cleaning Habits That Keep Your Home Looking Great
Why Cleaning Your Home May Help You Sleep Better
The Mental Health Benefits of a Clean and Clutter-Free Space
How Quezon City Measures Up in Cleanliness
Is the Philippines Taking Steps Toward a Cleaner Future
How to Maintain a Clean Home Without Harsh Chemicals
Keep Your Home Sparkling All Year With These Simple Tricks
What’s the Difference Between Spring Cleaning and Deep Cleaning
The Benefits of Regular Strata Cleaning for Property Management
Why Disinfecting High-Touch Surfaces Is Key to a Healthy Home
How Deep Cleaning Improves Your Health and Home Environment
The Link Between Deep Cleaning and Fewer Allergy Symptoms
Why Cleaning Can Help You Feel Calmer and Happier
The Best Way to Keep Your Home Clean Week After Week
Everything You Need to Know About Spring Cleaning

How Doing Household Chores Can Improve Sleep Quality
Household tasks can enhance your sleep quality. Activities such as mopping, doing the dishes, vacuuming, and tidying up the house reduce the urge to toss and turn in bed, as they expend physical energy and create a natural inclination for rest. The other factor is that if the house is tidy and structured, it will make it easier to fall asleep. Other household activities, such as dishwashing and floor carpet cleaning, are however repetitive and tend to be stress relievers that can put you at ease. Household chores, which are daily activities of most people, can also be important in boosting self-esteem, improving overall mental wellness, and enabling people to fall asleep. You do not need to make drastic changes to change the situation; just do it step by step.
Find Out The Surprising Link Between A Tidy Home And Restful Nights
Household Chores For A Peaceful Night
Whatever the reasons, sleep becomes compromised in many instances because of the lifestyles that people have adopted. On the other hand, an individual's sleeping pattern can also be directly influenced by the environment within which the individual lives. The execution of simple household chores such as cleaning the house can contribute to good sleeping. The following details try to widen awareness of how these chores help in getting enough sleep and provide tips for carrying them out effectively.
The Relationship Between Household Chores And Sleep Quality
It is fair to say that most people do not know the connection between cleaning the house and improving the quality of sleep. However, there is compelling evidence showing that an increased level of order in the house improves one's well-being by helping avoid stressful situations hard to regulate and thus are best not to be created in the first place. A tidy house also promotes calmness, relaxation, and a peaceful sleep.
1. Reducing Stress And Anxiety
Among many other benefits that come tagged along with doing household chores precisely, stress and anxiety are well known. Usually, anxiety-provoking situations in a household start with something that can be overwhelming, like cluttered areas in the house. There is so much research that indicates that having a regular cleaning schedule reduces daily stress levels.
Practical Steps:
Establish a cleaning routine: Create a weekly plan for household chores. By splitting tasks, one can minimize the chances of a work overload and subsequently prevent dust accumulation.
Focus on one room at a time: Instead of cleaning the entire house in one day, focus on one room per day. This style reduces the dread of doing the chores and allows for a more thorough job.
Set timers: Setting a timer to keep track of how long the cleaning can last will help allocate a much shorter time (say 15 minutes–30 minutes) for cleaning. Thus, making it possible to complete this duty. This measure can make chores feel less of a responsibility and more of an achievable task.
2. Promoting Physical Activity
Household chores are ideal for physical activity, and it can be noted that physical activity improves the quality of sleep. Physical exercises regularly assist in better sleep cycles for the body by making it easier to fall asleep and remain asleep through the night. Slight activities such as vacuuming or gardening should count on any of the individual’s targets for physical exercises.
Practical Steps:
Incorporate movement into chores: Create a list of activities that will not only include chores such as sweeping, mopping, and tidying heavy things. These tasks serve a dual purpose of cleaning your house and incorporating workouts.
Make it enjoyable: Engage in your house chores while listening to music or podcasts. This approach can help you stay active and stimulated.
Track your activity: You may want to use fitness aids or applications that assist in tracking your physical activity around the house. Keeping track of progress sometimes pushes the individual to active movements.

Creating A Calming Environment
Clutter can create mental distractions, making your brain not shut off the thoughts and transition into rest. If you're in an environment where clutter is everywhere, it's tough to get your mind to turn off and transition into sleep. You'll be able to continuously create that atmosphere of rest with frequent decluttering.
1. Decluttering For Mental Clarity
Clutter can create mental distractions, making your brain not shut off the thoughts and transition into rest. If you're in an environment where clutter is everywhere, it's tough to get your mind to turn off and transition into sleep. You'll be able to continuously create that atmosphere of rest with frequent decluttering.
Practical Steps:
"One In, One Out" Reason: For every new thing taken into your home, try to remove the old one. Well, the practice is not to let the mess build up.
Create space: make sure everything in the house has a place. They will help keep things contained and also add to less visual clutter.
Schedule regular decluttering sessions: Allow yourself the time to go through all of your possessions and eliminate things that are not necessary or no longer serve you.
2. Establishing A Relaxing Pre-Sleep Routine
Evening household chores can be a good part of your bedtime ritual, so you associate them with bedtime. Having a routine before falling asleep helps regulate your body’s internal clock, which makes it easier to sleep.
Practical Steps:
Do a little cleaning: Add in some light cleaning jobs one hour before going to bed, such as sorting the sitting room or cleaning up the dishes. These little tasks will help change your mind from daytime business to nighttime relaxation.
Set a relaxing atmosphere: After working up a sweat cleaning, drop the lights and return a peaceful vibe to your cove with cozy lighting or relaxing aromas (lavender anyone?) filling your home.
Practice mindfulness when cleaning: Treat chores with mindfulness—instead of just doing chores as a regular task, focus all the energy on each task. It makes you relax and gets you ready to sleep well.

The Psychological Benefits Of Cleaning
Engaging in household chores has psychological benefits that go beyond just making the place tidy. The action of scrubbing or wiping can fuel the feeling of achievement as well as improve control over one’s surroundings.
1. Boosting Mood Through Accomplishment
Completing household chores brings the feeling of task completion, and this in turn is seen to help in improving mood and easing tension. When you complete the activities of cleaning or organizing an area, you might see the area in a better positive way, thus enhancing your mental health status.
Practical Steps:
Celebrate the small things: After helping with household chores, regardless of the size, look for a reason to reward yourself or someone who assisted you. The motivation helps in making individuals try to keep the house clean.
Set achievable goals: It is easier to work on a larger task once it is divided into smaller units to complete each of them one at a time.
2. Creating A Sense Of Control
Cleanliness within the house promotes a sense of control and feelings of safety, which are very important for better mental health. During cleaning activities, always be mindful that the more you create the space, it allows calmness and good sleep.
Practical Steps:
Personalize your space: Make sure your space reflects your identity and tastes through decoration or organizing.
Consistency: A regular cleaning pattern helps you feel in control of your space.

Embrace The Benefits Of A Clean Home For Better Sleep
Household chores make a difference in hygiene, but also in sleep quality and overall health. Make these strategies part of your daily life to improve your sleep and mental health. Your mind and body will thank you for it.
Everything You Need to Know About Cleaning and Home Care
From Quick Daily Fixes to Full Deep Clean Guides, All in One Place
House Cleaning Made Simple With These Must-Know Tips
The Smart Way to Deep Clean Your Home and Save Money
How to Deep Clean Your Home One Room at a Time
New Year’s Eve Cleaning Superstitions and Facts
Street Cleaning Efforts That Make a Big Impact
Simple Ways to Cleanse Negative Vibes From Your Space
The Truth Behind the Egg Ritual for Aura Cleansing
Cleaning Routines Designed for Your Busy Life
Can Rain Really Help Clean City Streets
How an Egg Cleanse May Affect You Spiritually and Physically
Time-Saving House Cleaning Tips That Actually Work
Daily Cleaning Habits That Keep Your Home Looking Great
Why Cleaning Your Home May Help You Sleep Better
The Mental Health Benefits of a Clean and Clutter-Free Space
How Quezon City Measures Up in Cleanliness
Is the Philippines Taking Steps Toward a Cleaner Future
How to Maintain a Clean Home Without Harsh Chemicals
Keep Your Home Sparkling All Year With These Simple Tricks
What’s the Difference Between Spring Cleaning and Deep Cleaning
The Benefits of Regular Strata Cleaning for Property Management
Why Disinfecting High-Touch Surfaces Is Key to a Healthy Home
How Deep Cleaning Improves Your Health and Home Environment
The Link Between Deep Cleaning and Fewer Allergy Symptoms
Why Cleaning Can Help You Feel Calmer and Happier
The Best Way to Keep Your Home Clean Week After Week
Everything You Need to Know About Spring Cleaning
A Budget-Friendly Guide To Deep Cleaning Your Home
Deep cleaning one's house does not have to be expensive. Look around your house for items that have been in your possession already for a long time and yet are useful in cleaning, such as vinegar, baking soda, and dish soap, to use when trying to get rid of various stains and grime, especially in high-traffic parts of the house. Cleaning should focus on the floor, bathroom, and kitchen but ideally one area at a time to minimize effort and optimize resources. Use your rags from old clothes you no longer wear or put into other uses and homemade cleaning solutions. Clean as you declutter for a fresher space with fewer allergens. Regular upkeep and simple techniques will keep your home sparkling without breaking the bank; yes, deep cleaning can be affordable and effective for anyone.
Improve Your Living Space Without Breaking The Bank
A Fresh Home On A Budget

Deep cleaning of the house is a comprehensive practice that is very necessary for a healthy and hospitable living environment. Many people, however, do not do it because they fear it may involve too many expenses for cleaners and hiring pros. It is quite possible to do a deep cleaning of your house without breaking the bank.
This guide will explain effective strategies, identify necessary supplies, and outline in detail step-by-step procedures to help individuals perform a deep clean economically.
Understanding Deep Cleaning
Before you embark on this deep cleaning adventure, it is important to define what deep cleaning is all about. Deep cleaning is more than the usual cleaning, where one will clean the visible surfaces only; instead, it encompasses a thorough procedure that affects the hidden dirt and grease. Key areas to pay attention to include:
Accumulation of dust: This takes time, whereby it settles on the surface; an example would be on the shelf, baseboards, or ceiling fans.
Carpets and upholstery: Carry stains and allergens that are impossible to get rid of with a basic vacuum.
Kitchen appliances: Grease and food particles accumulate in unreachable areas.
Bathrooms: Mold and mildew are prone to developing in these wet areas if they are not cleaned regularly.
A deep cleaning not only keeps your home looking fantastic but also improves air quality for better living.
Essential Supplies For Budget-Friendly Cleaning
While undertaking heavy cleaning of the home, there are a few supplies that you would need to lower costs. Most likely, many good cleaners can be prepared from simple kitchen materials. Below is the general summary of the materials needed.

Basic Cleaning Supplies
All-purpose cleaner: A solution of white vinegar and water in equal parts is effective for cleaning the majority of surfaces and is extremely economical.
Baking soda: A natural, mild scrub that helps in scrubbing the surfaces to eliminate pet stains while deodorizing.
Microfiber cloths: These are good for dusting and cleaning marks from most surfaces, like plastic, without scratching them.
Bucket and mops: Prepare mops in lukewarm, soapy water and mop floors with them.
A toothbrush or small brush: This makes it easy to clean grout seams or small areas.
Rubber gloves: These will prevent the possible soreness that contact with cleaning agents.
Vacuum cleaning: Consider borrowing one from a friend or renting such equipment for that day if you don't own one.
Optional Supplies
Essential oils: For scent and possible anti-bacterial action.
Steam cleaner: Are high-efficient machines when used on upholstery and carpets, but be careful while borrowing or renting such equipment.
Step-by-Step Deep Cleaning Your House
Now that your supplies are in place, let us go to the practical part of the step-by-step process on how to clean your house quickly, efficiently, and cost-effectively.
1. Create A Cleaning Schedule
To clean, you need to make a schedule that divides the areas while cleaning so that it does not become a mess. In this way, you can get things in order. This way, you'll be sure not to forget anything. For example:
Day 1: Living Room and Furniture.
Day 2: The kitchen and its sections.
Day 3: Bathrooms—walls and floors.
Day 4: Bedrooms and wardrobes.
Day 5: Hallways and Entryways

2. Put Everything Back Where It Belongs First
This means that when in a room, you sort out by first removing everything there that shouldn't be around. Take away personal items on display and remove the lots of unnecessary objects. Which is important, it makes clearing faster and easier. Sometimes take out containers or boxes of thing belonging to some other place-in other words, you'll give them a home later.
3. Dust Carefully
Dust from top to bottom using microfiber cloths: light fixtures and ceiling fans, then shelves and furniture, finishing with baseboards. Don't forget the electronics, but make sure to wipe them dry.
4. Clean Windows And Mirrors
You can also use your all-purpose cleaner or mixture to wipe down glass windows and mirrors. To make no streaks, then be sure to use a squeegee, as that really makes your window sparkle. For extra sparkle on finishing up cleaning, substitute with crumpled newspaper against using paper towels to clean around the area.
5. Clean And Polish All Floors
Sweep and mop the hard floors with warm, soapy water or an appropriate floor cleaner for your type of flooring. Do remember to vacuum carpets well and, if possible, steam clean them or shampoo them if such services are available to you.
6. Save The Kitchen For The Last
Clean the fridge on the inside and outside, and wipe the microwave, the oven, and the dishwasher. Tough stains on the countertops can be scrubbed off using a baking soda paste (baking soda and water mixture).
7. Cleaning And Sanitizing All Bathrooms
When you go to the bathrooms, sinks, toilets, showers, and baths, you always want to do a proper job of disinfection using your general-purpose cleaner. Yes, grout is a different story, but baking soda is magic; when used, the stuff should be applied with a toothbrush. This means that if scrubbing the toilet, put the cleaner in, let it sit for several minutes before getting out the brush, and begin pushing it around.
8. Organize As You Go
For every room that you clean, make sure you do not leave items all over the floor and try to return them to orderly positions. Don’t forget to get rid of items that are out of use or are no longer required to minimize the bulk.
Maintaining Your Clean Home On A Budget
Once you have finished cleaning, maintaining it will save you from future overwhelming tasks:
Create A Routine
Create a weekly cleaning schedule for lighter cleaning tasks, like dusting and vacuuming, which will keep the dirt down between deep cleans.between deep cleans.
Natural Cleaners
Continue the regular upkeep with budget-friendly natural cleaners like vinegar and baking soda; they work fine on most surfaces.
Involve Family Members
As you share space with your other family members, explain to them the need to clean the house by allocating each member of the family responsibility or a section of the house. This will not only reduce the burden but will also enhance cooperation in ensuring that your house remains clean.

Embrace A Clean, Affordable Home.
Achieving a deep clean of your house on a lower budget is not impossible if preparation and some creativity are involved. Items that are cheap to buy, a plan that has been prepared to enhance order, and procedures that are to be followed in that order will enable you to achieve this clean and orderly house at a low cost. Remember that cleanliness does not happen overnight; it is a habit that can be achieved with ease once simple practices become part of your daily routine.
Once the suggestions above have been adhered to, you will have cut some costs and at the same time, ensure that a better setting is created for you and your family members.
Everything You Need to Know About Cleaning and Home Care
From Quick Daily Fixes to Full Deep Clean Guides, All in One Place
House Cleaning Made Simple With These Must-Know Tips
The Smart Way to Deep Clean Your Home and Save Money
How to Deep Clean Your Home One Room at a Time
New Year’s Eve Cleaning Superstitions and Facts
Street Cleaning Efforts That Make a Big Impact
Simple Ways to Cleanse Negative Vibes From Your Space
The Truth Behind the Egg Ritual for Aura Cleansing
Cleaning Routines Designed for Your Busy Life
Can Rain Really Help Clean City Streets
How an Egg Cleanse May Affect You Spiritually and Physically
Time-Saving House Cleaning Tips That Actually Work
Daily Cleaning Habits That Keep Your Home Looking Great
Why Cleaning Your Home May Help You Sleep Better
The Mental Health Benefits of a Clean and Clutter-Free Space
How Quezon City Measures Up in Cleanliness
Is the Philippines Taking Steps Toward a Cleaner Future
How to Maintain a Clean Home Without Harsh Chemicals
Keep Your Home Sparkling All Year With These Simple Tricks
What’s the Difference Between Spring Cleaning and Deep Cleaning
The Benefits of Regular Strata Cleaning for Property Management
Why Disinfecting High-Touch Surfaces Is Key to a Healthy Home
How Deep Cleaning Improves Your Health and Home Environment
The Link Between Deep Cleaning and Fewer Allergy Symptoms
Why Cleaning Can Help You Feel Calmer and Happier
The Best Way to Keep Your Home Clean Week After Week
Everything You Need to Know About Spring Cleaning

Making Every Season Sparkle With A Home Always Fresh And Cozy
Keeping your home fresh and cozy throughout the seasons makes requires effort. Each season provides an opportunity to refresh your space. Cleaning becomes less of an obligation and more of an opportunity for renewal, given that spring brings deep cleaning and preparation for warmer days, summer involves only quick touch-ups, fall organizations for winter comfort, and wintertime focus on creating a warm home.
Your Seasonal Guide To Keeping A Clean And Inviting Home All Year
Enjoy A Clean And Cozy Atmosphere Throughout The Year
Cleaning and caring for a warm home is many times never really work at all. As the seasons transition, there are always new opportunities to renew your space and adjust the cleanup accordingly based upon external and life environments. You’re in control of your home’s organization through warm inviting capacity and coziness all year long. Let’s now venture deeper into why rewarding cleanup can be so effortlessly completed with these seasons’ ideas.
Spring Cleaning Prepares You For A New Beginning
Spring is all about new beginnings, and it is the best time to revive your home. After months of cold weather, a deep spring clean enables you to shake out winter’s grime and mess and get your space ready for brighter, sunnier days.
Declutter To Breathe Easier
It is high time to sort through those storage rooms and drawers you shied away from for years. Classify all things: those you’d like to retain in life, to give away, or to throw away. The mess is managed with sorting using the three-box system — box to donate items, another to throw away trash, and another to relocate items. The process of disposing of mess is going to bring functionality to your residence, but it provides you with that internal feeling of fulfillment.
Deep Cleaning Brings a Fresh Start
Spring is when you work through areas you most likely neglected during winter months. Clean all your windows inside and out to have light streaming through and lighting up your space. Dust your light fixtures and ceiling fans to get them ready for warm months. Be sure to deep clean all of your kitchen appliances: ovens, fridges, and so on. These little tasks will cumulatively make a huge difference to how new your home smells and looks.
Regular Maintenance Keeps Everything Running Efficiently
Spring isn’t just about spring cleaning but about preparing for the upcoming year as well. Be sure to take a peek at your air filters and see if there is any winter damage and get out and clean out your outdoors. Those little maintenance things now are going to save you a world of hassles later.
Summer Cleaning Chills Out and Keeps You Organized
Summer brings with it an air of carefree abandon, but with it come some added challenges: increased dirtiness, humidity, and active lifestyles. With fast, handy solutions, however, you can keep your house nice and tidy while never missing out on sun fun.
Keep Outdoor Areas Tidy
More time outdoors can quickly translate to dirt and debris inside. Regularly sweep patios, decks, and doorways to reduce messes. Power wash patio furniture to get rid of pollen and dirt so your space is clean and ready for entertaining.
Keep Fresh Air Indoors
Humidity makes the air in your house feel stale. Switch out or change out your air conditioning filters so they’re working properly. Open windows and run fans when it’s colder outside to keep humidity to a minimum. Being comfortable is worth you doing a bit of work for.
Speed Cleaning Tips Save Time
Summer and crazy schedules go hand in hand, so stick to basics when you’re cleaning. Keep some simple items like spray or wipes near heavy traffic points to allow for fast touch-ups and save time and prevent messes from piling up and drawing time away from enjoying the season.

Fall Cleaning Prepares Your Home For Coziness
The autumn is the perfect time to prep your house for those months ahead of chilly weather to set in so you can get all sorted out, rid of junk and some heavy-duty cleaning off your to-do list before winter starts to settle in.
Revitalize Your Wardrobe and Simplify
Switch summer clothes for thicker ones when temperatures fall. This is a wonderful opportunity to organize your clothes and to give away all those clothes you haven’t worn yet. The earlier you organize your clothes, the less bother when the chill starts to spread.
Improve Indoor Air Quality
Close windows when heaters are blowing and fresh air is at its highest priority. Dust to minimize allergens by half, vacuum out the carpets, and clean out your house vents for extra circulation inside the house. This is a great time of year to pull out your air purifier if you have one.
Deep Cleaning Gets You Winter-Ready
Make the most of the season to carry out bigger jobs of cleaning: steam-clean rugs, wash windows to bring in extra light, and organize storage areas. Planning ahead will save you angst and work when winter sets in.

Winter Cleaning Keeps Things Cozy And Comfortable
When it’s cold outside, it’s warm inside at home. Since you’ll spend a majority of time inside during winter months, everything has to be sparkling clean, tidy, and warm. Daily maintenance and occasional chores during the season help you maintain a warm sanctuary all through winter.
Keep With Entryways
Snow, dirt, and sleet can turn your front door area into a mess quickly. Catch dirt with mats and boot trays; wash often. It is one of those little habits that will save your floors and make cleanup a little bit easier.
Prepare For Holiday Guests
The holidays are about decorating, entertaining, and visits with loved ones. Before you ever open up decorations, first make room for festive flairs with decluttering. Open guest rooms to visitors with fresh bedding and a touch of extra TLC; these little touches will set exactly the right mood.
Clean Up After The Party
Once the celebration is over, take time to properly stow decorations for another year. As you stow them, identify things being utilized and get rid of things unwanted anymore. Starting a new year with a clean home is really a nice break.
Make It a Priority to Work in Some Seasonally Based Cleaning
Having cleaned with and by season, you find being in charge and managing and running the home makes you feel revived and open all year long. The seasons will bring you opportunity to take added precautions with some work at bay, whether it being doing a full de-cluttering during spring or doing a personal touch-over during this wintery season. Spring is a fresh start; summer is to keep things light and doable; fall is when you want to prepare; winter is a cozy retreat.
The feeling of cleaning would never become overwhelming but ever a normal part of life’s ebbs and flows as you adjust yourself to those ebbs and flows. And by doing it consistently and bit by bit all year long, you’ll have a home ever ready for whatever comes its way with any change of seasons.

Everything You Need to Know About Cleaning and Home Care
From Quick Daily Fixes to Full Deep Clean Guides, All in One Place
House Cleaning Made Simple With These Must-Know Tips
The Smart Way to Deep Clean Your Home and Save Money
How to Deep Clean Your Home One Room at a Time
New Year’s Eve Cleaning Superstitions and Facts
Street Cleaning Efforts That Make a Big Impact
Simple Ways to Cleanse Negative Vibes From Your Space
The Truth Behind the Egg Ritual for Aura Cleansing
Cleaning Routines Designed for Your Busy Life
Can Rain Really Help Clean City Streets
How an Egg Cleanse May Affect You Spiritually and Physically
Time-Saving House Cleaning Tips That Actually Work
Daily Cleaning Habits That Keep Your Home Looking Great
Why Cleaning Your Home May Help You Sleep Better
The Mental Health Benefits of a Clean and Clutter-Free Space
How Quezon City Measures Up in Cleanliness
Is the Philippines Taking Steps Toward a Cleaner Future
How to Maintain a Clean Home Without Harsh Chemicals
Keep Your Home Sparkling All Year With These Simple Tricks
What’s the Difference Between Spring Cleaning and Deep Cleaning
The Benefits of Regular Strata Cleaning for Property Management
Why Disinfecting High-Touch Surfaces Is Key to a Healthy Home
How Deep Cleaning Improves Your Health and Home Environment
The Link Between Deep Cleaning and Fewer Allergy Symptoms
Why Cleaning Can Help You Feel Calmer and Happier
The Best Way to Keep Your Home Clean Week After Week
Everything You Need to Know About Spring Cleaning

The Profound Connection Between Regular Cleaning And Mental Well Being
Maintaining a clean and organized home is not just about aesthetics; it plays a crucial role in enhancing mental well-being. In today’s fast-paced world, where stress and anxiety are prevalent, the act of cleaning can provide significant psychological benefits. Studies have shown that regular cleaning can lead to reduced stress levels, improved focus, and an overall boost in mood.
Why Regular Cleaning Is Essential For Your Well Being?
Mental Health Benefits Of Regular Cleaning
Daily cleaning is much more important than meeting your aesthetical requirements; in fact, it is very important in terms of physical and mental health. This article is meant to shed light on many facets with regard to frequent cleaning as a tool of attaining and building a healthier living. It is often depicted as a dull chore work. In reality, it is much more valuable rather than an appealing outlook. The best ways of improving physical and mental wellness have embraced daily cleaning. The cleanliness of homes is one of the predicators of the whole of wellness including physical and mental sharpness. Daily cleaning actually makes a very large impact on the nature of our lives.

The Correlation Between Hygiene and Mental Wellness
A house that is clean will enable one to be on top of things and will decrease one’s amount of stress. A dirty room, on the other hand, sets the stage for disorder and distress. Actually, scientists prove as much: since clean rooms have less of the stress hormone called cortisol, you will definitely be less tense if it is clean.
Managing Stress and Anxiety
It is hard to concentrate on anything or even relax with a messy surroundings. Cleaning and organizing are tangible ways of scrubbing out your mental and physical space of the messes, reducing the feeling of pressure in the process. Cleaning enables an emotional discharge of reward and accomplishment where a person feels able to be in command of things in their presence.
Promoting a Feeling of Control
It is very, very therapeutic and may cause much-needed feelings of being in control of an out-of-control or chaotic circumstance by taking control back over one’s existence and creating order in it. It incorporates stability as well as self-strength feelings into the person. A certain measure of control is a part of a very significant aspect of good psychology as the levels of stressful emotions are sure going to be higher. It incorporates order into your life with an environment that is going to be one that is a pathway to higher focus and productivity.
Cleaning for Mindfulness
It is also feasible for cleaning to be mindful in and of itself. Instruction on one to simply be in the immediate moments while dusting or sweeping the floor lessens rigid thought and induces relaxation. Apart from an anxiolytic effect, such specifics that are positive for our wellbeing are concerning the philosophy of mindfulness beneath it. While one is preoccupied with such matters, increasingly one is more conscious of the world that is present and unwinds over time in your head.
Mood and Productivity Enhancement
Cleaning, as opposed to other things, lifts your spirits up and gains a positive stimulus for work. Various researchers have observed that individuals have been seen with increased motivation and better creative insights in clean and neat rooms. With cleaning, you are therefore able to gain an energy-rich impulse for productivity since multiple actions involve solving problems and doing small jobs. Keeping the environment clean will do no other thing apart from preparing the atmosphere equally for working into your goals.

Creation of a Healthy Indoor Environment
Smoggier Skies
Good indoor air quality is attained with a clean home. Allergens like dust, pet dander, and mold spores accrete over time and have a highly negative impact on respiratory illness. Responsible cleaning behaviors such as dusting and vacuuming enable elimination of those noxious particles, so the air you breathe is fresher and healthier. It is particularly true for asthma and allergic patients, where symptoms are relieved and quality of life is improved with simply having a clean house.
Germs and Illness Decrease
Preventing the spread of germs and infection is achieved through cleaning. Those high-touch points that constitute doorknobs, light switches, and countertops contain pathogens that cause such infections. You will prevent the chances of illness in the house if you subject those areas to the habit of disinfecting on a regular basis. A hygienic house ensures the family members and house guests get good health.
Reducing Stress and Anxiety
Mental Health Impact
There is an inherent relationship between mental health and a clean home. A dirty and untidy home is able to trigger the arousal of the stress and anxiety response, and it is hard for anyone to relax. An orderly home encourages a sense of tranquility and neatness. House-cleaning is a therapeutic exercise; it induces a sense of control over the immediate field.
Improved Mood and Productivity
A clean environment makes a huge difference for the majority of people in mood and level of productivity. It is testified that people who work in clean sites work with much higher motivation and creativity. So, regular cleaning supports mental health in conditions that are extremely positive for focus and productivity in any human activity.

Physical Health Development
Exercise
It is a light exercise, in any event. Just as vacuuming, sweeping, and mopping exercise other muscle units. Dust headstands of beds, dressers, headboards, and other ornamental pieces or picture frames.
Improved Immune System
A clean environment might bolster you against sickness. Since the body is never bombarded with illness-causing germs, it might develop immunity against sicknesses in such a manner that you become resistant.
Practical Advice for Keeping a Spotless Home
These are some methods that might be useful in arriving at the mental health benefit associated with hygiene:
Schedule a cleaning.
Routine cleaning will prevent mess accumulation.
Divide large jobs into smaller ones.
Achievable goals that are achieved daily or weekly.

The Transformative Power of Routine Cleaning for Your Well-being
It doesn’t stop with a clean home; regular cleaning is a component of total health and wellness. A hygienic environment is good tremendously for physical health by lessening allergens, staving off illness, and enhancing indoor air quality.
Everything You Need to Know About Cleaning and Home Care
From Quick Daily Fixes to Full Deep Clean Guides, All in One Place
House Cleaning Made Simple With These Must-Know Tips
The Smart Way to Deep Clean Your Home and Save Money
How to Deep Clean Your Home One Room at a Time
New Year’s Eve Cleaning Superstitions and Facts
Street Cleaning Efforts That Make a Big Impact
Simple Ways to Cleanse Negative Vibes From Your Space
The Truth Behind the Egg Ritual for Aura Cleansing
Cleaning Routines Designed for Your Busy Life
Can Rain Really Help Clean City Streets
How an Egg Cleanse May Affect You Spiritually and Physically
Time-Saving House Cleaning Tips That Actually Work
Daily Cleaning Habits That Keep Your Home Looking Great
Why Cleaning Your Home May Help You Sleep Better
The Mental Health Benefits of a Clean and Clutter-Free Space
How Quezon City Measures Up in Cleanliness
Is the Philippines Taking Steps Toward a Cleaner Future
How to Maintain a Clean Home Without Harsh Chemicals
Keep Your Home Sparkling All Year With These Simple Tricks
What’s the Difference Between Spring Cleaning and Deep Cleaning
The Benefits of Regular Strata Cleaning for Property Management
Why Disinfecting High-Touch Surfaces Is Key to a Healthy Home
How Deep Cleaning Improves Your Health and Home Environment
The Link Between Deep Cleaning and Fewer Allergy Symptoms
Why Cleaning Can Help You Feel Calmer and Happier
The Best Way to Keep Your Home Clean Week After Week
Everything You Need to Know About Spring Cleaning

How Does A Simple Cleaning Routine Keep Your Home Sparkling?
A cleaning schedule makes the otherwise daunting task of keeping the home fresh and in order an easy, no-stress event. You will have your tasks divided into smaller segments of daily, weekly, and monthly tasks, saving time and effort while keeping things organized. Learn how to devise a plan that keeps your living space tidy, reduces your stress, and meets your lifestyle. Make small steps toward a clean, welcoming home for you and your family.
Achieve A Fresh And Tidy Home With An Easy-To-Follow Cleaning Plan
Your Guide To Keeping A Clean And Organized Home Every Day
Keeping your home clean and organized does not have to feel like an overwhelming chore. As a matter of fact, with one well-organized cleaning schedule, a tidy and healthy home can easily become a piece of cake and a stress-free routine. Such a well-structured cleaning plan would mean not only more welcoming spaces but also a much healthier environment for you and your family.

What Is A Cleaning Schedule And Why Do You Need One?
A cleaning schedule is a plan that assists you in dividing up your cleaning work into daily, weekly, and monthly manageable portions. Instead of being overwhelmed with continuous chores, with a clear schedule one knows how to prioritize their tasks, be organized, and keep their house tidy without much hassle.
There are various reasons to commit to a cleaning schedule, and they all add up to one big thing: a cleaner, more organized home. Here is why you would want to consider it:
Reduces Stress: With a set routine, cleaning becomes predictable, and you won't feel like you're playing catch-up every time you walk into a room.
Saves Time: By spreading the cleaning tasks over days, weeks, and months, you avoid exhausting cleaning marathons. This helps in keeping your home looking nice while freeing up your time.
Encourages Uniformity: Regular cleaning ensures that dirt and clutter do not accumulate and makes it easier to maintain a tidy home.
How To Plan Your Perfect Cleaning Schedule
Creating a cleaning schedule does not have to be complicated; it starts with taking a closer look at your home. Here is a step-by-step guide to get you started.
Step 1: Take Stock Of Your Home
The first step toward the cleaning schedule is an assessment of your space. Consider the layout and size of your home, including areas that would require extra attention. High-traffic areas, like kitchens and living rooms, require daily care, while areas like guest rooms or storage rooms may only require occasional cleaning. Prioritize your tasks so you make sure to give attention to what needs it most.
Step 2: Break Tasks Down By Frequency
Now let's fill in some categories of tasks that might be more manageable: daily, weekly, and monthly.
Daily Cleaning Tasks: These are the meat and potatoes of a clean house; they keep your living space neat and organized with the least effort.
Making Your Bed: It is the easiest way to make your bedroom feel more organized instantly.
Do The Dishes: Try not to let dishes pile up high so kitchens are chaos-free.
Clean The Kitchen Countertops: A quick once-over ensures crumbs and spills are quickly erased.
Sweep Or Vacuum High-Traffic Areas: A few minutes of cleaning the busiest spots will keep dirt from spreading.
Take Out The Trash: Smaller bins emptied daily prevent odors from building up in your home.
Put Clutter Away: Take a few minutes each day to put things back in their place.

Weekly Cleaning Tasks: These are when it will go a bit deeper to keep your home fresh from top to bottom.
Dust Surfaces: Using a microfiber cloth dust shelves, furniture, and other electronic devices.
Vacuum Carpets And Rugs: This keeps your floor clean and maintains good air quality.
Mop The Hard Floors: Give your hard surfaces a good cleaning with an eco-friendly mop.
Clean Bathrooms: Scrub toilets, sinks, and showers to keep them shining.
Change Bed Linens: A fresh sheet is a comfortable sleeping environment.
Wipe Down Kitchen Appliances: Appliance exteriors, like your fridge and microwave, should be cleaned to avoid grime building up.
Monthly Cleaning Tasks: Involve areas that are not crucial, yet remain very important in putting your home at its best.
Deep Cleaning Of Kitchen Appliances: It includes cleaning inside the refrigerator, oven, and microwave for hygiene and efficiency.
Dust Blinds And Ceiling Fans: These are two more places that accumulate dust rather quickly, so don't forget to clean them once a month.
Wash The Windows: This allows natural light to flow inside and brighten your rooms.
Organize Closets: Go through your closets and donate clothes or things that are no longer serving a purpose.
Clean Light Fixtures And Baseboards: These small things make a big difference in giving your house a finished look.
Step 3: Make A Room-By-Room Checklist
Make a checklist for each room to ensure that you never miss a spot. It helps you keep track of where you've been and what you've done, so you don't miss anything.
Kitchen Checklist:
Clean countertops and backsplashes
Wipe down cabinet fronts
Clean the sink and faucet
Check for expired food in the fridge.
Mop the floor
Living Room Checklist:
Dust furniture and shelves
Vacuum under cushions and upholstery.
Wipe down electronics, including the TV and remotes.
Organize media centers or bookshelves.
Bathroom Checklist:
Scrub toilets, sinks, and tubs/showers
Clean mirrors and glass surfaces
Replace towels and washcloths
Mop the floors to remove grime.
Bedroom Checklist:
Make the bed each day
Dust nightstands and dressers
Vacuum or sweep underneath the bed
Organize the closet

Tips To Follow The Cleaning Schedule
It's easy to make a cleaning schedule, but the secret to follow-through for the long term is just that consistency. Following are some tips that will help you stay on track:
Set Reminders: Use phone alerts or a wall calendar to remind you when it’s time to clean. This ensures you won’t forget crucial tasks and can stay organized.
Involve Family Members: Assign specific tasks to them to share the load. This will make it even faster and add to shared responsibilities in the household.
Be Flexible: Life is unpredictable. One day, if you happen to miss doing something, don't stress. Just adjust your schedule to accommodate when you can.
Maintaining A Sparkling Home
With a decent cleaning schedule, your house can be spotless without all the work of investing hours into cleaning. A cleaning routine involving daily, weekly, and monthly tasks keeps everything in check while you never feel overwhelmed. Consistency is key, and if you make cleaning a manageable habit, then you can enjoy your sparkling home with no last-minute cleaning marathon.
Remember, it is not about perfection; it is about making cleaning part of your life. All it takes is a couple of simple changes, and your space will be cleaned and organized.
Everything You Need to Know About Cleaning and Home Care
From Quick Daily Fixes to Full Deep Clean Guides, All in One Place
House Cleaning Made Simple With These Must-Know Tips
The Smart Way to Deep Clean Your Home and Save Money
How to Deep Clean Your Home One Room at a Time
New Year’s Eve Cleaning Superstitions and Facts
Street Cleaning Efforts That Make a Big Impact
Simple Ways to Cleanse Negative Vibes From Your Space
The Truth Behind the Egg Ritual for Aura Cleansing
Cleaning Routines Designed for Your Busy Life
Can Rain Really Help Clean City Streets
How an Egg Cleanse May Affect You Spiritually and Physically
Time-Saving House Cleaning Tips That Actually Work
Daily Cleaning Habits That Keep Your Home Looking Great
Why Cleaning Your Home May Help You Sleep Better
The Mental Health Benefits of a Clean and Clutter-Free Space
How Quezon City Measures Up in Cleanliness
Is the Philippines Taking Steps Toward a Cleaner Future
How to Maintain a Clean Home Without Harsh Chemicals
Keep Your Home Sparkling All Year With These Simple Tricks
What’s the Difference Between Spring Cleaning and Deep Cleaning
The Benefits of Regular Strata Cleaning for Property Management
Why Disinfecting High-Touch Surfaces Is Key to a Healthy Home
How Deep Cleaning Improves Your Health and Home Environment
The Link Between Deep Cleaning and Fewer Allergy Symptoms
Why Cleaning Can Help You Feel Calmer and Happier
The Best Way to Keep Your Home Clean Week After Week
Everything You Need to Know About Spring Cleaning

A Room By Room Guide In Deep Cleaning Your Home
Explore how to organize your cleaning tasks by room, making it easier to focus on one area at a time. Learn about essential cleaning supplies you’ll need, as well as eco-friendly alternatives that are safe for your family and pets. We’ll also share insights on how to maintain cleanliness after your deep clean, ensuring your home remains a healthy sanctuary. Whether you're preparing for a special occasion or simply want to refresh your living space, our guide will equip you with the knowledge and tools needed to achieve a thorough cleaning. Embrace the satisfaction that comes from a sparkling home and enjoy the benefits of a clean environment on your overall well-being.
A Comprehensive Room By Room Blueprint For Deep Cleaning Your Entire Home
An Exhaustive Room By Room Approach To Deep Cleaning
It would seem like a daunting task-a deep cleaning of your home. But having planned out how you might approach this monumental task, it can be well-approachable, even rewarding. Follow this comprehensive, room-by-room guide to handle every section of your dwelling expertly until every nook and cranny becomes clean and fresh for occupation. Let's look into each room of your house in depth with the steps of deep cleaning. The right cleaning supplies are important to help in keeping a clean and healthy living environment, whether one is deep cleaning or simply maintaining.

Getting Ready For Deep Cleaning
Before you begin, make sure you have all the cleaning supplies that you may need. Here's a checklist of items you may need:
General-purpose cleaner
Glass cleaner
Disinfectant wipes or spray
Microfiber clothes
Sponges and scrub brushes
Broom, mop, and vacuum
Garbage bags
Rubber gloves
Duster or dusting clothes
Gather all your cleaning supplies ahead of time, and then block out a whole day or weekend to devote to deep cleaning. It's also good to turn on some music or a podcast to make it a more enjoyable process.
Deep Cleaning of Kitchen
The kitchen may be the heart of the home, but it's equally one of the grimiest places in the house. Here's how to deep clean this vital space:
Clear Out the Cabinets and Pantry
Take everything out of the cabinets and the pantry. Go through and check expiration dates on food items, discarding those that have expired. Wipe down shelves with an all-purpose cleaner.
Cleaning Appliances
Focus on your major appliances :
Refrigerator: remove all the foodstuff, proceed to wash the shelves and drawers with warm soapy water. Do not forget the outside and handles.
Oven: The grease and grime should be cleaned using an oven cleaner or baking soda mixed with water. Let it stay for some time, then clean it by wiping.
Microwave Cleanup: Heat bowl of water and lemon juice for five minutes and let grime get loose; wipe down inside.
Wipe down surfaces
Wipe down countertops, backsplashes, and other surfaces using disinfectant wipes or spray; pay special attention to areas around sinks, as bacteria breed there.
Sweeping and mopping of the floors
Finish this step by removing debris and mopping with the proper cleaner for your floors.
Deep Cleaning of the Living Room
The living room is where you relax and often entertain guests, so special attention is due here.
Dust All Surfaces
Start from the top down, dusting ceiling fans, light fixtures, shelves, and furniture. Use a microfiber cloth or duster, which will effectively trap dust.
Upholstery Cleaning
Vacuum sofas and chairs, particularly under cushions. If feasible, spot clean stains based on the fabric care instructions.
Electronics cleaning
Wipe down the electronics with a microfiber cloth for screens, including TVs and gaming consoles. Avoid using harsh chemicals against surfaces.
Organize Bookshelves
Take everything off your bookshelves and dust each item before reorganizing as you put them back. Donate books you do not read anymore.
Floors vacuumed or mopped
End by vacuuming carpets or rugs thoroughly. For hardwood or tile floors, sweep first, then mop.
Deep Cleaning of the Bedroom
A clean bedroom makes anyone relaxed and even sleep better, for that matter.
Strip the Bed
Remove all bedding: sheets, pillowcases, and comforters. Wash them according to instructions on the care label while you clean other areas.
Dust Surfaces
Dust nightstands, dressers, and headboards. Also, dust any decorative items or picture frames.
Organize Closets
Take everything out of your closet and sort through your clothes. Give away anything you haven't worn in a year. Wipe down the shelves and replace items in an organized fashion.
Clean under furniture.
Move furniture if necessary to enable vacuuming or mopping under beds and dressers, areas where dust bunnies often collect.
Sweep or Mop Floors
Finish by thoroughly vacuuming the carpets or rugs; where necessary, mop hard floors.

Bathroom Deep Cleaning
Bathrooms need to be deep cleaned frequently because of the water that can build up mold.
Clear Off Countertops
Take everything off countertops and put it in the cabinets. Throw away expired products and wipe down surfaces with disinfectant.
Scrub Shower and Tub
Scrub tiles, grout, showerheads, and faucets with bathroom cleaner or a mixture of white vinegar and baking soda-scrubbing thoroughly.
Toilet Cleaning
Use toilet bowl cleaner inside the bowl while wiping down the exterior with disinfectant wipes or spray.
Clean Mirrors
Use glass cleaner to clean streak-free sparkling mirrors.
Sweeping and mopping of floors
Sweep up hair and other debris before mopping with a bathroom-suitable disinfectant solution.

Home Office Deep Cleaning
It is important to keep an office space clean, especially when so many people work from home.
Clean Your Desk
Clear everything off your desk. Wipe it down with disinfectant and then put items back on in an organized manner.
Dust Electronics
Dust your computer monitor, keyboard, printer, and other electronics with appropriate cleaners designed to clean screens.
Organize Files
Organize papers, file them or shred them depending on whether you still need them, and place them in labeled folders for quick, easy access.
Vacuum or Mop Floors
Finish by vacuuming carpets or rugs thoroughly; mop hard floors as needed.
Final Touches
Once you’ve completed deep cleaning each room in your home:
Take Out Trash: Collect trash bags from every room and dispose of them properly.
Air Out Your Home: Open windows to let fresh air circulate throughout your space.
Add Finishing Touches: Consider adding fresh flowers or scented candles to create an inviting atmosphere in your freshly cleaned home.

Embrace the Benefits of a Clean Home
Deep cleaning your home room by room not only enhances the aesthetic appeal of your living space but also contributes significantly to your overall health and well-being. By following a systematic approach to cleaning, you can tackle each area effectively, ensuring that every corner of your home is fresh, organized, and inviting.
Everything You Need to Know About Cleaning and Home Care
From Quick Daily Fixes to Full Deep Clean Guides, All in One Place
House Cleaning Made Simple With These Must-Know Tips
The Smart Way to Deep Clean Your Home and Save Money
How to Deep Clean Your Home One Room at a Time
New Year’s Eve Cleaning Superstitions and Facts
Street Cleaning Efforts That Make a Big Impact
Simple Ways to Cleanse Negative Vibes From Your Space
The Truth Behind the Egg Ritual for Aura Cleansing
Cleaning Routines Designed for Your Busy Life
Can Rain Really Help Clean City Streets
How an Egg Cleanse May Affect You Spiritually and Physically
Time-Saving House Cleaning Tips That Actually Work
Daily Cleaning Habits That Keep Your Home Looking Great
Why Cleaning Your Home May Help You Sleep Better
The Mental Health Benefits of a Clean and Clutter-Free Space
How Quezon City Measures Up in Cleanliness
Is the Philippines Taking Steps Toward a Cleaner Future
How to Maintain a Clean Home Without Harsh Chemicals
Keep Your Home Sparkling All Year With These Simple Tricks
What’s the Difference Between Spring Cleaning and Deep Cleaning
The Benefits of Regular Strata Cleaning for Property Management
Why Disinfecting High-Touch Surfaces Is Key to a Healthy Home
How Deep Cleaning Improves Your Health and Home Environment
The Link Between Deep Cleaning and Fewer Allergy Symptoms
Why Cleaning Can Help You Feel Calmer and Happier
The Best Way to Keep Your Home Clean Week After Week
Everything You Need to Know About Spring Cleaning

How To Prevent Allergies With Cleaning
Cleaning regularly can help in the reduction of allergens within a home, thus minimizing allergy-like actions. Start with vacuum cleaning over carpets and rugs once a week. Use a vacuum featuring an attachment with a HEPA filter to trap dust mites and all pet dander. In addition, wipe down surfaces with cloths that have much moisture to draw allergists rather than flying them along with any breeze. Wash your bedding with hot water every week-goodbye, dust mites-and occasionally clean curtains and blinds. Apart from proper ventilation, try air purifiers to control indoor allergens like molds and pollen. Avoid major irritant chemicals and find hypoallergic or natural cleaners because chemical cleaners may themselves irritatingly affect the person during cleaning service.
The Importance Of A Clean Environment For Allergy Prevention
A Clean Home Matters For Allergy Prevention
Ensuring a tidy environment is crucial for enhancing health and well-being, especially for those who are susceptible to allergies. Allergies have a notable impact on one's quality of life, particularly worsened by common indoor allergens like dust, pet dander, mold, and pollen.

Understanding Allergies And Their Triggers
Allergies manifest when the immune system responds to allergens, usually considered harmless. Typical indoor allergens consist of:
Dust mites: Tiny creatures that flourish in bedding, carpets, and upholstery.
Pet dander: Consists of skin flakes shed by cats, dogs, and other pets that can potentially cause allergic reactions.
Mold spores: Fungi that thrive in moist areas within the household, dispersing spores into the surrounding air.
Pollen: Outdoor allergens may enter your home through open windows and doors.
The initial step in avoiding allergy symptoms during cleaning is to comprehend these triggers. Through the implementation of efficient cleaning practices, it is possible to reduce exposure to these allergens and ease allergy symptoms.
Effective Cleaning Strategies To Prevent Allergies

1. Regular Dusting And Vacuuming
Consistent dusting plays a vital role in reducing allergens present in the household. Dust tends to build up rapidly on surfaces, particularly in regions where cleaning is not done regularly. Utilizing microfiber cloths enables the efficient capture of dust, preventing its dispersion. Areas that should be dusted regularly are the following:
Furniture surfaces
Shelves
Baseboards
Ceiling fans
Light fixtures
Electronics
It is recommended to vacuum your home weekly with a vacuum cleaner that has a HEPA (High-Efficiency Particulate Air) filter. This filter is designed to trap tiny particles such as dust mites and pet dander, keeping them from circulating back into the air. Key areas to focus on when vacuuming include:
Floor covers such as carpets and rugs
Furniture with fabric upholstery
Underneath furniture is a common spot for dust buildup.
Window coverings such as curtains and drapes.
2. Deep Cleaning Carpets And Upholstery
Deep cleaning is crucial because carpets and upholstery can accumulate high levels of allergens. It is recommended to schedule professional deep cleaning services at least twice a year. This procedure usually includes:
Carpet cleaning with steam involves hot water extraction, effectively eliminating embedded dirt and allergens. Using specialized cleaning solutions during upholstery shampooing helps to effectively remove dust mites, dander, and other allergens from furniture.
Ensuring these surfaces undergo routine maintenance assists in keeping them free of allergens. If you have pets or someone with allergies in your home, it might be beneficial to choose carpets made of low-pile materials that are easier to clean.
3. Regulate Humidity Levels
Since the growth of mold occurs very fast in humid conditions, maintaining proper humidity prevents the mold from growing. To achieve this:
Use dehumidifiers by placing them in humid areas, including basements or bathrooms.
Consider installing exhaust fans in bathrooms and kitchens to help remove moisture from the air, ultimately keeping humidity levels down.
Check regularly for signs of leakage or water damage; let plumbing problems be solved as soon as possible to avoid mold growth.
Maintaining indoor humidity within the 30% to 50% level will not only hamper mold growth but will also make the atmosphere less responsive to dust mites.
4. Wash Bedding Often
Bedding is one of the biggest attractants for dust mites and allergens. To minimize the exposure:
Washing in hot water at least at 130°F weekly: sheets, pillowcases, and blankets.
Consider allergen-proof covers: Cover pillows and mattresses to offer protection against dust mites.
This significantly reduces the amount of allergens present while sleeping and thus allows for better quality sleep with fewer allergy symptoms.

5. Declutter The Home
A messy house traps a lot of dust and tends to make cleaning more cumbersome. Therefore, to provide a much healthier environment:
Declutter regularly: Pick up things that are not needed or used. These include old magazines, clothes, toys, and all those other things that can collect dust.
Store items in sealed containers: Keep your belongings in sealed containers instead of open boxes or bins to minimize the build-up of dust.
Less clutter makes the cleaning of surfaces easier, and it creates a less cluttered living space.
6. Use Air Purifiers
Air purifiers fitted with a HEPA filter can be tremendous devices to improve indoor air because they capture common airborne allergens like pollen, pet dander, and mold spores. As such, placing the air purifiers within those usual places around the house bedroom or living room will further optimize their effectiveness in the capture of potential allergens.
When choosing an air filter:
Look for models with a Clean Air Delivery Rate (CADR) rating to accommodate the room size.
Change filters regularly with the frequency recommended by the manufacturer.
7. Clean Air Ducts Regularly
Over time, the air ducts collect dust, mold, and other allergens that circulate throughout the home every time the HVAC system operates. The cleaning of the air ducts should be done by professionals every few years for the proper flow of clean air throughout the living space.
When arranging duct cleaning:
Avail the services of a reputable service provider who applies proper techniques.
For one, have your HVAC system inspected for problems that can further the issue of poor air quality.
8. Maintain Indoor Plants Wisely
While indoor plants might improve air quality by ridding the atmosphere of various toxins, they can be very mold-prone if not taken care of well. To enjoy the benefits from indoor plants while minimizing risks from allergies:
Select low-maintenance plants that don't require too much watering.
Avoid overwatering; let the soil go somewhat dry between waterings.
Regularly clean the dust off the leaves.

A Clean Home Equals Fewer Allergies
Cleaning up your home is not only for good appearance but to offer you a safe environment, free of any triggers that can cause an allergy. Efficient cleaning practice will help improve the quality of life and reduce risks of allergy health issues.
All-in-One Cleaning Guide for a Fresher, More Comfortable Home
Step-by-Step Tips to Clean, Organize, and Maintain Every Part of Your Space
Best Way To Clean Gold Earrings
Best Way To Clean MacBook Screen
Best Way To Clean Vinyl Records
Can Washing Machines Be Stopped Mid-Cycle
Can You Wash Dry Clean Only Curtains
Cleaning Comfort Room Safety Precautions To Be Observed
Cleaning Pet Urine From Carpet
Cleaning Stainless Steel Fridge
How Technology Is Remodeling The Cleaning Industry
How To Get Rid Of Cigarette Smell In Car
How To Get Self Tanner Out Of Carpets
How To Make Your House Smell Like Laundry Detergent
How To Prepare Your Home For A Deep Cleaning Service
How To Prevent Allergies With Cleaning
How To Remove Carpets DIY Guide
How To Replace Carpets By Yourself
Magic Eraser To Spot Cleaning Walls
Open Windows To Deodorize Home
Removing Bleach Smell From House
Keep Your Home Clean With Simple Eco-Friendly Practices
Eco-friendly cleaning is the easier, yet effective way to maintain a spotless home, all in an environmentally-friendly fashion. Replacing chemicals with a plant-based, biodegradable option means you're well on the way to making sure your home is safer for the living environment inside it-especially around children and pets. The performance of eco-friendly products remains excellent compared to traditional cleaners, just without the negative health outcomes.
Simplifying Eco-Friendly Cleaning For A Healthier Home
Improve Your Home With Eco-Friendly Practices
Cleaning your home and being considerate of the environment does not have to be challenging on its own. Eco-friendly cleaning will help you give your family a healthier home space and contribute to a greener planet. By making simple, easy changes, you'll be able to reduce your waste and save money while minimizing your contact with harmful chemicals—all while maintaining a spotless home.
Why Eco-Friendly Cleaning Makes Sense For Your Home And The Planet

Healthier Choices For A Safer Living Space
Most commercial cleaning products have harsh chemicals, affecting indoor air quality that might irritate the skin or respiratory system. The most simple and effective way of looking out for your health and your family's health is using cleaners' natural alternatives.
These would be effective eco-friendly cleaning solutions made either from plants or things that can easily degrade. In this way, it's assured that your house will remain a safe and healthy place for your family.
Reducing Your Environmental Impact Starts At Home
Traditional cleaning products can affect both your household and the environment. Most of them contain ingredients that can either pollute water systems or destroy ecosystems.
Switching to biodegradable or non-toxic alternatives can reduce pollution and take care of biodiversity. Whether big or small, everything you do will help create a sustainable future ahead.
Eco-Friendly Cleaning Does Not Have To Be So Pricey
Going green is expensive is a myth. Many eco-effective cleaning alternatives happen to be practical and affordable. Some everyday items can handle cleaning jobs like lemon juice, vinegar, and baking soda.
Depending on multi-purpose and natural products can save you money. It will cut down waste from single cleaners. This will simplify your cleaning and reduce clutter in your home.
Simple And Effective Green Cleaning Practices
1. Choose Biodegradable And Non-Toxic Products
Look for cleaning products labeled as biodegradable or plant-based. These will break down naturally and leave minimal impact on the environment. Choose brands that use renewable resources to further reduce your ecological footprint.
2. Clean More Effectively With Microfiber Tools
Other options include microfiber cloths and mops, which also works like disposable cleaning products. These reusable tools do an amazing job of gathering dirt and bacteria with water only, thus reducing or eliminating chemical cleaners. They are also cost-effective since they can be washed and reutilized multiple times.
3. Try Steam Cleaning For A Chemical-Free Approach
Steam cleaning is also an eco-friendly technique, as it makes use of only water heated at high temperatures to sanitize. It works very well in fast action for the removal of bacteria, allergens, and even molds without harsh chemicals.
This is an ideal method for families with children or pets since this procedure avoids the possibility of toxins exposure while keeping your home spotless.
4. Cut Down On Packaging Waste By Having More Concentrated Cleaning Solutions
Concentrated cleaners allow you to use less product for the same results. They take less packaging, which means fewer plastic bottles end up in landfill. Diluting these at home is a small yet impactful step toward reducing waste.
5. Invest In Sustainable Cleaning Tools
It would be nice to replace sponges or brushes with products produced from recycled or natural materials; brushes made of bamboo and compostable sponges are also a very good option. They can accomplish the same tasks as traditional utilities while causing less harm.

Easy DIY Eco-Friendly Cleaning Recipes To Give A Shot At Home
You do not need to buy over-the-top products to clean more efficiently. Here are a few very simple homemade solutions you can easily prepare within minutes:
All-Purpose Cleaner For Daily Surfaces
1 cup white vinegar
1 cup water
Optional: a few drops of essential oil, such as lemon or lavender.
Mix in a spray bottle, shake, and off you go. The basic stuff is excellent for dealing with countertops, and sinks, as well as general cleaning areas like tables, etc.
Light Baking Soda Scrub For Stubborn Stains
1 cup baking soda
½ cup water
Mix these into a paste and apply to surfaces needing to be scrubbed: tubs, sinks. Baking soda is a mild abrasive that removes stains without scuffing surfaces.
Glass Cleaner For A Streak-Free Shine
2 cups distilled water
¼ cup white vinegar
Optional: 1 teaspoon dish soap
Combine in a spray bottle, shake, and use with a microfiber cloth to clean windows and mirrors. The simple formula leaves streak-less sparkling results.

Simple Ways To Reduce Waste When Cleaning
1. Replace Paper Towels With Multi-Use Cloth.
Switching completely to microfiber or other reusable cloth replaces can be the easiest manner of waste reduction. This can be washed with water and reused many times, making them perfect for practicality and more sensitive to nature compared to simple paper towels.
2. Save Water While Cleaning.
Be mindful of water use by turning off the tap while scrubbing or rinsing. For floors, consider using a damp mop instead of a bucket of water. These small habits can collectively make a big difference in conserving this important resource.
3. Choose Eco-Friendly Laundry Detergents.
Most commercial detergents contain phosphates and artificial fragrances, which can cause harm to the environment. Choose biodegradable detergents that do not have harsh chemicals in them. They'll clean your clothes while helping to minimize water pollution.

Making Eco-Friendly Cleaning Part Of Your Lifestyle
Eco-friendly cleaning is more than using greener products; it's a behavior that shows your concern for the planet in every single aspect of your life. You can keep your home spotless without giving up any of your values by using natural ingredients, investing in reusable tools, and keeping track of your waste.
You're not only giving yourself and your loved ones a safer space, but you are contributing to a greener planet for future generations. These tips and methods, no matter how small, can lead to long-lasting positive change.
Everything You Need to Know About Cleaning and Home Care
From Quick Daily Fixes to Full Deep Clean Guides, All in One Place
House Cleaning Made Simple With These Must-Know Tips
The Smart Way to Deep Clean Your Home and Save Money
How to Deep Clean Your Home One Room at a Time
New Year’s Eve Cleaning Superstitions and Facts
Street Cleaning Efforts That Make a Big Impact
Simple Ways to Cleanse Negative Vibes From Your Space
The Truth Behind the Egg Ritual for Aura Cleansing
Cleaning Routines Designed for Your Busy Life
Can Rain Really Help Clean City Streets
How an Egg Cleanse May Affect You Spiritually and Physically
Time-Saving House Cleaning Tips That Actually Work
Daily Cleaning Habits That Keep Your Home Looking Great
Why Cleaning Your Home May Help You Sleep Better
The Mental Health Benefits of a Clean and Clutter-Free Space
How Quezon City Measures Up in Cleanliness
Is the Philippines Taking Steps Toward a Cleaner Future
How to Maintain a Clean Home Without Harsh Chemicals
Keep Your Home Sparkling All Year With These Simple Tricks
What’s the Difference Between Spring Cleaning and Deep Cleaning
The Benefits of Regular Strata Cleaning for Property Management
Why Disinfecting High-Touch Surfaces Is Key to a Healthy Home
How Deep Cleaning Improves Your Health and Home Environment
The Link Between Deep Cleaning and Fewer Allergy Symptoms
Why Cleaning Can Help You Feel Calmer and Happier
The Best Way to Keep Your Home Clean Week After Week
Everything You Need to Know About Spring Cleaning
Strata Cleaning
Strata properties require ongoing cleaning to ensure shared areas are kept clean and welcoming for all residents. Our strata cleaning services provide reliable, expert care for buildings of any size. We offer tailored solutions for lobbies, hallways, stairwells, parking areas, and other common spaces, using eco-friendly cleaning products. From regular maintenance to deep cleans, our trained cleaners take pride in delivering excellent results while maintaining a safe, hygienic environment. By choosing our services, you’re ensuring your strata property retains its value, cleanliness, and positive atmosphere for both residents and visitors.
Expert Cleaning For Every Corner Of Your Strata Property
Eco-Friendly Cleaning Solutions For Shared Spaces

Understanding Strata Cleaning
Multi-unit strata cleaning is maintenance of common areas to ensure residents’ comfort and health. The work makes a property presentable and well-maintained.
Definition and Importance
Strata cleaning is maintenance and cleaning services at multi-unit buildings involving common areas. These areas are usually stairwells, lifts, corridors and lobbies. These buildings always need maintenance to keep them presentable and clean because these are facilities frequently used.
The inhabitants can become dissatisfied and the value of the property can decrease if strata cleaning is neglected. Clean common areas can greatly contribute to a building’s appeal and simultaneously avoid damage from dust and mildew. The engagement of expert services liberates management from organizing internal activities and secures a consistent level of hygiene. The health and general well-being of the community and a high level of satisfaction amongst inhabitants are frequently improved by adequately cleaned properties at frequent intervals.
Included Services
Cleaning services for strata include many tasks to keep common areas tidy and clean. These are:
Floor Cleaning: Vacuuming floors with carpeting or sweeping and mopping hard floors.
Window Cleaning: Cleaning windows inside public areas.
Trash Management: Garbage bins emptied and liners refreshed.
Sanitizing Surfaces: Elevator buttons and handrails are points of high contact and are to be cleaned frequently to prevent germs from spreading.
Garden Care: The outdoors and gardens need to be equally attended to as those inside are.
General Dusting: Dusting surfaces such as furniture and ornaments.
Strata cleaning upholds the appearance of property, aids cleanliness, and preserves property value. Hire mature cleaners to maintain high standards.
Also Read: What Is Spring Cleaning?

Benefits of Strata Cleaning
The strata cleaning offers numerous advantages to building-based communities. The maintenance of common areas fosters renter satisfaction and durable buildings.
Increased Property Value
Directly related to the value of property is keeping common areas like lobbies and corridors to a tidy and clean condition. Clean, well-maintained areas appeal to possible tenants and buyers, stimulating demand and prices. A facility that is never dirty indicates well-executed management procedures and makes it comforting to possible investors that there will not be much maintenance to deal with in the future. Regular cleaning prolongs the life cycle of surfaces, floors, and fixtures by lessening wear and tear, ultimately decreasing replacement costs. Preemptive measures can stop small things from escalating to something large and requiring expensive repairs.
Improved Safety and Hygiene
Cleaning supports the health of tenants by keeping common areas clean. Daily sanitizing reduces allergens and bacteria, minimizing spread of illness at locations like stairwells and lifts. Clean doorways and footpaths reduce chances of accidents involving slip and fall, a primary safety factor particularly at locations with heavy traffics. Accidents risk is reduced through clevering away garbage and wiping spills up quickly. By disposing of trash properly, residents can prevent infestations by bugs which can affect their health. Clean and well-maintained environments promote community health and create healthy lifestyle choices.
Also Read: Who Can Benefit From Extreme Cleaning Services?
Selecting the Right Strata Cleaning Service
Selecting the best strata cleaning service locks in the sparkling clean and nice common areas at home. Make certain needs and issues work when you’re comparing services.
Factors to Consider
Experience: Search for companies with a track record successfully doing strata cleaning. Experienced companies can manage numerous various cleaning jobs and are accustomed to multi-unit buildings’ specific demands. Read reviews by customers or service ratings for comparable buildings to confirm their experience.
Licensing and Insurance: Make sure that the cleaning service is adequately insured and properly licensed. This verifies adherence to industry standards and legislation and safeguards against potential liabilities.
Service Scope: Select a vendor with a wide scope of services, such as garbage management, surface disinfection, window and floor maintenance. A wide scope of services creates consistency and minimal fuss by allowing one source to handle all the cleaning requirements.
Reputation: Use word of mouth or online reviews to research the reputation of a service. Good reviews are a sign of customer satisfaction and reliability.
Customization and Flexibility: Make sure that the supplier provides personalized cleaning programs and customizable scheduling. This makes sure that the schedule is aligned with your facility’s unique requirements and schedule of operation.
Questions to Ask
What is your previous experience with strata cleaning?
Provide referrals from similar properties.
What is included with your base cleaning package?
What are your payment terms and rates?
What are your protocols for safety and quality?
What is your policy regarding cancellation and refunds?

Strata Cleaning Issues
Cleaning strata is a unique challenge by virtue of multi-unit buildings’ demand and sophistication. Efficient solutions are dependent upon effective management of environmental concerns and client demands.
Addressing Environmental Concerns
Choice of cleaners has a significant impact on the environment with respect to strata cleaning. To reduce chemical exposure while maintaining hygiene, environment-friendly items should be prioritized. A healthier and safer living environment can be attained by employing biodegradable products and diminishing the application of toxic chemicals. Trash can similarly be reduced by being efficient with water; when you are cleaning, consider integrating devices to achieve optimal water efficiency.
As common areas like halls and corridors are responsible for much garbage, refuse disposal deserves unique priority. As a means to foster green practices, incorporate selective garbage collection schemes and familiarize locals with effective trash separation. Compliance with community environmental legislations to the full extent is bound to ensure adherence and reduce environmental footprints.
Managing Client Expectations
The success of strata cleaning relies significantly on customer satisfaction. Satisfying diverse groups among tenants and owners requires fulfillment of different customer demands. Compatibility among customers and service delivery organizations with respect to frequency and quality of service is ensured through clear communications.
Tailoring cleaning schedules with flexibility enhances customer satisfaction. Program low-impact cleaning phases closely with strata management because residents are likely to feel annoyed by interruptions. Regular feedback collection assists with reviewing customer satisfaction and service performance improvement. Residents ought to actively be encouraged to present their concerns and suggestions.
Also Read: Cleaning Comfort Room Safety Precautions To Be Observed
Misunderstandings are avoided through openness about services, charges, and procedures. Trust is fostered and sound expectations are made with good contracts specifying services to be done, fees to be collected, and results to be obtained. Uphold high standards always to build long-term relationships with clients and promote peaceful dwelling condition.

Latest Innovations in Strata Cleaning
Misunderstandings are avoided through openness about services, charges, and procedures. Trust is fostered and sound expectations are made with good contracts specifying services to be done, fees to be collected, and results to be obtained. Uphold high standards always to build long-term relationships with clients and promote peaceful dwelling condition.
Technological Advancements
Maintenance programs for strata are streamlined with robotics. Automatic vac systems are one instance whereby man-hours are eliminated by sweeping huge corridor areas efficiently. Other equipment innovations and high-efficiency scrubbers allow superior cleaning on various substrates.
Internet of Things (IoT) streamlines equipment maintenance. Sensors monitor equipment usage and forecast maintenance requirements to save downtime. By enabling efficient scheduling of cleaning work based on actual data and guaranteeing reliable service is always consistently delivered, schedule technology provides additional efficiencies.
Strata management is able to communicate effectively with the aid of software programs. Real-time reporting of Cleaning Requirements and timely work completion is made possible with mobile applications. Online checklists assist to confirm nothing is forgotten and all areas are up to cleaning standards.
Predictive Cleaning is made possible by AI-based solutions. Trends in usage being tracked, activity peaks in buildings can potentially be predicted and cleaning plans can be optimized to keep the space cleaner at all times. Overall, stratum management is boosted by this cutting-edge technology.
Eco-friendly Solutions
Strata maintenance is currently controlled by environment-conscious maintenance methods. The communal area chemical film is properly washed away by biodegradable maintenance products to maintain public health. Low-flow pressure washers and other water-saving equipment save resources while being efficient.
The use of renewable energy is gaining momentum. The footprint is reduced by using electric tools and solar-powered cleaning equipment. Long-term environmental effects are reduced by using rechargeable battery packs.
Innovations in waste management promote environmental sustainability. Reduction in land contribution is achieved through the adoption of public space recycling infrastructure. Garden yard wastes composting promotes sustainable yard care practices.
Green certifications reflect dedication to sustainability initiatives. The incorporation of companies with already acquired certifications secures residents’ confidence to believe green procedures are being followed. The remedies appeal to residents who care about sustainability while conveying a vision for the future.
Contemporary strata cleaners are utilizing these innovations to improve productivity, sustainability, and tenant satisfaction and yet maintain a clean environment.
Also Read: Spring Cleaning VS Deep Cleaning Services
The Final Sweep of Excellence
To keep multi-unit buildings efficient and desirable necessitates regular strata cleaning. By making frequent, professional cleaning services a priority, you can maintain sanitary and convenient common areas and enhance property value and resident satisfaction. The success of strata cleaning is further maximized by embracing green methods and newer technology innovations, to the benefit of maintenance practices and environmental objectives alike. To achieve optimal benefits for your property and community at large, select a service provider based on experience, versatility, and sustainability commitment.
Frequently Asked Questions
-
Strata cleaning refers to the maintenance of shared spaces in multi-unit buildings, such as lobbies, hallways, elevators, and stairwells. This service ensures these areas are kept hygienic and visually appealing, contributing to both property value and a healthy living environment.
-
Strata cleaning is crucial as it maintains the aesthetic appeal and hygiene of common areas, enhancing property value and resident satisfaction. Regular cleaning reduces allergens and bacteria, preventing illness and ensuring safety in high-traffic areas.
-
Common strata cleaning services include floor cleaning, window washing, trash management, surface sanitization, garden maintenance, and general dusting. These ensure all shared areas remain clean and welcoming for residents and visitors.
-
Clean and well-maintained common areas increase property value by making the property more appealing to potential buyers and renters. This increases demand, which can lead to higher price points and greater community satisfaction.
-
Key factors include the provider's experience, licensing, insurance, service range, reputation, scheduling flexibility, and customization options. Evaluating these aspects ensures the service meets the specific needs and priorities for maintaining the property's common areas.
-
Challenges include managing environmental concerns and client expectations. Using eco-friendly products, effective waste strategies, and transparent communication are essential for minimizing ecological impact and ensuring resident satisfaction.
-
Modern innovations, such as robotics, IoT, and AI tools, streamline cleaning processes, enhance efficiency, and improve communication. Sustainable practices like biodegradable products and recycling further support eco-friendliness and resident satisfaction.
Everything You Need to Know About Cleaning and Home Care
From Quick Daily Fixes to Full Deep Clean Guides, All in One Place
House Cleaning Made Simple With These Must-Know Tips
The Smart Way to Deep Clean Your Home and Save Money
How to Deep Clean Your Home One Room at a Time
New Year’s Eve Cleaning Superstitions and Facts
Street Cleaning Efforts That Make a Big Impact
Simple Ways to Cleanse Negative Vibes From Your Space
The Truth Behind the Egg Ritual for Aura Cleansing
Cleaning Routines Designed for Your Busy Life
Can Rain Really Help Clean City Streets
How an Egg Cleanse May Affect You Spiritually and Physically
Time-Saving House Cleaning Tips That Actually Work
Daily Cleaning Habits That Keep Your Home Looking Great
Why Cleaning Your Home May Help You Sleep Better
The Mental Health Benefits of a Clean and Clutter-Free Space
How Quezon City Measures Up in Cleanliness
Is the Philippines Taking Steps Toward a Cleaner Future
How to Maintain a Clean Home Without Harsh Chemicals
Keep Your Home Sparkling All Year With These Simple Tricks
What’s the Difference Between Spring Cleaning and Deep Cleaning
The Benefits of Regular Strata Cleaning for Property Management
Why Disinfecting High-Touch Surfaces Is Key to a Healthy Home
How Deep Cleaning Improves Your Health and Home Environment
The Link Between Deep Cleaning and Fewer Allergy Symptoms
Why Cleaning Can Help You Feel Calmer and Happier
The Best Way to Keep Your Home Clean Week After Week
Everything You Need to Know About Spring Cleaning

How To Shrink Lace
Shrinking lace can be tricky, but with the right approach, you can ensure a snug fit without compromising the fabric’s beauty. Whether you’re working with lace garments or crafts, our guide offers step-by-step instructions on how to shrink lace safely. We’ll cover different methods, including using heat or moisture, and help you determine the best technique for your specific lace type. Say goodbye to ill-fitting lace and hello to perfectly resized pieces that look just as stunning as before. Explore our tips to shrink lace easily and maintain its intricate detailing.
Why Lace Shrinking Matters For A Perfect Fit
Preserving The Beauty Of Lace While Shrinking

Understanding Lace Fabric
The texture and design of lace fabric are delicately intricate. Traditionally, it uses designs made by twisting silk or cotton threads. Synthetic fabrics like polyester or nylon are used in contemporary versions. Because of its diverse composition, lace needs to be handled differently according to the kind of material.
The quality of cotton lace is softer and more flexible. With controlled heat, it shrinks more easily since it adjusts readily to temperature variations. Despite its beautiful texture, silk lace poses additional difficulties. When shrinking, it must be done gently because it is less resistant to heat and moisture. Lace made of synthetic materials, such as polyester and nylon, is less likely to shrink. On the other hand, modest size reductions could result from exposure to moderate heat.
Lace creation involves different techniques, impacting its durability and behavior when altered. Bobbin lace uses multiple threads wound on bobbins to form patterns. Needle lace, formed with a single needle and thread, results in more intricate designs. Machine-made lace typically uses automated processes to weave synthetic yarns, often mirroring traditional patterns.
Determining the type of lace is essential when trying to shrink it. Think about the material's durability and strength. While heavier types of laces need more exacting methods to avoid distortion, lighter types react to changes more quickly. Before moving on, always conduct a tiny, discrete test. This method guarantees process control and maintains the fabric's structural and aesthetic integrity.
Reasons for Shrinking Lace
Shrinking lace would improve the fit of a garment or enhance decor aesthetics. Sometimes, lace may have stretched over time from wear and washing. Treating this improves an unsightly wear look. Sizing changes are other reasons you might have acquired a lace piece much larger than desired. In situations like these, shrinking can render the item usable. Sometimes, ambiguities in the product description may lead to the acquisition of items of lace that are larger than what you intended for. Shrinking lace helps in managing the size and ensuring the lace meets aesthetic and functional requirements.
Also Read: How To Clean Dress Shoes
The most common causes of unintentional shrinkage in lace are heat and moisture. Knowing how to shrink it intentionally requires using these elements carefully. Shrinking lace as one method of adjusting its size enables one to resize a piece of vintage lace or even reuse decorative lace. You have a better fit, yet you still retain the detailed look of the fabric.

Preparation Before Shrinking
Proper preparation is key when shrinking lace so the patterns don’t get lost. By choosing the right lace and gathering your supplies, you’ll be more successful in this process.
Choosing the Right Lace Type
Choosing the right lace is key to shrinking it without damage. Lace comes in many forms, each with its properties.
Cotton Lace: Can be shrunk because it’s flexible with moisture and temperature changes. Easy to work with in this process.
Silk Lace: Needs to be handled with care because it’s heat and moisture-sensitive. Be careful.
Synthetic Lace (e.g., Nylon, Polyester): resists shrinkage but responds to moderate temperature changes. Always test shrink first.
Knowing the lace type will help you determine the methods and prevent texture or design changes.
Gathering Necessary Supplies
Gather your supplies ahead of time to make the shrinking process easier.
Mild Detergent: Protects the fibers of the lace during washing. Don’t use harsh chemicals that can damage them.
Wash Basin or Tub: Big enough to submerge the lace. Choose one that fits your lace item.
Clean Towels: For pressing out excess water without stretching the lace. Gentle pressure will maintain the pattern.
Measuring Tools: Use rulers to measure as you go and to check size.
Boiling Pot (for heat treatment): Only if your lace can be heat shrunk. Use with care so you don’t overshrink.
Having the right tools will allow you to adjust as you go without interruptions during the shrinking process.
Also Read: How To Clean A Tie At Home
Methods to Shrink Lace
Lace is delicate, so certain techniques are needed to shrink it effectively. These useful methods will help you shrink lace without sacrificing its exquisite elegance.
Hand Washing Technique
Gentle lace treatment is provided by hand washing. To prevent damage, especially to delicate textiles like silk, use lukewarm water. Add a tiny bit of mild detergent to a basin of lukewarm water. To get the detergent through the cloth, gently shake the lace while submerging it. To preserve the structure of the lace, do not use abrasive cleaning methods or wringing. Rinse the lace with lukewarm water until all of the detergent is gone. Using a fresh towel to absorb moisture, gently push out any extra water. Shape the lace to the appropriate size by lying it flat on a dry towel. To avoid unintended shrinkage, let it air dry away from heat sources or direct sunshine.
Using a Washing Machine
A washing machine may be an alternative for more durable lace varieties. Use a delicate cycle at all times to lessen the strain on the fibers. For added protection, put the lace in a mesh laundry bag. Use a light detergent and set the washing machine to a cold cycle. Make sure the drum is free of heavy anything that could agitate the lace. To avoid creases, take off the lace right away after the cycle. Instead of using a dryer, which could further shrink or damage the lace, it is preferable to lay it flat on a towel to dry.
Also Read: Can Washing Machines Be Stopped Mid-Cycle
Applying Heat with an Iron
By applying precise heat, ironing allows for regulated lace shrinkage. For sensitive textiles, set the iron's temperature to a low setting. Cover the lace with a moist cloth and place it on an ironing board. To prevent overheating, quickly and lightly press the iron over the material. Pay attention to the areas that require shrinking and modify the pressure according to the type of material. Silk requires the gentlest handling, whereas cotton lace can be heated a bit more. To set the newly shrunk form of the lace, let it cool completely before touching it.

Tips and Precautions
To prevent damage during the shrinking process, handle lace carefully. Examine the lace material first. Silk lace needs to be handled gently, although cotton lace tolerates mild temperatures well. Although synthetic lace frequently resists shrinking, it can tolerate more severe treatment.
To see how the lace responds, test a little, discrete area first. This easy technique shields the entire artwork from unanticipated damage. When washing, use a light detergent because harsh chemicals might weaken the fibers and ruin the delicate design.
When washing using your hands, use lukewarm water and avoid twisting or wringing the lace. To keep shape, gently squeeze out extra water between fresh towels. To reduce agitation, put the lace inside a mesh bag and use the delicate cycle if you're washing it.
Using the lowest heat setting, carefully apply an iron. If necessary, gently press the lace to encourage shrinkage after covering it with a pressing cloth to protect it from direct heat. Steer clear of steam since too much moisture can cause more stretching.
Take special care when handling lace whose material composition is unclear. Employ cautious techniques, beginning with the lowest temperature settings. If there are no noticeable effects, raise the temperature gradually while paying great attention to the lace at each step.
Also Read: Can You Wash Dry Clean Only Curtains
Depending on the lace's intended use, different considerations apply. Consistent results are more important when downsizing wearable objects than when modifying them for aesthetic reasons. Throughout the process, give top priority to maintaining the lace's structure and elegance.
Maintaining Shrunk Lace
Shrunk lace keeps its structure and beauty when properly cared Shrunk lace keeps its structure and beauty when properly cared for. Damage to delicate designs and fibers can be avoided by handling them with caution and attention to detail.
Gentle Cleaning: Steer clear of bleach and aggressive chemicals when cleaning lace. The integrity of the cloth is maintained by using cold water and mild soap. Rinse well to get rid of all the detergent.
Drying Techniques: To prevent additional shrinkage, stay away from direct heat sources like dryers and sunlight. Rather, place the lace flat on a fresh towel out of the sun. Carefully reshape it to preserve its shape while drying.
Storage Recommendations: To avoid moisture damage, keep lace in a cool, dry location. To lessen the chance of deterioration, wrap delicate pieces in tissue paper devoid of acid. Steer clear of plastic containers that could retain moisture.
Regular Inspections: Steer clear of bleach and aggressive chemicals when cleaning lace. The integrity of the cloth is maintained by using cold water and mild soap. Rinse well to get rid of all the detergent.
Avoid Heavy Use: To prevent additional shrinkage, stay away from direct heat sources like dryers and sunlight. Rather, place the lace flat on a fresh towel out of the sun. Carefully reshape it to preserve its shape while drying.
To avoid moisture damage, keep the lace in a cool, dry location. To lessen the chance of deterioration, wrap delicate pieces in tissue paper devoid of acid. Steer clear of plastic containers that could retain moisture.
The Closing Stitches
Understanding lace's special qualities and using the appropriate methods are essential to successfully reducing it. You can attain the required size without sacrificing the lace's attractiveness by carefully determining the type and being ready with the right equipment. To preserve lace's beauty over time, handle it with care, try techniques on a small area first, and adhere to the suggested maintenance procedures. Accept the difficulty of shrinking lace and take pleasure in the elegant effects it adds to your clothing and interior design.
Frequently Asked Questions
-
To shrink lace safely, use gentle methods like hand washing with lukewarm water. For sturdy lace types, you can use a washing machine on a delicate cycle. Avoid wringing or twisting the lace. Instead, press out excess water gently and dry it flat on a clean towel. Consider using a steam iron at the lowest setting with a pressing cloth for targeted areas. Always test a small, hidden section first to ensure the methods won’t damage the lace.
-
Identify the lace type first, as different materials require specific handling. Cotton lace is more forgiving with temperature changes, while silk lace needs gentler treatment. Gather necessary supplies, such as mild detergent and a wash basin, and test a small area first. Understand that synthetic lace might be more resistant but can respond to moderate heat adjustments. Proper preparation ensures the lace’s intricate patterns remain intact during the shrinking process.
-
Shrinking lace can improve the fit of a garment or enhance décor aesthetics without the need to replace the piece. Lace can stretch and become misshapen over time with wear and washing. Shrinking helps restore its original size, making oversized items usable again while preserving the intricate appeal of the fabric. This approach is particularly helpful for vintage lace items or when product descriptions are ambiguous.
-
To maintain shrunk lace, clean it gently with mild soap and cold water, avoiding harsh detergents and bleach. Lay the lace flat on a towel to dry and reshape it carefully. Store in a cool, dry place with acid-free tissue paper for delicate pieces, and avoid plastic containers. Regular inspections for wear help in maintaining its longevity. These practices ensure the lace retains its beauty and structural integrity.
-
Yes, gather mild detergent, a wash basin, clean towels, a measuring tool, and a boiling pot if heat treatment is necessary. Having these supplies ready will streamline the shrinking process and improve your chances of success. Additionally, a steam iron and a pressing cloth can be useful for targeted shrinkage on sturdier lace types. Proper tools, combined with gentle techniques, help safeguard the integrity of the lace.
All-in-One Cleaning Guide for a Fresher, More Comfortable Home
Step-by-Step Tips to Clean, Organize, and Maintain Every Part of Your Space
Best Way To Clean Gold Earrings
Best Way To Clean MacBook Screen
Best Way To Clean Vinyl Records
Can Washing Machines Be Stopped Mid-Cycle
Can You Wash Dry Clean Only Curtains
Cleaning Comfort Room Safety Precautions To Be Observed
Cleaning Pet Urine From Carpet
Cleaning Stainless Steel Fridge
How Technology Is Remodeling The Cleaning Industry
How To Get Rid Of Cigarette Smell In Car
How To Get Self Tanner Out Of Carpets
How To Make Your House Smell Like Laundry Detergent
How To Prepare Your Home For A Deep Cleaning Service
How To Prevent Allergies With Cleaning
How To Remove Carpets DIY Guide
How To Replace Carpets By Yourself
Magic Eraser To Spot Cleaning Walls
Open Windows To Deodorize Home
Removing Bleach Smell From House
How Do You Clean Outdoor Cushions
Keeping your outdoor cushions clean not only enhances their appearance but also extends their life. In this guide, we’ll explore simple and effective ways to clean outdoor cushions, from basic surface cleaning to removing tough stains and mildew. You’ll learn the right tools and techniques to restore your cushions to like-new condition, making them a vibrant part of your outdoor décor. Whether dealing with everyday dirt or unexpected spills, this step-by-step guide will help you maintain your outdoor cushions with ease, ensuring they stay fresh and inviting year-round.
Bring Your Outdoor Cushions Back To Life
Removing Dirt And Debris The Right Way

Understanding Outdoor Cushion Materials
Knowing the type of material your outdoor cushions are made from helps guide the cleaning process. Different materials require different care to maintain their appearance and durability.
Synthetic Fabrics
Materials like polyester and acrylic (e.g., Sunbrella) resist fading and mildew. These are often water-resistant, making them easier to clean. A mix of mild soap and water usually suffices for regular washing.Natural Fabrics
Cotton and linen may appear in outdoor use but are less common due to their susceptibility to mold and moisture damage. These need delicate handling, with spot cleaning being preferable.Blends and Coated Fabrics
Some cushions come with a blend of natural and synthetic fibers or a protective coating (e.g., vinyl-backed). Check the manufacturer's instructions for specific cleaning guidelines as these might also include UV protection.Foam Inserts
Foam inserts inside the cushions should be ready for cleaning separately from their covers. If the cover is removable, wash the foam by gently soaking it in a solution of mild soap and water, then thoroughly air-drying to prevent mold growth.Removable Covers
Many modern cushions include zippers for easy cover removal. Before cleaning, check if they're machine washable. Use a gentle detergent and cold water to wash; air-drying usually maintains their shape and texture.
Understanding these materials and their care instructions ensures the longevity and beauty of your outdoor seating. Consistent, appropriate care keeps the colors vibrant and the surfaces comfortable for extended use.

Preparing for the Cleaning Process
Preparing outdoor cushions involves several crucial steps to ensure effective cleaning. Before starting, you'll gather necessary supplies and understand fabric care by checking labels.
Gathering Cleaning Supplies
Cleaning is made simple and effective with the correct tools. To remove dirt without causing harm to the fibers of the garment, start by gathering soft-bristle brushes. To get rid of stains without losing the colors, use a gentle detergent made for outdoor textiles. White vinegar is an effective disinfectant and mildew remover. A garden hose helps get rid of soap residues by gently rinsing. Microfiber towels efficiently and non-scratchingly dry surfaces. Lastly, to make things easier, collect buckets for combining cleaning solutions.
Checking the Care Labels
Important details regarding how to properly clean outdoor cushions are provided by care labels. Because natural and synthetic fabrics require different cleaning solutions, find the label and take note of the materials used. Recognize the signs that indicate if hand washing is recommended or if machine washing is safe. To prevent shrinkage or damage from too much heat, check the recommended temperature. Examine the additional instructions for specific cycle settings if the detachable covers are washable. Knowing the labels helps maintain the fabric's longevity and aesthetic appeal.

Step-by-Step Cleaning Guide
Outdoor cushions require specific care to maintain their appearance and functionality. Follow this guide to keep your outdoor seating looking pristine and inviting.
Removing Loose Debris
Start by taking care of any loose dirt or debris. To avoid damaging the cushions, shake them gently outside without using too much effort. Remove any last bits of surface dirt and pollen from all sides with a soft-bristle brush. To remove tiny particles stuck in the fabric, use a vacuum with an upholstery attachment for complicated weave patterns.
Spot Cleaning Stains
To deal with stains quickly, use a clean microfiber cloth to blot the affected area, making sure to remove as much residue as you can. Using a sponge, apply a mild detergent and lukewarm water solution to the discolored area. To avoid moisture problems, do not oversaturate the fabric. Wash the area with clean water after gently scrubbing the discoloration in circular motions. White vinegar can be added to the solution to increase its cleaning ability for tough stains like mildew.
Deep Cleaning Techniques
Get cushions ready for deep cleaning when they need more thorough maintenance. Pour lukewarm water and a tiny bit of mild detergent into a large basin or bathtub. Make sure the foam and fabric are completely wet by completely submerging each cushion. To help dislodge buried dirt, gently shake the cushions with your hands. Rinse well with fresh water to get rid of any soap residue. To avoid color fading, let the cushions air dry fully in a well-ventilated place away from direct sunlight. Refer to the care label's detailed washing directions for removable covers, since they can permit machine washing.

Drying and Maintenance Tips
Proper drying and maintenance ensure outdoor cushions remain attractive and durable. Following specific methods enhances their longevity and appearance.
Air Drying Methods
For effective air drying, place pillows flat on a sanitized surface. Drying times are accelerated by direct sunlight, although extended exposure might cause fading. To promote even drying on both sides, flip pillows from time to time. To promote ventilation, place prop pillows in an upside-down V form against a wall if there is room.
Encourage ventilation, especially in humid situations, by using a fan outside to speed up the process. Avoid using a dryer since heat can destroy the integrity of the fabric and the foam padding. For best results, remove the covers from the inserts of standard cushions with detachable covers and dry each part separately.
Protecting Against Future Stains
Use fabric protectors to make a barrier that will keep spills and stains out. For optimal results, use solutions like Scotchgard made for outdoor textiles and adhere to the label guidelines. To keep the protection, reapply occasionally or following thorough cleanings.
When not in use, keep cushions in a weatherproof storage box or bag to avoid moisture exposure and dirt buildup. For convenient access and space savings, think about under-seat storage options.
By keeping essentials like mild detergent and soft-bristle brushes close at hand, you can promote timely cleaning. To reduce long-term consequences, clean up spills and stains as soon as possible. Slipcovers provide easy removal and cleaning choices while protecting cushions and extending their lifespan. Benefits include making maintenance tasks simpler and reducing direct interaction with environmental factors.
Clean and Ready for Outdoor Relaxation
Caring for your outdoor cushions doesn't have to be that much work. By simply knowing the materials and using the proper cleaning technique, one can keep them nice the whole season. A little TLC goes a long way, and they will remain an oasis of comfort where plush surfaces and radiant colors are reflected from your outdoor seating. Remember to collect the needed supplies, read labels for specific care instructions, and then proceed with detailed washing and drying instructions. By following the steps above, you will be able to ensure that cushions last long, look good, and continue to portray an inviting outdoor space for years to come.
Frequently Asked Questions
-
Outdoor cushions should be cleaned regularly to maintain their appearance and longevity. It's best to perform routine cleaning every few weeks, especially during periods of heavy use or after exposure to potential dirt and stains. However, deep cleaning can be done at least once every season to tackle any stubborn stains and refresh the cushions thoroughly.
-
For effective cleaning, gather supplies such as soft-bristle brushes, mild detergents, white vinegar, and microfiber cloths. These tools help remove dirt and stains gently while preserving the fabric's integrity. Be sure to check the care label on your cushions for any additional recommended cleaning products based on the material type.
-
It's generally not recommended to use bleach on outdoor cushions, as it can damage fabrics and cause discoloration, especially on natural or delicately colored materials. Instead, opt for mild detergents and white vinegar, which are effective for cleaning without the harshness of bleach. Always test any cleaning solution in an inconspicuous area first.
-
To dry outdoor cushions, air drying is best. Lay them flat in a sunny spot to expedite drying, but avoid prolonged exposure to prevent color fading. If cushions have removable covers, remove and dry them separately. Ensure cushions are completely dry before use or storage to prevent mold and mildew growth.
-
Removable covers offer convenience and extended fabric life. They can be easily washed separately, allowing for thorough cleaning without affecting the cushion's interior foam or core. Removable covers also provide the opportunity to refresh the look of your outdoor seating space by switching out covers for different styles or colors.
-
Using a fabric protector spray designed for outdoor furniture can help repel spills and stains on your cushions. Additionally, storing cushions in weather-resistant containers or covers when not in use, especially during harsh weather conditions, will prevent exposure to elements that cause damage and wear over time.
-
Understanding the materials of outdoor cushions is crucial for choosing the appropriate cleaning method. Different fabric types, such as synthetic vs. natural, require varied care to maintain their look and durability. Knowing your cushion material helps ensure you use the right cleaning products and techniques, preserving their longevity and appearance.
All-in-One Cleaning Guide for a Fresher, More Comfortable Home
Step-by-Step Tips to Clean, Organize, and Maintain Every Part of Your Space
Best Way To Clean Gold Earrings
Best Way To Clean MacBook Screen
Best Way To Clean Vinyl Records
Can Washing Machines Be Stopped Mid-Cycle
Can You Wash Dry Clean Only Curtains
Cleaning Comfort Room Safety Precautions To Be Observed
Cleaning Pet Urine From Carpet
Cleaning Stainless Steel Fridge
How Technology Is Remodeling The Cleaning Industry
How To Get Rid Of Cigarette Smell In Car
How To Get Self Tanner Out Of Carpets
How To Make Your House Smell Like Laundry Detergent
How To Prepare Your Home For A Deep Cleaning Service
How To Prevent Allergies With Cleaning
How To Remove Carpets DIY Guide
How To Replace Carpets By Yourself
Magic Eraser To Spot Cleaning Walls
Open Windows To Deodorize Home
Removing Bleach Smell From House

How To Get Glitter Off Skin
Glitter can be fun until it’s time to clean it off your skin! If you’re struggling to remove glitter after a party or craft project, don’t worry. Our guide is here to help. We explore easy and effective methods to get glitter off your skin using common household items like baby oil, lotion, and tape. These solutions ensure you won’t have to scrub harshly or irritate your skin. With the right approach, you’ll be glitter-free in no time. Read on for all the tips and tricks to keep your skin smooth and clean without the sparkle!
Tired Of Glitter Sticking Around? Here’s How To Get It Off
DIY Glitter Removal Solutions For Smooth Clean Skin

Understanding The Glitter Dilemma
Glitter’s stickiness, coupled with static cling because of static electricity, makes it notoriously hard to get off one’s skin, but with gentle and educated technique, one can succeed where others fail.
Despite its glamorous look, glitter tends to stick around too long and becomes obstinately adhered to the skin. These problems with adhesion are aggravated by its makeup. Glitter gets adhered to things and is made up of very small shiny particles stuck together with a glue. Static electricity is more difficult to remove with it by making it stick to the skin. Despite its usage for arts and parties being so popular, stickiness is a problem with glitter.
Removing glitter is an activity that requires patience. Common remedies such as water and soap fail badly because glitter is famously stubborn. Rubbing or washing can even exacerbate the problem by distributing glitter rather than removing it. An understanding of attributes that confer stickiness to glitter enables effective dealing with it. Gentle removal procedures have the additional advantage of sparing your skin because they enable you to execute glitter removal. Effective removal procedures adoption is a function of an understanding of these attributes.
Effective Methods For Removing Glitter
Glitter is often difficult to remove because it sticks to your skin. Quick and efficient removal methods using common objects can facilitate removal.
Using Adhesive Tape
It’s a snap to trap glitter particles with Scotch tape. Choose a tape with medium stickiness—ordinary Scotch tape or masking tape is ideal. Press a piece of tape over sparkling skin gently, pressing down lightly but never applying enough pressure to be hurtful. Peel off the tape, and take a look at particles caught. Repeat as needed, changing pieces of tape to avoid redepositing the glitter.
Applying Oils Or Lotions
Glitter’s stickiness is loosened by oils and lotions. Use coconut oil, baby oil, or skin lotion. Simply spray a good volume on your skin with parts having glitter. Let it remain for a minute or so to loosen particles. Get off the oil or lotion with a soft cloth or cotton ball. You will find that the glitter lifts off with it but a smooth moisturized skin is left behind.
Washing With Soap And Water
Soap and water are a final rinse to get rid of any remaining particles. Choose a soft liquid soap to make sure your skin is not aggravated. Create a good size amount of suds with the soap and focus on glittery areas. Rinse with warm water a few times to get rid of all soap residue and glitter. Pat dry with a towel and inspect your skin to make sure any particles are gone. A repeat wash or a soft-bristled brush might be needed to finish.

Specialized Products For Glitter Removal
There are products available that can efficiently remove glitter from skin with a gentle treatment. These products are created to facilitate easy removal without irritating your skin.
Glitter Removal Wipes
Glitter wipes provide a convenient solution to pesky glitter. Pre-moistened with a solution that is supposed to eliminate the gooey aspect of glitter, these wipes can be used to lightly wipe off the skin to get rid of glitter particles. Glitter wipes from brands like Bodyography and Pixie minimize skin redness. Glitter is usually eliminated with a quick swipe off your skin.
If you frequently utilize glitter, consider having these wipes right with you. They’re perfect for being taken on-the-go because they’re easy to pack thanks to their portable size. After an event has taken place, utilize these wipes to ensure your skin is able to stay smooth with a comfortable feel
Makeup Removers
Makeup removers usually work wonderfully to take off glitter. Makeup removers with an oil-based makeup remover formula are often particularly effective. Oil dissolves the stickiness of glitter making removal a breeze. Because micellar water is so effective with dirt removal and debris from your face, you should also reap positive benefits. Oil-based and micellar water makeup removers by companies including Bioderma and Garnier have a long history of being effective but gentle cleansing products.
To use, massage the remover softly across the glittered area with a cotton pad. It will be left to remain for a moment before removal of the glitter. Scrubbing is avoided with this process, but moisture is retained throughout the skin.
Look for waterproof or long-lasting cosmetics to get maximum results because they typically desire long-lasting particles like glitter. It is achievable to maintain your skin’s integrity and ease removal of glitter by incorporating makeup removers.

Tips For Preventing Future Glitter Mishaps
Reduce excess glitter deposits with caution-based rules and optimized application procedures. Prevent glitter irritation and maintain a tidy appearance with easy preventative measures.
Choosing The Right Glitter
To ensure low skin attachment, choose your glitter carefully. Choose a larger cosmetic grade glitter instead, because it is less prone to adhering with time and tends to have a smoother texture. Don’t choose paper or decoration craft glitter because it is more prone to having sharp edges and adhering more permanently. To ensure low risk of flare-up, look for hypoallergenic or skin-safe claims.
Try biodegradable glitter. Not only is its vegetable-based construction less impactful for the earth, but often it’s also easier to wash off. Ethically responsible businesses such as Glitterevolution and EcoStardust carry green skin-care lines.
Use glitter gels or products with stickiness to limit the application of the glitter to where it is designated. In such uses, peeling can be restricted or reduced with less likelihood for the glitter to diffuse.
Preparing Your Skin Before Application
Prepare your skin to make a barrier to keep excess glitter from sticking to your skin. Pre-wash your skin so that oils or dirt would be eliminated to cause an uneven spread of glitter.
Use a thin layer of primer or moisturizer on your skin. Glitter adheres poorly to moisturized skin because it creates a smooth finish. Use oil-free products to make it last longer and avoid smudging.
Before applying glitter, set with a setting spray. Spray your face or area where you’ve designated glitter lightly, then let it dry completely. It creates an extra layer of protection, which makes cleanup after an event easier.
Apply a final setting spray to ensure the look is set after you’ve applied your glitter. It is a method to minimize fallout with your glitter makeup and to keep it intact. It is part of why buying good-quality sprays and primers is helpful to overall glitter removal and maintenance.

Avoid Common Errors
Use tape and oil-based products, don’t scrub, take your time, moisturize skin, test product, wash off residue to avoid further issues.
Effective removal of glitter is ensured by avoiding common pitfalls. Issues only get worse with the incorrect tool. Remove glitter effectively without irritating by utilizing soft, adherent removal solutions like tape instead of scratchy cloths or towels.
Because glitter is so clingy, water won’t suffice. Pre-wash with oil-based products to loosen adhesives. Another error is scrubbing too vigorously, pushing glitter further into the skin. To reduce skin abrasion, gentle patting movements should be employed instead.
Glitter is more difficult to apply if you rush. To be effective and to prevent messes, be sure to allow sufficient time for each step to the removal process. It is more difficult to remove later if skin preparation is omitted before application. Be sure to moisturize and rinse your skin so that you have a barrier present which will make a removal process easier.
Skin problems arise if product compatibility is overlooked. Always pretest new products on a tiny area of skin for a sensitivity check. Inadvertent neglecting of residue after initial washing welcomes additional issues. After initial removal has been done, be sure none is left behind by washing vigorously with soft soap.
When they are performed by a professional, these methods avoid the risks and effectively remove glitters.
Completing Your Glitter Clean-Up
It doesn’t have to be a painful process to remove glitter from your skin. You can conveniently remove glitter with sticky tape, oils, and specialty wipes without having to aggressively wash. Always prepare your skin beforehand before applying glitter, and choose products that will be easy to remove.
To have a smooth finish, avoid pitfalls such as only using water or scrubbing excessively but allow enough time to complete each process. You can enjoy having the sparkle without having to deal with lingering glitter by doing what is recommended here.
Frequently Asked Questions
-
Glitter adheres to the skin due to static electricity and its adhesive properties, which makes it cling stubbornly. Traditional methods like water and soap are often ineffective because they can't break this adhesive bond, and scrubbing can spread glitter further instead of removing it.
-
Start with adhesive tape to lift off the glitter particles gently. Follow up by applying oils or lotions such as coconut or baby oil to break the bond. Then, wash with gentle soap and water to ensure all residue is removed without irritating the skin.
-
Yes, there are specialized products like glitter removal wipes from brands like Bodyography and Pixie. These wipes are pre-moistened with a cleaning solution specifically designed to break down glitter's adhesive properties, providing a convenient and gentle solution.
-
Absolutely. Oil-based makeup removers effectively break down the adhesive grip of glitter on the skin while keeping the skin hydrated. Products like micellar water can also simplify the removal process without drying out the skin.
-
To prevent excessive sticking, use larger, cosmetic-grade glitter, and consider biodegradable options that are less tenacious. Properly prep your skin before application by cleansing, moisturizing, and using setting sprays to create a protective barrier.
-
Avoid using rough cloths, harsh scrubbing, and water alone as they can irritate your skin and push glitter deeper. Instead, use adhesive methods, oil-based products, and gentle dabbing motions. Allocate proper time to ensure thorough removal and skin safety.
-
Yes, always test new products for compatibility to avoid skin issues. Patch testing ensures you're not allergic or reactive to the product, which is crucial for preventing irritation, especially when dealing with add-ons like glitter.
-
Ensure thorough washing after initial glitter removal to eliminate any lingering residue. Use a gentle cleanser to clean your skin thoroughly but avoid over-washing to maintain skin moisture and barrier integrity.
All-in-One Cleaning Guide for a Fresher, More Comfortable Home
Step-by-Step Tips to Clean, Organize, and Maintain Every Part of Your Space
Best Way To Clean Gold Earrings
Best Way To Clean MacBook Screen
Best Way To Clean Vinyl Records
Can Washing Machines Be Stopped Mid-Cycle
Can You Wash Dry Clean Only Curtains
Cleaning Comfort Room Safety Precautions To Be Observed
Cleaning Pet Urine From Carpet
Cleaning Stainless Steel Fridge
How Technology Is Remodeling The Cleaning Industry
How To Get Rid Of Cigarette Smell In Car
How To Get Self Tanner Out Of Carpets
How To Make Your House Smell Like Laundry Detergent
How To Prepare Your Home For A Deep Cleaning Service
How To Prevent Allergies With Cleaning
How To Remove Carpets DIY Guide
How To Replace Carpets By Yourself
Magic Eraser To Spot Cleaning Walls
Open Windows To Deodorize Home
Removing Bleach Smell From House
House Smells Like Cigarettes
If your house smells like cigarettes, you’re likely desperate for a solution. Cigarette odors can cling to walls, carpets, and furniture, making your home feel stale. Thankfully, there are proven methods to remove these unpleasant smells for good. From professional cleaning tips to DIY hacks like using vinegar, baking soda, and air purifiers, you can transform your space into a fresher, more inviting environment. Whether you’re dealing with recent smoke or lingering odors from the past, this guide will help you tackle cigarette smells and make your home smell clean and fresh once again.
The Ultimate Guide To Removing Cigarette Odors
DIY Methods To Remove Smoke Smells From Your House

Understanding the Issue
Since more than 7,000 compounds from tobacco are deeply absorbed into surfaces, including walls, carpets, and HVAC systems, it is challenging to get rid of the lingering cigarette smoke odor in without house cleaning or repainting numerous areas.
The smell of cigarette smoke in your home can seem impossible to get rid of because tobacco smoke contains over 7,000 chemicals, according to the American Lung Association. Those chemicals seep into surfaces like carpets, upholstery, curtains, and walls. Because of this deep absorption, it’s hard to eliminate the smell without addressing multiple areas.
If a smoker lived in the house before or smoked for an extended period, the smoke particles penetrate deep into porous materials like wood and drywall. The particles embed themselves into those surfaces and create a smell that regular cleaning can’t get rid of.
Think about the HVAC system if the smell is throughout the house. Air ducts can hold onto smoke particles and circulate the smell when the system runs. Regular house duct cleaning becomes important in this situation.
Other common culprits contribute to the smell too. Nicotine and tar can stain walls and leave a visual reminder of the problem. Removing or repainting surfaces may need to be done along with cleaning to get rid of the smell.
Understanding the causes means understanding that the smoke smell isn’t a surface problem—it’s a complex issue that affects many areas of the home. Knowing the scope of the infiltration helps you come up with a comprehensive approach so you can have more effective solutions.
Causes of Cigarette Odor in the House
To properly handle the problem, you must comprehend why cigarette odor persists in your house. There are a number of reasons why this odor persists.
Indoor Smoking
The main cause of a home's cigarette odor is frequent indoor smoking. When you smoke indoors, smoke particles land on different surfaces. These particles tend to become embedded in porous materials, such as upholstery and carpets. Odors are retained on surfaces more strongly with repeated exposure. Smoke drifts toward regions with less ventilation when it is smoked indoors. Doorways and windows that remain closed restrict airflow and intensify odors. This concentration results in stronger, more persistent odors that are harder for the body to naturally get rid of.
Residual Smoke and Tar
Another important factor contributing to lingering cigarette smells is residual smoke, particularly from infrequent ventilation. Particles of smoke go into places that are difficult to clean or hide. These particles are persistently present in window frames and air ducts. Sticky residues are produced by tar chemicals found in cigarette smoke. These residues adhere to ceilings and walls. They eat away at paint or wallpaper over time, changing its hue. Surfaces that have this tar accumulation require extensive cleaning or replacement. Due to their small size, smoke particles can also enter less visible areas, like behind appliances. These particles continue to emit scents even after quitting smoking. To deal with these trapped particles, thorough cleaning methods are needed, making sure that every nook and cranny is cleaned.
Comprehending these particular causes aids in developing a focused strategy to get rid of cigarette odors. You can handle smoke odor removal more effectively if you know which products and regions are most impacted.

Effects of Cigarette Odor
Cigarette odor has far-reaching consequences, impacting your health and the quality of your indoor environment. Understanding these effects is crucial for taking informed action.
Health Concerns
Exposing yourself to cigarette odor in your home carries several health hazards. There are over 7,000 chemicals in cigarette smoke; most are toxic, and about 70 are linked to cancer. In addition, if you have asthma or other respiratory conditions, inhaling residual smoke particles may worsen symptoms, leading to increased coughing, wheezing, or difficulty breathing. It has also been linked to an increased susceptibility to respiratory infections and reduced lung function amongst children and the elderly, even when this exposure involves only long-term third-hand smoke. The elimination of cigarette odors can, therefore, further reduce potential health problems and provide a healthier atmosphere for everyone in a given home.
Impact on Indoor Environment
Cigarette smoke will grossly impact your personal indoor space in terms of air quality and even surface cleanliness. The odor from cigarette smoke can cling to walls, furniture, and curtains, giving a terrible and lingering smell. This makes these rooms less inviting and may even decrease the perceived cleanliness of your home. Poor air quality emanating from cigarette odor leads to irritated eyes and headaches as part of the problems. It will also lower the efficiency of your HVAC system in case the smoke particles are circulated; hence, there are potential maintenance challenges. Addressing cigarette odor is one of the acts related to improving indoor air quality and providing a fresh atmosphere in the home where comfortable and healthy living could be accommodated.

Methods to Remove Cigarette Smell
Removing cigarette smell from your house involves thorough cleaning and air purification. Addressing both aspects ensures a fresher living environment.
Deep Cleaning Techniques
Eliminate the odor directly at the source: clean the surfaces where smoke particles have accumulated. Smokiness could also be neutralized in this regard by swabbing down walls, ceilings, and other surfaces using a mixture of water and white vinegar. You should abstain from this solution in case said surface is sensitive; instead, it's best to use a commercial cleaner.
All fabrics, curtains, upholstery, and bedding are to be washed in hot water using a strong detergent. If odors persist, then a cup of white vinegar added to the wash cycle serves as a repellent. Steam cleaning of carpets and rugs or calling professional services offering complete cleaning will be done.
Sprinkle baking soda on carpets and upholstery, leaving them on for 15 minutes. Now, it is time to vacuum as much as possible. Baking soda absorbs odors; hence, this remedy is very effective yet very inexpensive.
Clean heavy surfaces and declutter. Remove and wash everything that might hold smoke particles in furniture, electronics, and decorations. For heavier odor removal, renting a heavy-duty ozone generator is available. Run it according to the instructions because it is really powerful.
Air Purification Solutions
Add air cleaning systems with HEPA filtration to remove smoke particles from the air. Make sure they are sized correctly for the size of the room they'll be operating in. Replace filters often as performance is lowered by clogged filters.
Set up activated carbon filters that effectively capture certain compounds responsible for cigarette smell. These filters are good at absorbing gases and volatile organic compounds. Use fans to improve air circulation within your home. Good air circulation can circulate the hanging smell that congregates in a pocket of stale air. Open the windows when the weather permits to ventilate properly. Adding fresh air will dilute the concentration of odors and supplement the extraction achieved in the other steps. Use a diffuser with scented essential oils, such as lavender or eucalyptus, to temporarily mask the odors while more rigorous cleaning takes effect.
Implement these techniques completely in your home for effectiveness. Continuous application of deep cleaning and air purification makes your house a fresher environment.

Preventive Measures
Implementing preventive actions can significantly reduce cigarette odors in your home. Fostering an odor-free environment starts with making crucial lifestyle changes.
Smoke-free Home Policies
To reduce lingering smells, make your house a smoke-free zone. Make sure that everyone in the house and guests respect the designated, unobstructed smoking places outside. By doing this, smoke cannot enter indoor areas. Effectively convey these guidelines to all, stressing the value of keeping the interior air clean.
To keep cigarette remnants contained, pick locations that are specifically designed for this purpose and include outdoor ashtrays. To reinforce smoking boundaries, think about putting up signs or reminders. To prevent smoke from floating indoors, plug holes in windows and doors to protect entry sites. Smokers can further lower the danger of indoor contamination by being encouraged to smoke away from windows and doors.
Regular Maintenance Tips
Cigarette scents can be avoided with regular maintenance. Open your windows to let fresh air into your house on a regular basis. To move residual smoke particles and spread air, use fans. This method lessens the concentration of odors and revitalizes your living area.
Curtains and upholstery, which frequently retain smoke particles, should be cleaned on a regular basis to maintain cleanliness. Every day, use a vacuum with a HEPA filter to collect and stop the re-release of dust particles from carpets. Instead of covering up scents, use vinegar-based cleansers to clean surfaces.
To stop smoke particles from recirculating within, it is best to change HVAC filters regularly, ideally every two to three months. Every year, check and clean the air ducts. Include houseplants like aloe vera or English ivy to naturally enhance indoor air quality because research indicates that they are effective at eliminating toxins. A healthier living environment can be efficiently supported by using these maintenance measures.
Closing the Smoke Chapter
It can be intimidating to deal with a home that smells like cigarettes, but you can solve the problem if you take the proper approach. You may restore the freshness of your living area by focusing on the source of the odor and using thorough cleaning methods. It's important to keep in mind how ventilation and air purification contribute to a clean environment. Relentless cigarette odors can be avoided by enforcing smoke-free regulations and performing routine maintenance. You may make your house healthier and more welcoming for you and your loved ones by implementing these ideas.
Frequently Asked Questions
-
Cigarette smoke odor can significantly degrade indoor air quality. The over 7,000 chemicals present in tobacco smoke can cling to surfaces and recirculate through HVAC systems, making the environment unpleasant and potentially harmful. Poor air quality affects comfort, leading to a less inviting space and possibly triggering respiratory issues, especially in vulnerable individuals.
-
Cigarette smoke odor persists because it penetrates porous materials, embedding deeply into carpets, upholstery, curtains, and walls. These materials absorb the odor, which regular cleaning may not entirely eliminate. Additionally, smoke particles might settle into the HVAC system, continually recirculating the smell in your home.
-
To effectively eliminate cigarette smoke odor, employ deep cleaning techniques. Use a vinegar solution for surfaces, wash fabrics in hot water with detergent and vinegar, and apply baking soda on carpets. Clean hard surfaces thoroughly and consider using an ozone generator for persistent odors. These methods can significantly reduce the smell.
-
Yes, air purifiers with HEPA filters and activated carbon can help remove cigarette smoke odor. They trap and neutralize smoke particles, improving air quality. Increase air circulation with fans and open windows for fresh air. Additionally, using essential oil diffusers can temporarily mask any remaining odors.
-
To reduce cigarette odors, establish smoke-free home policies by designating outdoor smoking areas. Ensure regular ventilation, clean curtains and upholstery frequently, and use HEPA-filtered vacuums on carpets. Change HVAC filters regularly and consider integrating house plants like English Ivy to naturally improve air quality.
-
Yes, vinegar and baking soda are effective in removing cigarette odor. Vinegar neutralizes odors when used as a cleaning solution for various surfaces. Baking soda absorbs odors, making it ideal for sprinkling on carpets and upholstery before vacuuming. These natural cleaners are safe and improve air freshness.
-
HVAC filters should be changed every 1-3 months, especially in homes affected by cigarette smoke. Regularly replacing filters prevents smoke particles from recirculating, helping to maintain better air quality. This practice is essential for reducing persistent odors and supporting a healthier indoor environment overall.
All-in-One Cleaning Guide for a Fresher, More Comfortable Home
Step-by-Step Tips to Clean, Organize, and Maintain Every Part of Your Space
Best Way To Clean Gold Earrings
Best Way To Clean MacBook Screen
Best Way To Clean Vinyl Records
Can Washing Machines Be Stopped Mid-Cycle
Can You Wash Dry Clean Only Curtains
Cleaning Comfort Room Safety Precautions To Be Observed
Cleaning Pet Urine From Carpet
Cleaning Stainless Steel Fridge
How Technology Is Remodeling The Cleaning Industry
How To Get Rid Of Cigarette Smell In Car
How To Get Self Tanner Out Of Carpets
How To Make Your House Smell Like Laundry Detergent
How To Prepare Your Home For A Deep Cleaning Service
How To Prevent Allergies With Cleaning
How To Remove Carpets DIY Guide
How To Replace Carpets By Yourself
Magic Eraser To Spot Cleaning Walls
Open Windows To Deodorize Home
Removing Bleach Smell From House

How To Get Rid Of Cigarette Smell In Car
Removing cigarette smell from your car is essential for a fresh and inviting interior. Whether you’ve recently quit smoking or just purchased a used car with lingering odors, getting rid of that stubborn smell can seem difficult. Fortunately, there are various methods to tackle the issue. From vacuuming and cleaning the upholstery to using odor-neutralizing sprays and air fresheners, you can eliminate cigarette odors for good. This guide provides step-by-step instructions to restore the freshness of your car’s interior, ensuring a pleasant ride every time.
A Breath Of Fresh Air Erase Cigarette Smell in Your Vehicle
How To Keep Your Car Fresh After Removing Smoke Odor
Various sections within a car can be infested with cigarette stink.Tar and nicotine found in smoke leave behind persistent odors that are difficult to remove from seats and carpets. Particulates become ingrained among such fibers every time you smoke. In addition to that, it is possible for smoke to seep into air conditioning units as well as vents, thus making odor removal even more difficult.
How often a vehicle has been smoked will largely determine how strong a smell is. Common usage enables residue to gather and seep deeper into fibres. Seats constructed with leather are subject to lingering odours despite possibly receiving less smoke than cloth.
How odors of smoke persist with indoor environments can be established by environmental parameters. As humidity breaks down products from smoke within an interior’s air and helps with stickiness to surfaces, humidities with high amounts boost odor strength. It might cause the vehicle to retain additional stink.
It becomes simpler to aim the correct cleaning procedures by being aware of these variables. Trapped remainders within air filtration systems and vents will be gone if you don’t aim to remove the smell from just the surface. You will be better able to eliminate cigarettes’ bad smell from your ride if you locate and remove each culprit.

Initial Cleaning Steps
Effective remedy to cigarette odor within your car is to deep clean your car’s interior. Such preparation opens the door to a good-smelling vehicle.
Removing Ash and Debris
Remove any dirt or ash that is apparent on your vehicle to address the surface reasons behind the smell of cigarettes. Start with a draining of ashtrays, if needed. When they’re completely outside the vehicle, scrub with soap and water and let air dry.
Use a soft brush or cloth to softly remove ash present around locations near consoles as well as cup holders. Be watchful to finer debris, including ash particles, which might be trapped within the crevices within your vehicle.
To remove persistent ash from tight spaces, use a compressed air canister or a portable mini vacuum. To clean surfaces use a cloth soaked with a mixture of water and soft detergent. It serves to remove sticky residues that could preserve odors.
Vacuuming the Interior
After getting rid of ash and dust, deep vacuum your vehicle to get rid of cigar odor from inner reasons. To get to every corner and crack, vacuum a vehicle with a hose attachment, paying particular attention to spaces such as beneath seats and mats.
To be able to cover every area fully, start by shifting seats forward and backward. Because they have a tendency to fall into seat edges as much as seat creases, pay particular attention to these areas.
Move to carpets as they tend to retain lingering odors from smoke. Utilize a brush attachment with your vacuum to maximize suction effectiveness and cleaning. Note that odors and smoke can also seep into the trunk region. Utilize your vacuum’s HEPA filter to capture smaller particles and avoid their recirculation into your vehicle’s interior air.
These first steps allow you to set a starting point for ridding your vehicle of odors from smoke from within.

Deep Cleaning Techniques
Rather than merely covering up cigarette odors, they eliminate their origin. In such a manner, deep cleaning strategies efficiently get rid of lingering odors. With such strategies, a cleaner car interior is guaranteed.
Using Baking Soda
When soaking up undesirable odors from clothing, odors disappear with baking soda. Evenly spread across carpets and chairs the baking soda. Keep it for a good fifteen minutes, or pungent odors, several hours.
To remove odors soaked with baking soda as well as baking soda itself, vacuum your entire vehicle once soaked. Repeat or let the baking soda remain overnight if odors stick. To continually soak up odors, an open box of baking soda can also be placed under chairs. Used with continuous cleaning, baking soda guarantees your ride is odor-free for a long time.
Applying Vinegar Solutions
Vinegar is a deodorizer because it breaks down smell-producing compounds. In a spray bottle, combine an equal amount of white vinegar and water. Spray a small amount of solution on carpets, seats, and other cloth-covered surfaces.
Don’t soak because too much moisture can cause mildew. Let the solution air dry itself. To get rid of residual odors, you might stick a bowl of vinegar in the car overnight. This technique ensures a conclusive method to getting rid of odors because it only works if done with additional cleaning.
Professional Cleaning Services
Using better machinery and methods than available at home, professional detailing guarantees complete odor eradication. In carpets and furniture heavily stained with dirt, steam cleaning is commonly included in services.
Some technicians also provide ozone treatment that efficiently takes care of odors resulting from smoke since it removes odors at their molecular stage. It may be a good idea to consider hiring a professional cleaning lady to handle the problem holistically if initial efforts yield nothing.
Professional detailing has a gigantic advantage to offer if you want a ride completely odor-free despite being a pricey investment.

Use of Chemical Odor Eliminators
Odor eliminators have chemicals which offer a convenient solution to get rid of lingering smoke odors from cars. Speciality products basically achieve long-duration freshness because they break down odor chemicals rather than covering up odor chemicals.
Choosing the Right Product
It is also important to select a good chemical odor eliminator that is suitable for your car’s interior’s particular needs. Choose products that have been labeled to remove smoke odor.
Tar and nicotine particles that get stuck in upholstery and airvents are efficiently broken down by several enzyme-based products. Make sure that the cleaner is also safe to be applied with all the surfaces found in your vehicle including the leather seats and upholstery.
Review consumer reviews and ratings of several products to determine how well they work with daily uses. As some treatments offer progressive odor removal with good scents, others may be more suitable for rapid repair with an after-scent-free solution.
Because some products work instantly and others may take a series of applications to achieve best results, also consider how long a treatment will last and what is most convenient for your preference and lifestyle.
Proper Application Techniques
Effective usage of chemical deodorizers is ensured by using the right usage procedures. To start with, one should completely wash the car’s interior to eliminate any dirt lying on the surfaces that can hinder usage efficiency.
One is guaranteed success with proper usage, hence ensure that one reads through the instructions properly on the labeling of the product.
When spritzing or misting, uniformly cover entire fabric surfaces such as seats and carpets with a prudent standoff to avoid over-saturation. When treating ventilation systems, start the vehicle with the air setting to spin the eliminator throughout the ductwork.
Apply a suitable quantity because too much product might cause excess moisture with prospective mildew growth.
To achieve an even distribution, place the product strategically in different locations within automobiles such as cup holders or behind seats if available as a gel or sachet. To achieve having the product work as intended, retain sachets in place for an agreed time. Check for reapplication regularly to ensure freshness.
Good application coupled with the right selection of a deodorizer brings a higher likelihood for a non-cigarette-odor car interior.

Preventive Measures
Minimizing one’s exposure to smoke from cigarettes within the car serves to keep a clean zone. It is easier to be able to hinder the progression of odors that stick if you take preventative measures.
Airing Out the Car
Smoke still present in your vehicle is diminished if you ventilate frequently. Open all the windows right away to allow for a flow of fresh air after smoking. For ventilation purposes, park where ventilation is excellent. Use fans if it is at all possible to increase air flow.
Using an air purifier with a HEPA filter will diminish smoke particles significantly in the air. Freshness can be preserved by positioning odor absorbers such as activated charcoal bags in strategic areas.
Regular Maintenance Tips
Routine upkeep prevents smoke particles from ever accumulating undetected. Firstly, vacuum carpets and furniture routinely to eliminate ash and debris. Ash trays must be cleaned after use to avoid lingering odors.
To avoid leaving a residue behind, regularly use an appropriate cleaner to wipe down panels such as dashboard panels and doors. Every few months replace cabin air filters to stop trapped smoke particles from being recirculated.
As part of maintenance checks, use specialist machines to clean vents to remove any accumulated smoke deposit. Regularly implementing these procedures, you should be able to maintain a comfortable home that’s fresh.
Completing an Emphys Free Vehicle
Although it may be difficult to eliminate cigarette odor from your ride, it is perfectly viable with the right strategy. You can eliminate lingering odors effectively by including the early stages of cleaning with deep-clean methods.
Each method is imperative to restore freshness if you choose to use DIY remedies such as vinegar and baking soda or contract a cleaner. Note that using the correct chemical odor removers and doing so properly will greatly aid your results.
Preventative maintenance ensures that your ride is also a comfortable place to be at all times. You will have a cleaner, comfier vehicle space if you invest regularly.
Frequently Asked Questions
-
Start by removing visible ash and debris. Empty ashtrays, clean crevices, and wipe surfaces with a mild detergent solution. Thoroughly vacuum the interior, focusing on seats, carpets, and hard-to-reach areas. These steps set the foundation for effective odor removal.
-
Use baking soda and vinegar solutions for deep cleaning. Sprinkle baking soda on seats and carpets, let it sit, then vacuum. For stubborn odors, repeat or leave overnight. Mist fabric surfaces with a vinegar-water mixture to neutralize smells.
-
Yes, professional services use specialized tools like steam cleaning and ozone treatments for efficient odor removal. Though they might be costly, they can effectively achieve an odor-free vehicle, especially when previous efforts haven't worked.
-
Choose enzyme-based odor eliminators labeled for smoke odor removal. Clean the interior before application, follow product instructions, and ensure even distribution across fabrics and ventilation systems for best results.
-
Absolutely. Limit smoke exposure, regularly air out the car, and use air purifiers with HEPA filters. Perform frequent vacuuming, clean ashtrays, wipe surfaces, and check cabin air filters to prevent odor buildup and maintain a fresh environment.
All-in-One Cleaning Guide for a Fresher, More Comfortable Home
Step-by-Step Tips to Clean, Organize, and Maintain Every Part of Your Space
Best Way To Clean Gold Earrings
Best Way To Clean MacBook Screen
Best Way To Clean Vinyl Records
Can Washing Machines Be Stopped Mid-Cycle
Can You Wash Dry Clean Only Curtains
Cleaning Comfort Room Safety Precautions To Be Observed
Cleaning Pet Urine From Carpet
Cleaning Stainless Steel Fridge
How Technology Is Remodeling The Cleaning Industry
How To Get Rid Of Cigarette Smell In Car
How To Get Self Tanner Out Of Carpets
How To Make Your House Smell Like Laundry Detergent
How To Prepare Your Home For A Deep Cleaning Service
How To Prevent Allergies With Cleaning
How To Remove Carpets DIY Guide
How To Replace Carpets By Yourself
Magic Eraser To Spot Cleaning Walls
Open Windows To Deodorize Home
Removing Bleach Smell From House
How To Remove Clorox Smell
If the strong scent of Clorox cleaner lingers long after you’ve finished cleaning, you’re not alone. While this powerful disinfectant is great at killing germs, its distinct smell can be overwhelming. Thankfully, there are easy ways to remove Clorox smell from your home. From increasing ventilation to using natural odor absorbers like baking soda or vinegar, you can quickly freshen up your living space. In this guide, we’ll walk you through several effective methods to neutralize that lingering Clorox odor and help your home smell clean—without the strong chemical scent.
Why Clorox Smell Lingers And How To Remove It
Say Goodbye To That Strong Clorox Scent
Understanding Clorox Smell
Because Clorox contains chlorine, it emits a noticeable smell. Chloramines, which give off a potent smell, are created when chlorine reacts with organic materials. This smell can persist in enclosed areas, detracting from the welcoming atmosphere. The presence of chlorine odor is typically reduced by reduced nasal sensitivity or enhanced air exchange.
To decide how to treat the Clorox odor, gauge how strong it is. A high presence indicates inadequate ventilation or a high concentration of chlorine. Smell retention is influenced by a number of factors, including air circulation, cleaning time, and room size. Odors linger longer in smaller areas with less airflow.
To properly manage communal places with lingering scents, identify them. Chloramine synthesis is increased by the organic matter residues commonly found after the bathroom and kitchen cleaning. To apply focused odor elimination techniques in certain regions, be aware of these interactions.
Reduce the amount of odor retention by using the right cleaning methods. Make sure there is enough airflow both during and after cleaning. Apply the right amount of Clorox to avoid overpowering odors. A fresh-smelling atmosphere is ensured by using fans or opening windows, which encourage odors to dissipate more quickly.

Steps to Remove Clorox Smell from Skin
Removing the Clorox smell from your skin can be straightforward with a few practical methods. You can use common household items to neutralize the odor effectively.
Using Soap and Water
Start by washing your hands with soap and warm water. Lather well and scrub both sides of your hands, between fingers, and at the roots of your nails for at least 20 seconds. Since the smell might be strong enough, repeating the process might be necessary because a single wash may not completely get it off. Finally, dry with a clean towel after washing.
For those tough odors, try a liquid hand soap with an antimicrobial action—the concept being that it might be much more capable of neutralizing the chlorine molecules. Also, add a light abrasive to take off extra skin. Focus on the areas of skin contacting the Clorox solution. After washing, apply a moisturizer to prevent dryness of skin from frequent washing.
Applying Vinegar Solution
Mix a solution of diluted vinegar: one part white vinegar to one part water. Soak a cotton ball or soft cloth in the solution and lightly apply it to affected areas. Let the solution sit on your skin for one minute before allowing it to be rinsed off with warm water.
Vinegar is a natural deodorizer; it balances the skin pH, thus helping to neutralize chlorine odor. If the smell is still persistent, then repeat; this should not be done more than once to avoid skin irritation. Follow this with a mild moisturizer to keep the skin hydrated. In such cases, it would be better to check sensitivity to vinegar on some small area of skin beforehand. In that way, you will be secured from possible bad reactions when working with the solution.

Eliminating Clorox Smell from Fabrics
Removing the lingering Clorox smell from fabrics involves targeted techniques to ensure freshness without compromising cleanliness. Follow these steps to effectively neutralize odors.
Pre-Wash Treatment
Cleaning is improved when the Clorox odor is addressed prior to washing. To get rid of surface residue, start by giving the fabric a quick rinse in cold water. Mix one part vinegar with four parts water to make a pre-soak solution. To counteract the chlorine stench, soak the fabric for at least half an hour in vinegar. Before soaking, check the colorfastness of a small section of fabric because vinegar can alter some dyes. Baking soda can also be used as a deodorizer. A half-cup of baking soda can be dissolved in water and soaked for half an hour, or it can be sprinkled straight onto moist fabric. Chlorine compound scents are captured and eliminated in this stage. Before washing, gently squeeze out any extra liquid from the fabric.
Machine Wash Tips
Selecting the right detergent and paying attention to settings are essential for efficient machine washing. Because hot water can exacerbate odors by releasing chlorine residues, choose a standard wash cycle with cold water. To help remove odors without adding more scents, use a detergent that doesn't include any fragrances. The efficiency of the detergent against odors that are difficult to get rid of is increased when half a cup of baking soda is added to the wash. To further eliminate any lingering chlorine smell, try adding one cup of white vinegar throughout the rinse cycle. Fabric softeners can trap odors instead of removing them, so stay away from using them. Check the fabric for any residual odor after washing. Repeat the washing procedure or prolong the rinse cycle if it is discovered. Mildew can cause unpleasant scents, so make sure your materials dry thoroughly in a well-ventilated location.

Removing Clorox Smell from Surfaces
Neutralizing the Clorox smell on surfaces requires effective methods to ensure a pleasant environment. Various household items and techniques can help achieve this goal without compromising the cleaning benefits of Clorox.
Natural Odor Neutralizers
Clorox odor on surfaces can be successfully eliminated by using natural odor neutralizers. A simple household item that works well for naturally absorbing odors is baking soda. After cleaning, lightly dust the impacted area with baking soda, leave it there for fifteen minutes, and then use a moist cloth to remove it.
Another good choice for getting rid of Clorox smells is white vinegar. In a spray bottle, combine equal parts water and white vinegar. After applying the solution, let it to air dry. Chlorine and vinegar's inherent acidity combine to lessen the odor and make the space smell better.
You can also add lemon juice, which has antibacterial qualities and a lovely fragrance. Dampen a cloth in the water after squeezing fresh lemon juice into a basin. Clean the surface to leave a hint of citrus. Lemon juice provides a nice contrast to the chlorine scent, albeit it might not totally eliminate strong odors.
Ventilation and Airing Techniques
Strong Clorox smells can be eliminated with the help of proper ventilation and airing measures. To promote natural airflow in the space and hasten the dispersion of the odor, open the doors and windows.
Ventilation can be improved by using fans. To remove residual odors, strategically place an oscillating fan or box fan to force air out of the space. Additionally, ceiling fans aid in air circulation, hastening the dispersion of odors.
Odor elimination is aided by natural sunshine. If at all feasible, let sunshine into the space. This will create a fresher atmosphere by breaking down the chemical components that cause scents.
Use air purifiers with activated carbon filters if there is inadequate ventilation. By effectively capturing and neutralizing chlorine particles, these gadgets can produce cleaner air and a cozier environment.
Clorox odors may be efficiently managed by using these natural neutralizers and ventilation strategies, keeping your surfaces and living areas smelling clean and inviting.

Preventing Clorox Smell in the Future
To avoid the persistent Clorox odor, consider using certain methods and alternatives. By adhering to guidelines and exploring substitutes, you can maintain a fresher environment without unwanted smells.
Proper Usage Guidelines
Use Clorox properly by following these guidelines to reduce odor. Dilute Clorox with water according to the label instructions to reduce the smell. Open windows or use fans while and after cleaning to let the smell air out. Use Clorox sparingly in small spaces like bathrooms or kitchens to not overpower the smell. Clean surfaces with water after using Clorox to remove excess chlorine that causes odor.
Wear gloves to limit skin contact with Clorox to reduce the smell on your hands. Use Clorox in short bursts, not long periods, to not let the smell linger. Store Clorox in a cool, dry place with a tight lid to prevent leaks or vapor release that can add to household odors. These tips will help you use Clorox properly without overpowering scents.
Alternatives to Clorox
If the smell is too much to handle, consider alternatives to Clorox. White vinegar is a natural disinfectant without the chlorine smell. Mix vinegar with water 1:1 for a cleaning solution. Baking soda is a mild abrasive that cleans and deodorizes without leaving a strong smell behind; use it on surfaces by sprinkling and scrubbing gently.
Hydrogen peroxide is a disinfectant. Use a 3% solution on surfaces and store it in a dark bottle to keep it effective. Lemon juice is a cleaner and natural deodorizer; it is used with water to clean surfaces or freshen fabrics.
Tea tree oil has antimicrobial properties; mix with water for a nice-smelling cleaning solution. Castile soap diluted with water is a gentle and effective cleaners. By using these alternatives, you can clean your home without the Clorox smell.
Bringing It All Back to Freshness
Managing Clorox smell is all about knowing the source and using practical solutions. By using common household items and good ventilation, you can neutralize the bad smell and have a cleaner, fresher home. Whether it's on your skin, fabrics, or surfaces, the key is to act fast and follow the instructions. And considering alternatives to Clorox will help you get the same clean without the strong chlorine smell. With these tips, you can have a welcoming, odor-free home and focus on the comfort and hygiene of your space.
Frequently Asked Questions
-
Clorox's strong odor is primarily due to its chlorine content. When chlorine interacts with organic matter, it forms chloramines, which have a potent smell. In enclosed spaces, this scent can linger, making it important to ventilate these areas during and after cleaning.
-
To eliminate the Clorox smell, ensure proper ventilation by opening windows and using fans. Use natural odor neutralizers like baking soda, white vinegar, or lemon juice on surfaces. For limited ventilation areas, consider using air purifiers with activated carbon filters.
-
If Clorox smell lingers on your skin, wash thoroughly with warm water and soap. For stubborn odors, use antimicrobial soap or a diluted vinegar solution. Moisturize afterward to avoid skin dryness.
-
Start by rinsing fabrics with cold water and vinegar before machine washing them with a fragrance-free detergent. Baking soda can further help deodorize. Avoid using fabric softeners and ensure fabrics dry completely in a well-ventilated area.
-
To prevent Clorox odors, dilute the product and ensure proper air circulation during cleaning. Rinse surfaces with water afterward. Consider using alternatives like white vinegar, baking soda, hydrogen peroxide, or lemon juice for cleaning without the chlorine smell.
All-in-One Cleaning Guide for a Fresher, More Comfortable Home
Step-by-Step Tips to Clean, Organize, and Maintain Every Part of Your Space
Best Way To Clean Gold Earrings
Best Way To Clean MacBook Screen
Best Way To Clean Vinyl Records
Can Washing Machines Be Stopped Mid-Cycle
Can You Wash Dry Clean Only Curtains
Cleaning Comfort Room Safety Precautions To Be Observed
Cleaning Pet Urine From Carpet
Cleaning Stainless Steel Fridge
How Technology Is Remodeling The Cleaning Industry
How To Get Rid Of Cigarette Smell In Car
How To Get Self Tanner Out Of Carpets
How To Make Your House Smell Like Laundry Detergent
How To Prepare Your Home For A Deep Cleaning Service
How To Prevent Allergies With Cleaning
How To Remove Carpets DIY Guide
How To Replace Carpets By Yourself
Magic Eraser To Spot Cleaning Walls
Open Windows To Deodorize Home
Removing Bleach Smell From House

How To Make Your House Smell Like Laundry Detergent
There’s nothing like the fresh, clean smell of laundry detergent, and it’s possible to bring that scent beyond the laundry room. If you love the feeling of walking into a room that smells as fresh as newly washed clothes, this guide is for you! From DIY scented solutions to clever air fresheners, there are various easy and affordable ways to ensure your entire house smells like freshly laundered linens. You’ll learn how to harness the power of laundry detergent scents with practical, simple hacks that make your home feel inviting and fresh all day long.
Effortless Ways To Make Your House Smell Like Fresh Laundry
Simple Scent Hacks For Lasting Freshness

In their provision of long-lasting, new fragrances that cater to a variety of consumer demands and multicultural trends, laundry detergent scents—created with a blend of manmade compounds and naturals—evoke a sense of freshness and comfort, lift mood, and turn homes into comfortable spaces.
Scenting detergents for laundry induce feelings of freshness and comfort. Such scents, seeking to recall the smell of clean clothes, tend to combine flower-like, citrusy, and refreshing ingredients. Such scents’ affective appeal is due to their power to evoke pleasant memories and associations with freshly cleaned clothes.
Science created for these perfumes involves a combination of natural and artificial chemicals. Perfumes are developed with utmost care by producers incorporating perfume oils and molecules that keep their persistence even after they dry as well as after storage. Even a long duration after clothes have been taken through a wash, such creating process maintains freshness impact.
For its part, science is complemented by psychology because one’s ability to perceive things is so influenced by smell that even one’s mood is affected. As one establishes a new and comfortable space with a good smell, one’s spirits lift. It is certainly true that you’ve learned to associate particular odors with relaxation or comfort. Such an experience is able to warm one’s home.
Strong consumer appetite for such perfumes compels manufacturers to introduce and broaden their lines. To accommodate individuals with diverse tastes, a number of manufacturers present perfumes that take their cues from nature or perfume trends.
Regional and ethnic influences frequently impact a brand’s choice of perfume. While some areas respect gentle, subtle perfumes, others choose a stronger, overwhelming perfume. Think about what suits your home’s look and available space as you add these perfumes.
Choosing products that release scents for a long period of time is needed to maintain the odor. Scent-enhancing additives, like dryer sheets or in-wash boosters, also can increase the odor and lift the mood of a home.
Choosing the Right Laundry Detergent Fragrance
Choosing a fragrance for your laundry detergent is important to bringing a new smell into your house. An excellent selection is a promise for a lingering and comfortable ambience that replicates freshness from a recent washing.
Popular Fragrance Options
There are a variety of options for scent substitutes to create various moods and feelings when one is picking a laundry detergent. Rose and lavender are a couple of flower perfumes that create a tranquilizing and calming mood. Perfume scents that stimulate a free-spirited mood, such as ocean breeze or misty mountain, may be a choice among some who want a light or airheaded vibe.
These types of fragrances are commonly advertised by manufacturers to be within reach to different sensibilities. For individuals who desire to select seasonally, some detergents contain odors that evoke particular seasons, such as spring flowers or winter evergreen. User comments and tag data provide information about a selection’s strength and duration to allow you to select one that is suitable for you.
Considerations for Sensitivities and Allergies
Selecting a detergent scent is a consideration for sensitivity to fragrances. Ingredients commonly present in scented detergents have the potential to lead to skin irritation or allergy. Hypoallergenic or non-scented lines, commonly dermatologist-tested with less irritant ingredients, suit sensitive skin.
It is possible to read off the ingredient list to detect potentially offending ingredients if allergies are an issue. Perfume-sensitive people would be advised to avoid phthalates and dyes commonly present in perfumed cosmetics and proven to magnify symptoms. There are a few companies that have vegetable or natural versions available that minimize risk.
Additional tips concerning good products include seeking doctors for recommendations and checking consumer reviews. Selecting detergents that are suitable for sensitive skin allows you to enjoy the freshness of a clean home but never have to compromise comfort or health.

Using Laundry Scent Boosters and Sachets
Laundry scent boosters and sachets effectively spread throughout your home with a fresh, clean laundry detergent smell. These products enable you to enjoy an effortless way to have a good smell constantly throughout various areas of your home.
Placement in Strategic Areas
The dissemination of scent is widened with sachets and smell boosters placed strategically around your home. To ensure that the odor is throughout the home, place them in air ducts to emanate the smell through ventilation. Store sachets in closets to keep garments smelling good between washing. Use them in linen closets to preserve the odor of freshly laundered sheets and towels. Place sachets near towels or in cabinets to add freshness throughout the bath. With their intentional placement comes a deliberate action to ensure the smell is sustained and a consistent pleasant odor is present.
DIY Scent Sachets at Home
You can also make your own perfume sachets using home things that are easy to find. Make sure that the tiny cloth pouches or bags you start with vent enough to release the smell. Fill some of these pouches with some baking soda and a few drops of your preferred washing detergent or laundry scent booster. Overall effectiveness is improved with baking soda as it cancels out odors and moisture. Add dry lavender or rose petals to the baking soda filling if you desire an earthier look.
Seal off the pouches or bags tightly and stash them in clothes closets, drawers, or anywhere else where you would prefer a constant fresh scent. With the DIY method, you can tweak to your heart’s desire to make sure that the smell is just to your preference.

Integrating Detergent into Household Cleaning Products
Putting detergent into home cleaning products brings the fresh warm scent of laundry to every part. Making some adjustments to your cleaning process, you have a more fragrant area.
Making a Multipurpose Cleaner
Put in laundry detergent to create a multi-purpose cleaner with a good lingering fragrance. Choose a scented liquid detergent with your preferred smell to start. Put one scoop detergent into two cups warm water in a spray bottle. Shake hard to fully mix ingredients together. Use to wipe down smooth surfaces such as kitchen appliances and counters. Be sure to spot test first if surfaces are painted or delicate.
The detergent surfactants effectively remove dirt and grime and deposit a fresh, clean odor. Add a few drops of an essential oil to complement the odor profile of your cleaner if you want a bolder odor. Lemon or lavender is good to pair with because they complement both the odor of the cleaner and its efficiency.
Enhancing Floor Cleaners
Add laundry detergent to your floor cleaner to give rooms a boost with the wonderful smell of clothes fresh from the washer. In a mop bucket, mix together 1 gallon warm water and 1/4 cup liquid detergent for hard flooring. For easy distribution, mix thoroughly. If flooring respond to soap-based treatments, mop vinyl, tile, or hardwood flooring with this mixture.
It has a pleasant smell and eliminates stubborn dirt and stains. Set up a deodorizing sprinkle for carpets. Combine one cup of baking soda with one teaspoon of powder detergent. Vacuum carpeted spaces after 15 minutes to eliminate excess residue.
Mixing detergent with floor cleaning not only rejuvenates surfaces but also constantly releases perfume to keep your home smelling fresh and clean.

Scented Candles and Room Fresheners
Scented candles and air fresheners offer a most effective way to impart a home with an odor of fresh clothes. Both offer a multi-purpose and convenient answer to perfuming.
Best Practices for Candles
Candles will make rooms smell like they’ve been freshened up with clothes if they’re done properly. Choose candles with zesty or flower fragrances, such as your preferred laundry soap.
Placement: To ensure that the smell diffuses large spaces, place candles in central spaces like living rooms or near doorways. To ensure that the smell remains constant, place them away from open door/windows as well as drafts.
Burn Time: To get an even wax pool and achieve maximum possible scent throw, burn candles for one to two hours. To avoid soot and gain a longer candle life, reduce the wick to 1/4 inch.
Safety: Never leave candles unattended. Keep them away from flammable materials on a hard heat-resistant surface. Always extinguish the candles after leaving the room.
Storage: Store away from direct sunlight and dust to preserve scent and color. Close unused candles with an airtight cover to preserve scent.
DIY Air Freshener Tips
Develop your own air fresheners to be able to manage ingredients as well as strength of a fragrance. These products are easy to use, economically priced, and adaptable.
Spray Freshener: In a spray bottle mix together 1 cup water, 2 tablespoons vodka or rubbing alcohol, and 10 to 15 drops of an essential oil. To create a duplicate laundry smell mix together oils of eucalyptus, lavender, or lemon. Shake beforehand, then spray spaces to be refreshed.
Gel Air Freshener: Add a few drops of food coloring to embellish after combining 1 cup water, 2 teaspoons gelatin, and 1 tablespoon salt. Fill with small jars and let set. These gel fresheners look beautiful in bathrooms or closets.
Scented Sachets: Assemble scented sachets by setting them out with muslin bags or pieces of fabric. Pack with dried flowers, herbs, or grain perfumed with essential oils like lemon or chamomile. Suspend sachets in closets or stash them in drawers.
Simmering Potpourri: Fill a pot with water, herbs, lemon or orange peels, and spices like cinnamon or vanilla. Warm fresh air fills the house with this air freshener.
Follow these tips to keep your smell regularly fresh and refreshing, with a scent reminiscent of just-laundered clothes.
The Finishing Touch to Freshness
It is possible and fun to turn your house into a paradise of fresh laundry smell. You can add a warm smell to any room with dryer sheets, essential oils, and advanced cleaning tactics. Welcome the magic of odor to boost your spirits and turn your house into a warm haven.
There is a scent to match your flair and preference, if you want something fresh, zestful, or perfumy. You can have a tidy and comfortable home setting that is homelike with home remedies and a smell sensibility policy of care.
All-in-One Cleaning Guide for a Fresher, More Comfortable Home
Step-by-Step Tips to Clean, Organize, and Maintain Every Part of Your Space
Best Way To Clean Gold Earrings
Best Way To Clean MacBook Screen
Best Way To Clean Vinyl Records
Can Washing Machines Be Stopped Mid-Cycle
Can You Wash Dry Clean Only Curtains
Cleaning Comfort Room Safety Precautions To Be Observed
Cleaning Pet Urine From Carpet
Cleaning Stainless Steel Fridge
How Technology Is Remodeling The Cleaning Industry
How To Get Rid Of Cigarette Smell In Car
How To Get Self Tanner Out Of Carpets
How To Make Your House Smell Like Laundry Detergent
How To Prepare Your Home For A Deep Cleaning Service
How To Prevent Allergies With Cleaning
How To Remove Carpets DIY Guide
How To Replace Carpets By Yourself
Magic Eraser To Spot Cleaning Walls
Open Windows To Deodorize Home
Removing Bleach Smell From House