
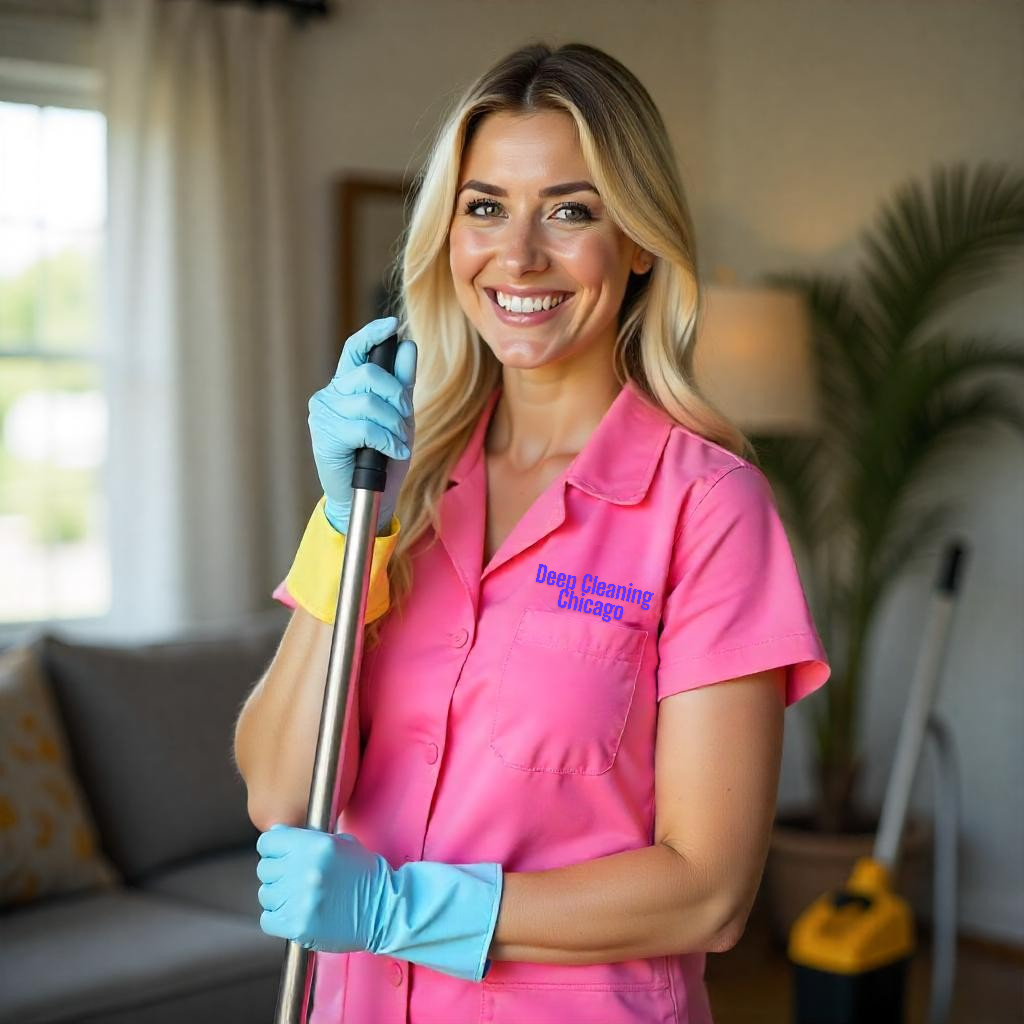
Magic Eraser To Spot Cleaning Walls
Using a Magic Eraser for spot cleaning walls is an effective and straightforward method to eliminate stubborn marks and stains. These cleaning sponges are made from melamine foam, which acts like super-fine sandpaper, allowing them to lift dirt and grime with just water. The unique open-cell structure of the foam traps particles, making it a powerful tool for tackling various wall blemishes, from scuff marks to crayon drawings left by children. The Magic Eraser is an invaluable tool in your cleaning arsenal, providing a chemical-free solution to maintaining a beautiful home environment.
How To Use A Magic Eraser For Spot Cleaning Walls
Effective Techniques For Removing Marks And Stains With A Magic Eraser
It is fundemental to a warm and cozy living space to maintain a clean wall. Like any space in your house, walls will inevitably accumulate scuff marks, spots, and dirt stains with repeated use. A Magic Eraser is an all-purpose scouring sponge that is probably the ultimate wall mark spot clean eraser. Here how you can spot clean wall marks with a Magic Eraser without chipping the paint off as well as how they can remove various spots and marks successfully.

Understanding Your Magic Eraser
Melamine foam is a quality scrubber that is utilize in making Magic Erasers. Dirt, grimes as well as stains can be scraped off by mud on surfaces by lifting. It can utilize on a host of other materials, but one has to be careful so as not to ruin sensitive as well as painted areas.
Advantages of Utilizing Magic Eraser
Versatility: It can be used on numerous surfaces such as walls, baseboards, countertops, etc.
Ease of Use: It requires small labour and can quickly remove marks and stains.
No Harsh Chemicals: It can actually do the job just with water, thus earning a place as the green cleaner.

How to Remove Marks and Spots with a Magic Eraser
Removal with a Magic Eraser of stains on walls is to be with a gentle hand and with a glide motion. These contain some of the highest tips on this page for getting the best for you.
1. Preparing the Site
Get the area ready that you will be cleaning up before you apply the Magic Eraser. Preremedy the wall by dusting it off with a soft dusting rag or a soft-bristled duster to get rid of loose particles and dirt. It will help avoid smudging spots and let you only treat spots.
2. Wet the Magic Eraser
Dampen the Magic Eraser with warm water. Wring out excess water so that it’s wet but not drippy. Too much water can dissolve off old paint or cause it to form bubbles.
3. Test an Unusual Spot
Test a non-obtrusive spot on the painting first and make sure it’s imperceptible before applying a painted area eraser. This holds doubly so in the case of dark or sensitive surface paints due to the fact that some paints do not accept an eraser’s roughness that well.
4. Push Gently
When you’re prepared to remove it, buff gently with an eraser in gentle circles around the stain. Do not buff too much; that will remove paint or stain by scraping off the top layers. You wish to pick up stain but do not damage what lies beneath.
5. Do It in Small Chunks
This will allow you to clean the area without breaking up the bits of wall that you’re saving. And this will allow you to monitor your progress and make adjustments in technique.
6. Wipe Clean After Use
Remove the area by wiping off with a wet cloth in order to remove any particles of dirt or particles left over from the eraser after having wiped out the mark. Nothing will then be left for dirt and grime to stick to in that spot on the wall.
7. Dry
Let the cleaned area set until completely dry before determining if further cleaning can be done. It will set more clearly if spots show up or if a spot-touching up will do.
8. Repeat if Necessary
You might be forced to repeat the efforts multiple times if you’ve stubborn stains that can’t be eliminated in a single shot; however, make sure you’re very much on your guard against over-scrubbing or being over-powerful later on.

Common Types of Marks and How to Remove Them
There are different types of marks that would necessitate a slight different approaches to using a Magic Eraser:
Scuff Marks: Scuff marks by furniture or shoe can typically be removed with an easy wipe by a damp Magic Eraser. Wipe gently over mark to lift up.
Crayon or Marker Stains: Scratches or drawings by kids with marker or crayon can be removed by a gentle Magic Eraser with some pressure in circles until they fade away.
Grease Stains: In kitchens where splatters of grease become an issue, sodden a Magic Eraser and gently scrub around the entire greasy area until squeaky clean.
Dirt Smudges: Streaks left by pet dirt or fingers can be removed with a wet Magic Eraser under soft pressure.
Walls Maintenance Tips
Once you’ve successfully cleaned your walls with your Magic Eraser, here are some tips regarding keeping things clean:
Dust Regularly: Dust your walls frequently with a duster or a microfiber cloth to prevent accretion.
Clean Up Immediately: Clean up spills or spots immediately as they happen, before they set allowing you to clean them up.
Washable Paint: In painting over an area again, use washable paints that were specially designed as easy cleaners.
To a Minimum: Leave areas where one would contact with hands on walls to a minimum, such as doorways, and shield with cover where you can.
Regular Inspections: Inspect your walls on a regular basis for new marks or staining that will necessitate some kind of repair.

The Complete Magic Eraser Spot Cleaning Walls Ultimate Guide
Spot cleaning walls with a Magic Eraser is ideal for a newly appearing house that is maintained clean without resorting to chemicals. These procedures—readying your area, testing your surfaces, soft pressure applied, and working in sections—will be able to help you eliminate various spots as well as stains without needing to make you compromise the strength of your wall.
Regular maintenance coupled with immediate response when spills or marks are made can make you enjoy walls that will look great for years without fault. Stain like shoe scuff mark or scribbling by the young ones when they use crayons can be erased with ease when you use a good tool like a Magic Eraser.
All-in-One Cleaning Guide for a Fresher, More Comfortable Home
Step-by-Step Tips to Clean, Organize, and Maintain Every Part of Your Space
Best Way To Clean Gold Earrings
Best Way To Clean MacBook Screen
Best Way To Clean Vinyl Records
Can Washing Machines Be Stopped Mid-Cycle
Can You Wash Dry Clean Only Curtains
Cleaning Comfort Room Safety Precautions To Be Observed
Cleaning Pet Urine From Carpet
Cleaning Stainless Steel Fridge
How Technology Is Remodeling The Cleaning Industry
How To Get Rid Of Cigarette Smell In Car
How To Get Self Tanner Out Of Carpets
How To Make Your House Smell Like Laundry Detergent
How To Prepare Your Home For A Deep Cleaning Service
How To Prevent Allergies With Cleaning
How To Remove Carpets DIY Guide
How To Replace Carpets By Yourself
Magic Eraser To Spot Cleaning Walls
Open Windows To Deodorize Home
Removing Bleach Smell From House

Egg Cleanse Side Effects
This is the cleaning of eggs process, which is a kind of offspring from the spirit world. This process eliminates all the types of bad energy present within the body and around the body. The eggs roll all over the body, taking in bad energies into itself. It will then determine how much energy it holds if left to stay inside water until cracks start forming. Still, some of the people on this drug will suffer from side effects such as stomach upsets, emotional episodes, dizziness or fatigue, or allergic reactions. Planning and thinking and having something in view enhance cleaning.
How To Handle Egg Cleaning Side Effects For A Better Experience
Egg Cleansing And What Is Its Importance
This is actually one of the spiritual exercises which many people do in the cleansing of their bodies to negative energy. Imagine that you are at a party and when someone comes inside with full negativity, can't you feel right in the change of energies already? The idea why an egg cleanse helps this negative energy way before it even reaches your spirit, it's like a spiritual vacuum cleaner!

During An Egg Cleanse, What Happens?
Basically, it’s quite simple. You are given an egg and you have to roll it all over your body from your head down to your toes. Some people have it that the egg takes any negative energy with you at the time of buying it. Then you place the egg in water and watch the shapes and patterns it will make when broken.
Common Side Effects Of Egg Cleansing
The side effects from egg cleansing are generally not likely, and include skin rash, itching, nausea, vomiting, and abdominal cramps.
Not all of the people who feel light and covered after an egg cleanse are going to be aware of these consequences. Here’s what you might experience:
Digestive Discomfort
Protein and fat, which isn’t the friendliest to some stomachs is good in eggs. After your cleanse, your body may feel a little queasy if you’re sensitive to these nutrients. This isn’t very proper, it’s like going out for a jog after taking a huge meal. For one, you might not want to be eating right before the process, if you know you tend to get upset stomachs for example.
Emotional Release
The process can occasionally make you touch feelings you never thought existed or even that might have been there in the first place. Have you ever cried during a movie? It’s freeing in the same way a piercing is, but its outcome, to some degree, can still be a shock. Since those feelings will be coming to the surface during or after the cleanse — you may wake up feeling depressed or anxious. You’ll want to have some tissues around you, and if not a friend to discuss things after, then a friend.
Fatigue
People who have just had the egg cleanse say they feel a little more tired than normal. Not only that, but you feel like you did good exercise, and, in a manner of speaking, you did—in a sort of way. The letting go of energies deplete as when you splash through mud before a formal occasion. After the cleanse make sure you let the body relax so the organs can chill out.
Allergic Reactions
If you knew you had an egg allergy, or even a sensitivity to, this ritual, unfortunately, won't be suitable for you, unless you’re ready for some serious discomfort, If you are not an egg person and want to practice an energy cleanse you also can practice it using your crystals or herbs.

Tips On How To Have A Good Egg Cleansing Experience
Let’s talk how to make the smoothest ride possible for your egg cleanse.
Prepare Your Room: Start the cleanse once you have made peacefulness around you. Light some candles, or a lot of incense, and treat it like a little home spa day. A little ambiance goes a long way now! You may also feel like you want to play some soft music or sounds about nature to create the feel.
Set Your Intentions: Think about what you want to let go of before you start rolling that egg all over your body. Is it work stress? Bad thoughts? If you could possibly make those feelings disappear through dark clouds coming out every time you roll your egg, that's a different deal. There is also that mental preparation that can have a lot to do with how that solid your body purifies feels.
Hydrate Yourself: Always drink lots of water before and after your cleanse. Hydration is your friend in this process because it flushes out toxins while everything else runs smoothly. It also helps in staying hydrated because if you are, it will lessen the digestive discomfort you feel afterwards.
Listen To Your Body: If ever during the cleanse you feel sick or overwhelmed by your emotions, stop. Like if you were stepping in muck before a very important event, fine to step back, regroup. It's going to be about your whole well-being, first and foremost!

The Stomach Cleaning After You Have Done The Egg Cleanse
Once you have completed your cleanse and tried to make sense of the readings (which can be rather liberating and rather confusing at the same time), it’s time to get rid of the egg. So don’t just throw it away! Some people argue that in order to get rid of it, one should simply flush it down the toilet or just get rid of it and never look back, so as not to let any negative energy back into your house.
Interpret Your Results
Break the egg on a bowl of water and look for which patterns may show. Many believe also that there are shapes that may resemble what kind of issues or energies you are releasing. Like:
Whites usually become foggy when the negativity does not have a chance of dispersion quickly.
Perhaps, you even have clear whites, indicating you removed bad energy.
According to them, yolk shapes can represent states of emotion: happy or sad.
Remember, interpretation is very subjective, so remember to trust your intuition.

Avoid Chaos In Your Life
It is as important to wash your favorite shoes every time that you step in the mud as it is to understand how to protect yourself against the negative energy.
Some regular cleansing is in order—through meditation, yoga, or another egg-cleaning ritual—about once every couple of months. The author continues arguing that to maintain the energy flow to be positive is to be positive.
Meditate—the kind of meditation you should do is up to you; it could be writing in a diary. This way, you don't get so caught up in life and can learn to exist outside of feelings and such. It can be almost like taking out the closet in the brain, as well, and having the individuals put back the crazy behavior.
Stay where you are with people who will encourage you to be a better person. It is like turning away from the muddy road during rain—negative thinking is like this, and it also taints the spirit. Stay with people who encourage you and not the ones who make you feel like you are losing your whole energy.
Personalizing Your Egg Cleansing Experience
For egg cleansing, there’s a lot of freedom, and it could have a pretty different effect. For many, it’s seen as a great way to combat stress and a negative outlook on life, but does it really work and do some people have side effects like stomach problems or mood swings or even allergic reactions? Create an atmosphere that’s calm and give your body plenty of time to listen. That’s why an open mind is important to bring to the cleanse as if you were starting a new chapter in a book. As with every other part of your body, this too needs to be taken care of emotionally after the cleanse as you would with your favorite shoes. If your life is coming to a point where you feel stressed and can’t cope, then maybe doing an egg cleansing and gently cleanse your spirit may help in getting back into balance with your own intuition.
Everything You Need to Know About Cleaning and Home Care
From Quick Daily Fixes to Full Deep Clean Guides, All in One Place
House Cleaning Made Simple With These Must-Know Tips
The Smart Way to Deep Clean Your Home and Save Money
How to Deep Clean Your Home One Room at a Time
New Year’s Eve Cleaning Superstitions and Facts
Street Cleaning Efforts That Make a Big Impact
Simple Ways to Cleanse Negative Vibes From Your Space
The Truth Behind the Egg Ritual for Aura Cleansing
Cleaning Routines Designed for Your Busy Life
Can Rain Really Help Clean City Streets
How an Egg Cleanse May Affect You Spiritually and Physically
Time-Saving House Cleaning Tips That Actually Work
Daily Cleaning Habits That Keep Your Home Looking Great
Why Cleaning Your Home May Help You Sleep Better
The Mental Health Benefits of a Clean and Clutter-Free Space
How Quezon City Measures Up in Cleanliness
Is the Philippines Taking Steps Toward a Cleaner Future
How to Maintain a Clean Home Without Harsh Chemicals
Keep Your Home Sparkling All Year With These Simple Tricks
What’s the Difference Between Spring Cleaning and Deep Cleaning
The Benefits of Regular Strata Cleaning for Property Management
Why Disinfecting High-Touch Surfaces Is Key to a Healthy Home
How Deep Cleaning Improves Your Health and Home Environment
The Link Between Deep Cleaning and Fewer Allergy Symptoms
Why Cleaning Can Help You Feel Calmer and Happier
The Best Way to Keep Your Home Clean Week After Week
Everything You Need to Know About Spring Cleaning

Cleaning Home From Bad Vibes
Removing negative energy from your house is more than just cleaning; it's about creating a welcoming and upbeat environment. To gain clarity, begin with decluttering to get rid of mental and physical burdens. Include purification practices such as sage smudging or salt application to cleanse the air. Natural light, colorful plants, and joyful personal touches can all improve your space. By creating thoughtful routines, you can make sure that your house stays a peaceful haven. You may create a welcoming environment that promotes peace and well-being in your day-to-day life by making a commitment to these behaviors.
Purifying Your Space From Bad Vibes
Building Your Home Into A Sanctuary Of Positive Energy
Your health depends on creating a peaceful living space. A person's house should be a haven that encourages calm, imagination, and optimism. Nonetheless, a lot of individuals feel "bad vibes" or negative energy in their homes, which can come from a variety of things, such as clutter, unresolved feelings, or even the energy of previous residents. This blog post will discuss practical methods for ridding your house of negative energy and turning it into a tranquil retreat.
Understanding Bad Vibes
What Are Bad Vibes?
The phrase "bad vibes" describes the unfavorable energy or sentiments that can permeate a space. There are several things that can affect this energy:
Emotional Residue: Stress, sadness, or unresolved disputes can leave an emotional mark on your surroundings.
Clutter: Mental clutter can result from physical clutter, which can cause discomfort and feelings of overload.
Environmental Factors: A bad atmosphere can be caused by bad lighting, offensive smells, or even the use of particular colors.
External Influences: The general atmosphere of your house may also be impacted by the energy of guests or nearby residents.

Recognizing the Signs
The first step in establishing a more pleasant atmosphere in your house is recognizing negative energy. Typical indicators include:
Constantly experiencing uneasiness or anxiousness
Having trouble resting or focusing
Tension or disputes among family members regularly
A feeling of weight or immobility in specific parts of the house
It could be time to tidy your space if you identify with any of these indicators.
Strategies For Cleansing Your Home
Clearing Out Your Area
Decluttering is one of the best ways to get rid of negative energy. It might be hard to feel at ease in your home when your surroundings are congested since a cluttered mind can result from a cluttered location.
Techniques To Declutter:
Set Aside Time: Decide to spend a particular day or weekend clearing out. Divide it up into smaller, more doable jobs.
Start Small: Take it one room or space at a time to get started. This will lessen the daunting nature of the process.
Sort the items into three groups: discard, donate/sell, and keep. Tell the truth about what you use and need.
Organize: After decluttering, arrange the things you're keeping in a way that makes them convenient and easily accessible.
Cleansing Rituals
After you've cleared out your area, think about adding cleansing practices to get rid of any residual bad energy.
Typical Cleaning Techniques:
Smudging: A traditional method of purifying areas is to burn palo santo, sweetgrass, or sage. Set a goal for clarity and positivity as you move through your house when it's smoking.
Salt Cleaning: Salt has a reputation for being a cleansing agent. Room corners can be dusted with salt and left for a full day before being vacuumed.
Sound Cleaning: To help release trapped energy, produce sound vibrations with bells, singing bowls, or chimes. Make noise as you move through each room.
Essential Oils: You can improve the mood and encourage relaxation by diffusing essential oils like eucalyptus, lavender, or lemon.

Bringing in Positive Energy
It's crucial to bring positive energy back into your house after cleaning it.
Tips for Bringing in Positive Energy:
Natural Light: To let in natural light during the day, open your blinds and drapes. Energy levels and emotions are both rejuvenated by sunlight.
Plants: Include indoor plants that enhance the aesthetics of your room while also promoting calm and better air quality.
Personal Touches: Use objects that make you happy, such as pictures of loved ones, pieces of art that speak to you, or mementos from special occasions.
Color psychology: Think about painting walls with hues that encourage creativity (like orange and yellow) or serenity (like gentle blues and greens).
Maintaining Positive Energy
Regular Cleaning Practices
Create consistent cleaning practices that extend beyond simple cleaning to ward off negative energy.
Recommended Practices:
Daily Tidying: To keep clutter from building up, spend ten to fifteen minutes every day cleaning up common areas.
Weekly Deep Cleaning: Schedule weekly time for deeper cleaning duties like dusting, vacuuming, and surface sanitization.
Monthly Decluttering: Make sure you aren't keeping things that aren't useful to you by going through your possessions once a month.
Mindful Living Practices
The positive energy in your house can be greatly increased by including thoughtful techniques in your everyday routine.
Mindfulness Techniques:
Meditation: Establish a special area for meditation where you can consistently engage in mindfulness exercises.
Gratitiude Journal: Keeping a gratitude notebook involves writing down the things for which you are thankful every day. This technique diverts attention from negativity.
Positive Affirmations: To strengthen positive views about your life and your surroundings, use affirmations.
Minimize Negative Influences: Pay attention to the news and social media you consume and how it impacts your energy and attitude.
Embracing Your Sanctuary
The clearing of negative energy from a house doesn't just involve cleaning but also filling it with the energy of joy and well-being. Your home can become a haven that nurtures your mental and emotional well-being when you become more aware of the sources of bad energy and put into practical practice techniques such as decluttering, cleansing rituals, and the placement of positive materials in your room.
Remember, it takes constant work and awareness to keep this nice environment going. You will be guaranteed that your home remains a serene and joyful place with mindful living techniques and regular cleaning for many years ahead. You deserve this serene living space, so take pleasure in the process!
Everything You Need to Know About Cleaning and Home Care
From Quick Daily Fixes to Full Deep Clean Guides, All in One Place
House Cleaning Made Simple With These Must-Know Tips
The Smart Way to Deep Clean Your Home and Save Money
How to Deep Clean Your Home One Room at a Time
New Year’s Eve Cleaning Superstitions and Facts
Street Cleaning Efforts That Make a Big Impact
Simple Ways to Cleanse Negative Vibes From Your Space
The Truth Behind the Egg Ritual for Aura Cleansing
Cleaning Routines Designed for Your Busy Life
Can Rain Really Help Clean City Streets
How an Egg Cleanse May Affect You Spiritually and Physically
Time-Saving House Cleaning Tips That Actually Work
Daily Cleaning Habits That Keep Your Home Looking Great
Why Cleaning Your Home May Help You Sleep Better
The Mental Health Benefits of a Clean and Clutter-Free Space
How Quezon City Measures Up in Cleanliness
Is the Philippines Taking Steps Toward a Cleaner Future
How to Maintain a Clean Home Without Harsh Chemicals
Keep Your Home Sparkling All Year With These Simple Tricks
What’s the Difference Between Spring Cleaning and Deep Cleaning
The Benefits of Regular Strata Cleaning for Property Management
Why Disinfecting High-Touch Surfaces Is Key to a Healthy Home
How Deep Cleaning Improves Your Health and Home Environment
The Link Between Deep Cleaning and Fewer Allergy Symptoms
Why Cleaning Can Help You Feel Calmer and Happier
The Best Way to Keep Your Home Clean Week After Week
Everything You Need to Know About Spring Cleaning

Cleaning Your Own Shoes
Getting around to cleaning your shoes is an often overlooked, but hugely important task, for the sake not only of your appearance, but the life of your footwear as well. Neat shoes are not only stylish; they also help maintain your feet healthier by curbing the development of dirt and germs. Learn how you can restore your shoes to appearance days of old using practical tips and techniques in this guide.
Why You Must Clean Your Shoes Today For A Better And Fresher Look?
Tips On How To Get Your Shoes Look New Again
Cleaning your shoes is one of the tasks usually forgotten, or maybe ignored. Do you really want to brush those sneakers or boots at the end of the day? Some don't. But trust me when I tell you that shoe cleaning doesn't have to be such a waste of a few hours of your day. In addition, good maintenance of your shoes not only makes them last longer, but it also makes you appear better and sharper dressed. See and learn how we can bring that sparkle back into your shoes!

Clean Shoes Or A Smelly Feet?
Why should you bother cleaning your shoes? Clean shoes are a great way to enhance the whole look when you are going for going to school, for an interview or to meet friend. Look at this, do you want to show up in a pair of sneakers that have seen better days or a pair of shoes that have been cleaned to the best of their ability? Many people see people who has clean shoes as professional and have attention to detail.
Health is also a concern. This is because shoes are used to catch dirt, germs and even fungi. Cleaning your feet should be done daily, which also prevent smelly feet. Do we not want to be known as the smelly feet type, aren’t we? Also, there is sustainability as well. Shoe maintenance makes it so that they do not get worn out easily, and since they will last long, they do not put pressure on the environment, and you will not have to keep on buying new ones.
Let's Get Started
Before we get into the details, you will need the following:
A small soft brush or an old toothbrush is just what you need when needing to get into small areas.
Maybe it's mild soap or detergent that doesn't scratch the shoes.
A warm water and blend this with your soap.
Microfiber cloths can also be used for drying and polishing processes.
Baking soda, it's a natural odor absorber – I swear by it!
Old newspapers or towels to drain and not lose the shape of your shoes.
A Friendly Guide To Cleaning Your Shoes
Prep Your Shoes
If you can, remove the shoelaces and insoles, so you'll be able to scrub every inch of your shoes.
Use the brush and sweep away debris on your shoes to avoid scratching your shoes when you scrub.
Time To Clean Those Kicks!
A warm water and a few drops of a very mild detergent to a bowl, then you're ready to start! Remember that you want it sudsing but not floating in sudsy bubbles.
Dipping your brush gently into the solutions and scrub your shoes. You can soak some of the stained areas, but avoid soaking leather or suede.
Don't forget to take a damp microfiber cloth and wipe your shoes down to remove any soap residue. This is the most important step because, let’s face it, nobody wants soap scum all over their favorite kicks!
For stinky odor, sprinkle baking soda into the shoes that have been used for some stinky purposes (that’s been all of us) and let sit overnight. It’ll absorb the unwanted odors.
Let’s Talk Drying
Stuff your shoes with old newspapers or towels to help them dry and keep their shape. Choose a good spot in a well-ventilated area that’s not in direct sunlight—sunlight fades colors and cracks materials.
Once everything is dry, a few hours later, put everything back together. They’ll look so fresh!
What To Do For Every Shoe Material
All shoes are not equal, here's how to approach any specific material:
Leather Shoes: Instead of using general detergent, use this type of leather cleaner. Just clean them and then lather the leather conditioner over them, that is how they become sharp-looking.
Suede Shoes: Water-repellent as sin! Use a suede brush to gently lift away the stains and dirt.
Canvas shoes: Usually can take so much scrubbing, and might survive a trip through the washer (check that care label first!).

Removing Tough Stains
Even the most favorite pair of shoes might have an occasional stubborn stain...and all the muddy moments at outdoor concerts, a cup of coffee all over your favorite pair of shoes, or rushing to class. Try these tricks for the really tough stains:
Cornstarch can be used to dust grease spots, then let it sit for approximately 30 minutes before brushing off.
If you have ink marks on canvas shoes, you can put rubbing alcohol on a cotton ball and dab at the mark until it’s gone.
If you scrub gently, you can easily bring out sticky dirt on rubber soles with an old toothbrush and a little baking soda.
This Is How To Keep Your Shoes Cleaner Longer
But with all that effort, those shoes still get dirty, don't they? Here are a few tips.
Clean them regularly, even up to once a month if you wear them that often.
For cleaning purposes, leather or suede should be sprayed with waterproofing sprays specifically tested for use on leather and suede, which repel dirt and moisture.
When not in use, store your shoes in a cool and dry place and away from the sun.
The Benefits Of Shoe Rotation
One often-overlooked tip is rotating your footwear. If you have multiple pairs of shoes that you love (and who doesn’t?), give each pair some time off between wears. This allows them to air out properly and reduces wear on any single pair.
Enjoy Taking Care Of Your Shoe Collection
Actually, it's a lot of fun (to be honest, rather than a chore!) cleaning out your shoes. There's something so satisfying watching the soles dig up all that stuff and come out of those busted ugly looking boots to sparkling beauties!
The next time you see those old dusty shoes just sitting in the corner of your closet, remember this guide! You can do it, it's that easy to keep your footwear fresh and stylish with just a little time and effort. You know clean shoes dress up an outfit, but you shouldn't forget that they can give you an extra bit of confidence. Why make it a ritual? Bust out the brushes of your favorite playlist and break it out – you've earned it for those shoes. It's not just about getting the job done right; it's about doing it the way that can hit real world ready to go with the confidence that you've looked after those kicks every time you walk out.

All-in-One Cleaning Guide for a Fresher, More Comfortable Home
Step-by-Step Tips to Clean, Organize, and Maintain Every Part of Your Space
Best Way To Clean Gold Earrings
Best Way To Clean MacBook Screen
Best Way To Clean Vinyl Records
Can Washing Machines Be Stopped Mid-Cycle
Can You Wash Dry Clean Only Curtains
Cleaning Comfort Room Safety Precautions To Be Observed
Cleaning Pet Urine From Carpet
Cleaning Stainless Steel Fridge
How Technology Is Remodeling The Cleaning Industry
How To Get Rid Of Cigarette Smell In Car
How To Get Self Tanner Out Of Carpets
How To Make Your House Smell Like Laundry Detergent
How To Prepare Your Home For A Deep Cleaning Service
How To Prevent Allergies With Cleaning
How To Remove Carpets DIY Guide
How To Replace Carpets By Yourself
Magic Eraser To Spot Cleaning Walls
Open Windows To Deodorize Home
Removing Bleach Smell From House
How To Clean Purse At Home
To keep your purse looking nice and lasting a long time, you must keep it clean at home. Cleaning at home will help keep your purse nice and in good condition for quite some time. First, of course, is the identification of what kind of material your purse is made from: leather, fabric, suede, or synthetic. Then comes preparing general cleaning materials in the form of a vacuum, soft cloths, or mild soap. After clearing every piece of debris from your purse and emptying it, spot all the stains and start cleaning them with the help of a proper solution. Use a leather cleaner and conditioner; for cloth, lightly use a soap solution. Proper care and storage will ensure that your purse continually looks like new. With the following simple steps, you'll be able to maintain your handbag in style and functional and as good as new for many years to come.
Home Care For Your Purse
Simple Steps To Keep Your Purse Fresh And Spotless
More than accessories, handbags are obligatory travelling companions that carry our daily essentials. Regularly cleaning them is imperative because they tend to accumulate dirt, stains, and odours with time. But maintaining a handbag is a daunting prospect with such a mix of different types and styles.
Distinguishing Different Types Of Purse Materials
Prior to starting to clean it is important to understand what your purse is made of. Each is unique and they all have different means of being taken care of. Below is a list of common parts of a purse:
Leather
As classy and classic as they come, leather handbags are also very prone to liquids and harsh chemicals. They require special treatment to preserve their texture and finish.
Fabric
Various types of cloth are used to manufacture purses. These include cotton, canvas, or artificial fiber. They can be machine-washed but should be cleaned spot to remove stains.
Suede
Suede leather is napped, soft, and hence prone to dirt and stains. Suede is also hard to clean because its texture is easy to destroy.
Synthetic
Man-made bags, including nylon or polyester bags, will be easier to clean and longer-lasting compared to their natural fiber versions. They will be more resistant to aggressive washing and frequently include stain-proofing.
Essential Cleaning Supplies
Regardless of what is the substance, right cleaning materials are what one should never be lacking to efficiently conduct the process of cleaning. The basic supplies checklist is listed as follows:
Soft cloths or microfiber towels
Mild soap or detergent
Water
Suede brush for suede handbags
Stain remover—suitable for purses crafted from leather
Small brush to reach most crevices
Brush-equipped vacuum cleaner, if preferred
Cotton swabs to reach restricted zones

Step-by-Step Cleaning Process
After establishing the material of your purse and preparing the materials you need, utilize these steps to effectively clean your handbag at home.
Step 1: Empty Your Purse
Empty your purse completely to prepare to start with the cleaning process. Inspect every pocket thoroughly for things you might have missed such as crumbs, makeup or receipts. This prepares you to be able to effectively clean your whole bag.
Step 2: Dusting and Vacuuming
Dust and dirt should be cleaned off gently from the exterior and interior of the purse with a soft cloth or with a vacuum cleaner’s brush attachment. Be especially attentive to corners and seams where dirt accretes. To prevent crushing delicate things, a vacuum cleaner with a low suction should be utilized.
Step 3: Remove Stained Spots
For Fabric Purses:
Prepare a Cleaning Mixture: In a bowl combine warm water with soft soap to make a washing solution.
Use the Solution: Gently pat stains with a towel soaked with solution. Avoid getting fabric wet.
Rinse: Remove any soap residue gently with a second damp cloth.
Dry: Before you reuse it, let the purse dry thoroughly.
For Leather Purses:
Use leather cleaner: Gently pat a soft cloth with a very tiny quantity of leather cleaner.
Wipe Down: Gently rub with a circular motion across leather’s face.
Condition: To maintain the suppleness of leather and prevent cracking, apply a leather conditioner after washing.
Dry: Keep it out of direct sunlight and heat to allow it to dry.
For Suede Purses:
Brush Off Dirt: Gently brush dirt off cloth with a suede brush.
Treat Stains: For stubborn stains, a tiny bit of white vinegar is applied with a cloth or a suede eraser.
Brush Again: To rejuvenate the texture of suede after it has been dry, brush it again.
For Synthetic Materials:
Cleaning solution: Mild detergent solution in warm water.
Clean: Wipe with a towel soaked with solution to clean exterior and interior surfaces.
Rinse: Get rid of any excess soap with a second damp cloth.
Dry: Let it dry fully.
Step 4: Clean Hardware And Straps
Consider your purse’s straps and hardware, such as zippers and buckles:
Metal Hardware: Metal parts should be cleaned with a soft cloth with water or mild soap.
Straps: Utilize the right cleaning technique outlined above, whether they be leather or fabric.
Step 5: Final Touches
Inspect your purse for stains or spots that require occasional spot cleaning after it has been cleaned and dry. Regularly spot clean those areas.
How To Keep Your Purse Clean After Cleaning
After a good cleanup, here are some more care tips:
Frequent Cleaning Practices
Keep in mind that a purse will only look good if properly maintained with a routine cleaning. You can do the soft cleaning once a month and deep cleaning several months apart, depending on how you use it.
Keep Things Safely
When you’re not using it, store the handbag in its dust bag or box to minimize exposure to dust and sunlight. It should never be hung using straps because that will cause it to stretch eventually.
Don’t Overload
Carrying too much with you may be overstressing your purse’s stitches and construction. Just carry essentials to preserve its integrity and shape.

Treating Specific Stains
Various stains require several different ways to be effectively removed. There are some stains that you will commonly come across:
Ink Stains
For fabric handbags:
Use rubbing alcohol immediately on the stain, using a cotton swab to apply.
Wash with cold water after treatment.
For leather purses:
Rub softly with rubbing alcohol on a cotton ball, being very cautious not to soak the leather.
Food Stains
For spills on cloth handbags:
Excess food should be eliminated immediately with a paper towel.
Rinse with water and soft soap.
For leather:
Avoid soaking and wipe off lightly with a damp cloth then dry.
Oil Stains
For oil stains on cloth
For several hours after applying cornstarch or talcum powder, let the stain stand before rinsing off.
For leather:
Use some kind of leather cleaner to remove oil.

Revive Your Handbag At Home
You don’t have to turn home cleaning of your purse into an insurmountable challenge; if you have access to information and protocols specific to a type of material, you’d be able to ensure its longevity and appearance.
You’d be able to keep your handbag sparklingly clean and pristine-looking through a few years to come with the assistance of such holistic guidance that encompasses learning about various types of materials, preparing specific equipment, conducting meticulous cleaning procedures, dealing with specific stains, and utilizing long-term maintenance techniques.
It is worth making an effort to take good care of your purse since it adds to its beauty besides enhancing its longevity. Get pleasure from cleaning!
All-in-One Cleaning Guide for a Fresher, More Comfortable Home
Step-by-Step Tips to Clean, Organize, and Maintain Every Part of Your Space
Best Way To Clean Gold Earrings
Best Way To Clean MacBook Screen
Best Way To Clean Vinyl Records
Can Washing Machines Be Stopped Mid-Cycle
Can You Wash Dry Clean Only Curtains
Cleaning Comfort Room Safety Precautions To Be Observed
Cleaning Pet Urine From Carpet
Cleaning Stainless Steel Fridge
How Technology Is Remodeling The Cleaning Industry
How To Get Rid Of Cigarette Smell In Car
How To Get Self Tanner Out Of Carpets
How To Make Your House Smell Like Laundry Detergent
How To Prepare Your Home For A Deep Cleaning Service
How To Prevent Allergies With Cleaning
How To Remove Carpets DIY Guide
How To Replace Carpets By Yourself
Magic Eraser To Spot Cleaning Walls
Open Windows To Deodorize Home
Removing Bleach Smell From House

Floors Smell Like Dog Urine
Dealing with dog urine odors can be a challenging task for pet owners, but understanding the underlying causes is the first step toward effective elimination. Dog urine contains various compounds, including ammonia, uric acid, and bacteria, contributing to its characteristic and often unpleasant smell. The odor can intensify based on several factors, such as your dog's diet, health conditions, and environmental influences. To effectively eliminate these odors from your floors, immediate cleanup is crucial. Using enzyme-based cleaners specifically designed for pet stains can break down odor causing compounds. For persistent smells, deep cleaning techniques such as steam cleaning carpets or utilizing specialized hardwood floor cleaners may be necessary.
How To Eliminate Dog Urine Odors From Your Floors
Understanding The Causes Of Dog Urine Smells
Dog’s urine maintains that crappy smell for a significant period of time. Dog’s urine chemically constitutes several compounds such as ammonia, uric acid, as well as bacteria compounds. It was established that ammonia concentration proved to be the primary reason for that horrible smell as well as that pungent smell since it widely constitutes dog’s urine. When fresh, that aroma can be soft but turns considerably great after the occurrence of decomposition of urine with the degradation of the urea molecule towards ammonia as well as other compounds.

Nutrition and Diet
The composition that a canine will get as food will determine what their urine will pong like.
Diets that contain protein will provide more quantities of urea to the urine that after breakdown will give a pungent ammonia-like scent.
These types of smells are what a healthy canine diet with plenty of quantities of drinks will lower.
Diseases
It will on occasion effect urinary excretion such disease conditions, as much so as your own dog’s urine smell.
Infections of the urinary tract as kidney disease would create alterations in chemical makeups found in your pet’s urine and will increase smell.
Transport immediately any unexpected alterations that had been with your canine’s scent as that with other symptoms to the vet.
Natural Factors
Bad urine odor is a result of urine warmth and moisture.
Since one possesses great moisture, water held in moisture can revive left uric acid crystals after a bath which bad urine odor will re-appear.
Also, absorbent flooring like carpets as well as wooden flooring will absorb piss so that it will be unpassable on removal grounds.
Preparing for Cleaning
Odors from untreated or poorly treated dog smells tend to re-appear after they’ve been removed.
It tends to be a result of residual uric acid crystals after bleading off their held-in liquids.
These can be re-activated once they encounter water or even moisture, as this will reinstate the stench.
Preventative maintenance to get long-lasting elimination the smells is by regular removal by pet stain-resistant solutions.

Efficient Dog Urine Smell Elimination Methods
It is only through applying effective cleaning products and procedures to flooring that a person is able to remove such unpleasant odors of dog urine.
Quick Cleaning
Wipe up excess urine: Wipe up as much urine as you can with cloths or paper towels as soon as a spill happens.
Utilize an enzyme cleaner: Enzyme-containing pet-odor removal products can be used successfully. They contain enzymes that digest the uric acid and don’t unsettle it like some do.
Preparations
Making a cleaner yourself is ridiculously easy:
Put an equal amount of white vinegar as water in a bowl.
This medicine to be used on the affected region was to be left for a moment after applying it, then wiped off with a clean towel.
Deep Cleaning Technologies
It can be steam cleaned as rugs can be steam cleaned and a pet stain specific hardwood floor cleaner will make a big difference.
Dry thoroughly after washing to prevent moisture from re-activating stink-causing chemicals that may linger.

Deep Cleansing Techniques
It might be worthwhile steaming rugs or carpets if smells of urine might have set deep.
Steam cleaning doesn’t actually remove stains itself, although it will sanitize a floor by eradiicating germs.
Hardwood floor specialty cleaners: In a hardwood or laminate floor, use specialty cleaners that are specifically intended for this type of flooring that will remove pet stains but will not ruin the finish.
Dry extensively: Dry the floor after a clean to make sure moisture doesn’t revive stink-causing molecules. Get air circulating with fans or windows.
How to Prevent Future Odors for Dog Owners
Regular Cleaning: These place the majority of his time. It will be a good idea to clean these regularly. Regular vacuuming and mopping help cut down on the smell.
Appropriate Training: Provide a suitable training of a canine to reduce indoor accidents. Suitable training instills a sense of good manners.
Watch Your Diet: You can reduce the strength of the stink with a diet change for your canine; discuss some forms of diet that will help with your canine’s health as well as stink elimination with your veterinarian.
Hydration: Encourage your dog to drink to dilute his urine and reduce odor intensity. You then choose a specific location outside to potty and attempt to get your dog to go on it repeatedly.

Preventing Future Odors – Instructions for Dog Owners
Regular Cleaning: Establish a routine for cleaning regularly where your dog spends most time.
Appropriate Training: Ensure that your canine is closely trained in order to reduce messes indoors.
Diet Tracker: A dietary shift might reduce urine odor coming from your dog.
Hydration: Do more drinks for your canine lower the concentration of the odor in the urine.
All-in-One Cleaning Guide for a Fresher, More Comfortable Home
Step-by-Step Tips to Clean, Organize, and Maintain Every Part of Your Space
Best Way To Clean Gold Earrings
Best Way To Clean MacBook Screen
Best Way To Clean Vinyl Records
Can Washing Machines Be Stopped Mid-Cycle
Can You Wash Dry Clean Only Curtains
Cleaning Comfort Room Safety Precautions To Be Observed
Cleaning Pet Urine From Carpet
Cleaning Stainless Steel Fridge
How Technology Is Remodeling The Cleaning Industry
How To Get Rid Of Cigarette Smell In Car
How To Get Self Tanner Out Of Carpets
How To Make Your House Smell Like Laundry Detergent
How To Prepare Your Home For A Deep Cleaning Service
How To Prevent Allergies With Cleaning
How To Remove Carpets DIY Guide
How To Replace Carpets By Yourself
Magic Eraser To Spot Cleaning Walls
Open Windows To Deodorize Home
Removing Bleach Smell From House

House Smells Like Marijuana
Do your houses smell like marijuana? You are not the only one-such a problem is quite common and could be as a result of personal use or rooms with previous occupants. But, the good news is that there are some preventive measures that you can take to get rid of cannabis smell from your home and breathe fresh air again, from letting fresh air in to cleaning and using natural odor eliminators, here are ways to get rid of cannabis smell from your home. Now, let’s find out how you can make your home welcoming and odor-free, without having to smell unpleasant odors.
What To Do When Your House Smells Like Weed?
Ways To Get Rid Of The Odor Of Cannabis In A House
There is nothing worse than a home that smells like marijuana especially for the marijuana smoker or anyone who wants to have fresh air in their homes. If you are in this position, don't worry you are not alone, almost everyone would have had to smell the scent of cannabis. It can stay in homes for a long time but how can you fix it? Here are the tips to give your home a fresh scent again.

Why Your House Could Have The Odor Of Marijuana?
What makes marijuana have a strong smell? Cannabinoids are chemical compounds from the family of terpenes, which gives different strains of cannabis their specific fragrance. Terpenes, when smoked, are emitted into the air, and this is what gives the plant the peculiar smell. This odor can stick on clothes and other places, which can be a problem.
At some point, you may be wondering if the smell is from your house or your neighbors. For places where use of Marijuana is allowed, it can be from a house around you, or maybe you have had visitors who violated your no-smoking rule, and there goes up the smoke!
Guide To Help You Get Rid Of The Odor
Now that we have looked at why your house smells like weed, here are some ways of getting rid of the smell from your house.
The simplest and most effective way to start is by airing out your space. Open windows and doors, letting the fresh air penetrate into the area. If it's a nice day outside, keep them open for several hours. This works wonders because marijuana smoke disperses easier than tobacco smoke. Who doesn't love a little fresh air?
It could be a game changer for you to invest in an air purifier. Be on the lookout for HEPA filters or activated carbon, especially designed for removing odor. One or two of them running could cut down a significant amount of lingering smells.
Marijuana smoke settles everywhere, so give your house a really good cleaning. Use a mixture of vinegar and water on surfaces such as countertops, tables, and even walls. Vinegar can counteract smells and is much gentler than other chemicals. Remember light fixtures and dust traps odor, so clean those at the same time.
Remember that the carpets, curtains, and upholstery shouldn't be forgotten either. Fabric can hold onto odors very easily and quickly, especially over time. Steam clean carpets or spray fabric refresher sprays that target tough smells. Toss curtains in with other washable items into the washing machine with a bit of baking soda.
If you have cushions or throws on the couch that have absorbed the smell, take those outside for a little bit of sun. UV rays can naturally help destroy smells!
If you are trying to find natural remedies, just put bowls of baking soda or activated charcoal around your house. Both those things are odor absorbers. You can also steam water with lemon slices and herbs like rosemary at the stove for a fragrant smell.
Another good option would be essential oils. A few drops of lavender or eucalyptus oil in a diffuser can replace that lingering smell with something much more inviting.
If the smell is still now removed, maybe it is time to get the professionals in. There are businesses that do specialize in removing marijuana smells from homes.
But the problem can be also due to the heating and cooling system. Change your filters on a regular basis—this easy step can make a huge difference in improving air quality.
How Can You Prevent Future Odors?
Now that you know how to remove the smell of marijuana from your home, it is high time you learn how to prevent it from coming back again.
If you entertain guests or if you are a tenant and let other people occupy your house, you discuss and define clearly your policy on smoking. That is perfectly valid if you do not like having smokers smoke in your house or visitors smoking because they want fresh air.
If smoking is permissible on your property, provide an outdoor space in which the guests can smoke their marijuana without interfering with the indoor air. It can be as simple as setting chairs and a sofa on a balcony or patio.
The simplest fix should still be on hand in your household to cover the odor until you can finally be out there getting a good, thorough cleaning. But, as will become apparent, these aren't long-term fixes that might help to replace a deep cleaning!

It's Time To Move On!
After all of these, and the smell still stays at your house, maybe it's time to look for a new home! It may not be ideal for everyone but there's just something freeing and refreshing on getting a fresh start in a new environment. It's okay!
Maybe, you can clean your house before deciding to pack away!
A Fresh Home Even With The Marijuana Smell
There is no need to live in a house with a smell of marijuana all the time. There are ways that can be done, and you can have your space back again. It is always okay to want a clean and refreshing home.
So the next time you feel that scent is on your living room, either relax and enjoy the smell, or do something. However, whichever way, you decide to ventilate your house or get professional help, here are tips on how you can prevent your home from smelling from it, and how you can always feel comfortable and odor free even from the smoke smell of marijuana.
Finally, it is the ambience and if there is anywhere to create it then it has to be a place that elicits happiness. But would that not be the very reason as to why home is home, anyways?
All-in-One Cleaning Guide for a Fresher, More Comfortable Home
Step-by-Step Tips to Clean, Organize, and Maintain Every Part of Your Space
Best Way To Clean Gold Earrings
Best Way To Clean MacBook Screen
Best Way To Clean Vinyl Records
Can Washing Machines Be Stopped Mid-Cycle
Can You Wash Dry Clean Only Curtains
Cleaning Comfort Room Safety Precautions To Be Observed
Cleaning Pet Urine From Carpet
Cleaning Stainless Steel Fridge
How Technology Is Remodeling The Cleaning Industry
How To Get Rid Of Cigarette Smell In Car
How To Get Self Tanner Out Of Carpets
How To Make Your House Smell Like Laundry Detergent
How To Prepare Your Home For A Deep Cleaning Service
How To Prevent Allergies With Cleaning
How To Remove Carpets DIY Guide
How To Replace Carpets By Yourself
Magic Eraser To Spot Cleaning Walls
Open Windows To Deodorize Home
Removing Bleach Smell From House
Cleaning Pet Urine From Carpet
Cleaning pet urine from carpets is no easy task for any pet owner, but it is very doable with the right attitude. Speed plays a crucial part because the sooner you clean the stains, the easier it becomes to eradicate them. After that, blot up all excess liquid. To get the smell off, mix vinegar with water. An enzyme-based cleaner does quite well in disposing of stubborn stains. And don't forget to sprinkle baking soda afterward, which will help absorb any lingering odors. By such practical means, you will keep your house clean and fresh while your pets are at home and welcome.
Mastering Carpet Care From Pet Urine
Effective Strategies To Remove Urine Stains And Odors

Pet owners may find it difficult and upsetting to deal with pet urine stains on carpets. These stains not only detract from the look of your flooring, but if left untreated, they may also cause offensive smells and even health problems. We will examine efficient techniques for removing pet urine from carpets, giving you the information and resources you need to bring your carpets back to their former splendor.
Understanding The Problem
The Reasons Why Pet Urine Is Hard To Clean
Uric acid found in pet pee has the ability to crystallize and stick to carpet fibers. Because of this, it is especially challenging to remove entirely. Furthermore, urine may seep into the carpet padding and even the subfloor underneath, leaving a lingering odor even after the stain has been cleansed. For efficient cleaning, it is essential to comprehend the characteristics of pet urine.

The Value Of Quick Action
Your chances of getting rid of a pet pee stain completely increase with the time you take to treat it. Older stains might set in and become more difficult to remove, while fresh stains are much easier to clear. Take immediate action to reduce damage if you find out your pet has been in an accident.
Step-by-Step Cleaning Process
Step 1: Gather Your Supplies
Gather all the things that you need before you begin cleaning. You will need:
Use either paper towels or clean, white rags.
A can of spray
White vinegar
Baking Soda
Dish soap, ideally without fragrance
Water
An enzyme-based cleanser is recommended but not necessary.
A vacuum
Step 2: Blot The Stain
Act Fast: The instant you notice the stain, grab a fresh cloth or paper towel.
Blot, Don't Rub: Gently blot the area to absorb as much liquid as possible. You will force the urine deeper into the carpet fibers if you rub.
Continue: Blotting should be continued until no further liquid is absorbed.
Step 3: Get A Cleaning Solution Ready
In a spray bottle, combine equal parts white vinegar and water to make a DIY cleaning solution. An enzyme-based cleanser made especially for pet stains is an alternative.
Step 4: Use The Cleaning Agent
Spray generously: Cover the stained area with your cleaning solution.
Let it Soak: To break down the urine chemicals and allow the solution to permeate the fibers, let it sit for five to ten minutes.
Step 5: Repeat Blotting
To absorb the cleaning solution and any leftover pee, dab the area once more with a fresh cloth or paper towel. Continue doing this until no more liquid is absorbed.
Step 6: Use Water To Rinse
Rinse the area gently with clean water to get rid of any remaining cleaning solution. Wipe off any extra moisture using a fresh cloth.
Step 7: Use Baking Soda
Sprinkle Generously: After the area is clean and somewhat damp but not soggy, generously sprinkle it with baking soda.
Let it Sit: Give the baking soda a few hours or perhaps a whole night to sit. This will assist in absorbing any residual smells.
Step 8: Use A Vacuum
Let the baking soda sit, then vacuum the area well to get rid of any remaining residue.
How to Deal with Set-In Stains
You might need to take extra precautions if you've found an older stain that has already set in:
Cleaning With Enzymes
Because enzyme-based cleaners contain natural enzymes that break down uric acid and other organic compounds found in pet pee, they are quite successful at removing older stains. Observe the application guidelines provided by the manufacturer.
Expert Cleaning Services
Consider using a professional carpet cleaning service that specializes in pet stain removal if DIY solutions don't work or if your carpet has several spots. They can successfully get rid of tough stains and smells thanks to their access to industrial-grade tools and specialty supplies.

Avoiding Incidents In The Future
Although accidents do occur, there are things you can do to reduce their frequency:
Regular Training
Make sure your pets are trained to use the restroom outside. Regular training lowers the number of incidents that occur indoors and reinforces positive habits.
Designated Bathroom Spaces
Provide specific spaces for your pets to relieve themselves outside. This makes it easier for pets to link restroom breaks to particular places.
Using Training Pads
If your puppy or pet is still being trained, you might want to use training pads indoors until they develop good toilet habits.

Wrapping Up The Battle Against Pet Stains
Removing pet urine from carpets doesn't have to be daunting. Knowing how to handle both fresh and set-in stains will keep your house clean and fresh for you and your pets. The sooner you address the stain, the better the results will be, and this will help protect your carpets from permanent damage.
With these strategies and tips up your sleeve, you will be ready for whatever accidents come your way with your pet.
All-in-One Cleaning Guide for a Fresher, More Comfortable Home
Step-by-Step Tips to Clean, Organize, and Maintain Every Part of Your Space
Best Way To Clean Gold Earrings
Best Way To Clean MacBook Screen
Best Way To Clean Vinyl Records
Can Washing Machines Be Stopped Mid-Cycle
Can You Wash Dry Clean Only Curtains
Cleaning Comfort Room Safety Precautions To Be Observed
Cleaning Pet Urine From Carpet
Cleaning Stainless Steel Fridge
How Technology Is Remodeling The Cleaning Industry
How To Get Rid Of Cigarette Smell In Car
How To Get Self Tanner Out Of Carpets
How To Make Your House Smell Like Laundry Detergent
How To Prepare Your Home For A Deep Cleaning Service
How To Prevent Allergies With Cleaning
How To Remove Carpets DIY Guide
How To Replace Carpets By Yourself
Magic Eraser To Spot Cleaning Walls
Open Windows To Deodorize Home
Removing Bleach Smell From House

Open Windows To Deodorize Home
Improved Indoor Air Quality Allowing fresh air to circulate reduces the concentration of indoor pollutants such as allergens, cooking byproducts, and volatile organic compounds (VOCs). This natural ventilation helps create a healthier living environment, which is essential for respiratory health and overall well-being. It not only reduces harmful pollutants but also promotes respiratory health, enhances cognitive function, and increases occupant comfort while being energy-efficient. As architects and designers prioritize these principles in building design, they contribute to a sustainable future that values both environmental health and human well-being.
Open Windows To Deodorize Your Home Fresh Air Solutions
The Benefits Of Ventilating Your Home How Fresh Air Eliminates Odors
Opening windows in your home is one of the simplest yet most effective ways to improve indoor air quality and eliminate unpleasant odors. Fresh air not only refreshes your living space but also plays a crucial role in maintaining a healthy environment. This guide will explore the numerous benefits of opening windows, particularly in deodorizing your home, and provide practical tips for maximizing fresh air circulation.

Why Opening Windows is a Must
The air in an indoor space is normally worse than that outdoors due to its tendency to gather dust, pet dander, and VOCs from all household products. The Consumer Product Safety Commission reported that the indoor air in a house contains higher concentrations of pollutants than that of the outdoors. Windows, therefore, should be opened often for ventilation.
1. Eliminating Stale Odors
Opening windows will get rid of stale smells that sometimes may take a little while to collect in a room. Smells from cooking, smell of pets, and overall household life lingers much longer in the room. These kinds of smells can dissipate quickly when there's fresh air around. Maybe you cooked fish or managed to burn something on your stove. You can just let fresh air get rid of the bad smell by opening the window to replace the fresh air outside.
2. Reducing Indoor Pollution
Stale air absorbs all the indoor pollutants that may cause health problems because the quality of air is not good. Ventilation from windows helps dilute the same pollutants every time by letting cleaner air from the outside into your house. This is one of the best methods for reducing allergens and irritants that may cause respiratory problems or allergies.
3. Psychological Well-being Enhancement
Fresh air exposure has been shown to enhance mood and cognitive performance. Additionally, research indicates that the best outdoor settings for improving productivity and mental clarity are those that are fresher and better ventilated. In fact, a Harvard study found that enhancing indoor air quality significantly improves decision-making abilities. As a result, it enhances your mental wellness in addition to revitalizing your house.

Practical Tips for Proper Ventilation
You can maximize the benefits of opening windows in your home to improve the quality of the air by following these tips:
1. Select the ideal moment.
When the air quality outside is at its peak, open your windows. Early in the morning or late at night, it is cooler and less humid. When pollution or pollen counts are high, don't open windows.
2. Ventilation throughout
A house can benefit from cross-ventilation by opening windows on both sides. This allows fresh air to continuously circulate inside each area as stagnant outside air pushes its stale self within to freshen it.
3. Use Screens
Installing window screens in your home can provide you the freedom to open windows while keeping out insects and allergens if you have pollen or insect allergies.
4. Add Indoor Plants
They improve beauty and naturally purify interior air. Spider plants and peace lilies are two examples of plants that are well-known for their ability to remove noxious substances from the environment, including odor.

Addressing Common Concerns
While there are numerous benefits to opening windows, worries over outdoor allergens or pollutants may persist with some homeowners:
1. Allergen Control
If you are allergic, yet you still have a preference for fresh air, then HEPA filters in your HVAC systems or portable air purifiers in specific areas of the house will trap those allergens so you may still ventilate, opening your windows from time to time, for example.
2. Atmospheric Pollution
Checking local air-quality reports before opening windows is a good idea in urban locations where outdoor pollution leaks are predicted. If the pollution level is excessive, people may be told to close their windows; most of these days occur when "smog alerts" are issued.
The benefits from window ventilation to the house are seasonal :
Spring: When flowers blossom and the temperature starts to rise, spring is a good time of year to revitalize the house with open windows and favorable weather.
Summer: During the hottest months, open your windows in the morning or evening.
Fall: The brisk air allows the room to air out before winter arrives, although there may be dropping debris and leaves.
Winter: While it is true that windows cannot be sealed during extremely cold temperatures, you can still benefit from brief, frequent ventilation sessions if you limit your time spent outside.

Some other benefits include opening windows
Among the numerous other factors that make these distinctive are:
Reduced Humidity: By preventing additional buildup, open windows reduce the amount of humidity in your home, preventing mold growth and condensation on windows.
Additionally, dangerous gasses like radon are dispersed by fresh air and accumulate through the crevices in a house's foundation.
Allow your home to naturally cool. Without using an air conditioner, the windows can be opened to create a naturally cool atmosphere during the cool months or evenings.
All-in-One Cleaning Guide for a Fresher, More Comfortable Home
Step-by-Step Tips to Clean, Organize, and Maintain Every Part of Your Space
Best Way To Clean Gold Earrings
Best Way To Clean MacBook Screen
Best Way To Clean Vinyl Records
Can Washing Machines Be Stopped Mid-Cycle
Can You Wash Dry Clean Only Curtains
Cleaning Comfort Room Safety Precautions To Be Observed
Cleaning Pet Urine From Carpet
Cleaning Stainless Steel Fridge
How Technology Is Remodeling The Cleaning Industry
How To Get Rid Of Cigarette Smell In Car
How To Get Self Tanner Out Of Carpets
How To Make Your House Smell Like Laundry Detergent
How To Prepare Your Home For A Deep Cleaning Service
How To Prevent Allergies With Cleaning
How To Remove Carpets DIY Guide
How To Replace Carpets By Yourself
Magic Eraser To Spot Cleaning Walls
Open Windows To Deodorize Home
Removing Bleach Smell From House

Removing Cigarette Smell From Apartment
It is quite difficult to remove cigarette stench from an apartment, but you can make it fresh and inviting with the right approach. All the residual smell will go away with a thorough cleaning of all walls, floors, and furniture. Natural neutralizers like vinegar and baking soda will absorb and neutralize smoke particles. This can be further improved through increased ventilation by window opening and the use of air cleaners. If the smell prevails, you may want to consider calling a professional for extra cleaning. With hard work and taking proactive measures, you'll be able to create a much more pleasant and inviting living space that is healthier for everyone.
Fresh Start For Your Apartment By Eliminating Cigarette Odors For Good
Effective Strategies To Eliminate Cigarette Odor From Your Home
Smoker’s breath can linger long after the very last stick has been extinguished. The aroma tends to permeate walls, carpets, and upholstery so that living quarters become somewhat unlivable to inhabit as well as visit for occupant and visitor. Do not panic yet, though, as such smells can be eliminated by a hint of easy as well as speedy clean up solutions, as well as a new lifeline can be injected back into residences.
What Produces That Odor?
What Is Cigarette Smoke?
Thousands of various chemical types make up a smoker’s haze, the majority being oily and tacky. These accumulate to surfaces as a smoker is smoking in a home and leave an air that is terribly difficult to get shot of. Particulates in the haze settle on furniture, walls, ceiling, even your clothing can give off a scent that will linger for several months or more years.
Causes of Residual Odors
Duration of Smoking: The longer a person invests in smoking indoors, the more entrenched the smell will be.
Material Type: Odors penetrate more easily some types of material than others such as carpeting and cloth upholstery.
Ventilation: Diffs slowly if ventilated poorly since it suspends smoke particles in air as well as particles on every surface.
Then if you want successfully inhibit the smell of smoker’s smoke away from your living area you need to consider these factors.
Assessing the Impact of Smoke Smell
Medical Issues
Smoke from a cigarette is a health risk as a discomfort for living. Chemicals that cause cancer in secondhand smoke have been known to compromise indoor air quality and lead to lung issues. When individuals with asthma or allergies breathe in the smell of a cigarette, their condition may be triggered.
Psychological Effects
Psychological effects can also be triggered by living in a flat where a person is subjected to a smell of cigarettes. It might cause people panic or discomfort as well as discourage individuals from visiting. It improves people’s moods as well as people’s health overall if a house smells nicely.
Efficient Methods for Eliminating Cigarette Smell
1. Careful Keeping Surfaces Cleanened
Get cig smoke out of flat: Step one will be to thoroughly clean your flat to get cig smoke out.
Walls and Ceilings: Clean walls and ceilings with a solution of water and vinegar or an applicable solution for washing. Since windows and corners will more than likely be where the majority of heavy smoking will accumulate, be particular to these areas more than likely.
Floors: Steam cleaning or shampooing ought to be preceded by a thorough vacuuming in order to remove strongly imbedded odors. Wood or tile floors can get their smells extracted by a solution of vinegar.
Upholstery: Vacuum upholstered items and spray an upholstery cleaner specifically designed by removing odors. Maintain soft and supple leather by spraying a leather conditioner after its use with a leather cleaner.

Windows And Air Vents
Open windows as often as possible. Clean window frames and screens as they might have accumulated residues from smoke. Periodically refresh filters to benefit air quality.
2. Utilize Odor Neutral
Baking Soda: Good natural deodorizer that can absorb smells efficiently. Dust the rugs, carpets, and upholstery with baking soda and let it stay for a few hours or overnight, then vacuum clean.
Activated Charcoal: Sprinkle bowls of activated charcoal around your flat. Very efficient for small areas like bathrooms or closets.
Vinegar Remedies: Mix equal parts vinegar and water in a spray bottle, then lightly spritz dust where odors focus most. Air dry; vinegar scent will be eliminated along with smoke stench.
3. Air Freshening
Air Purifiers: An effective quality air purifier with a HEPA filter can actually improve indoor air quality significantly.
Essential Oils: Use an essential oil diffuser (lavender or citrus) or create your own spray by mixing oils with water.
4. Professional Help
In the event that the odor persists, you may be forced to hire specialists who deal with eliminative smells. Treatments such as ozone treatment or thermal fogging may remove odors beyond homestead cleansing methods.
Preventing Future Odors
Smokers’ Protection
Consider placing smoking constraints in your flat if you live with smoking roommates or guests. Reducing exposure indoors improves air quality by creating smoking areas outside the house.
Regular Maintenance
Regular Dusting: Dust surfaces regularly to avoid particles from piling up.
Routine Carpet Cleaning: Professional-grade carpet cleaning can be scheduled once every six months or as often as necessary with a cleaning company.
Ventilation: Open windows to keep free air movement in fresh air.

A Breath Of Fresh Air
It requires sweat and an integrated approach to eliminate smoke odors in apartments, some that may require summoning a professional cleaner to visit, the use of natural air deodorizers, improving airflow, and more. It is achievable on one’s part to establish a fresh, pleasant living space that promotes health and wellness when equipped with the correct information regarding why smoking reeks and effective remedies.
You can improve the quality of living in your entire home without smells you don’t want by being regular with efforts and prevention methods. Adopt these methods now for a better tomorrow!
All-in-One Cleaning Guide for a Fresher, More Comfortable Home
Step-by-Step Tips to Clean, Organize, and Maintain Every Part of Your Space
Best Way To Clean Gold Earrings
Best Way To Clean MacBook Screen
Best Way To Clean Vinyl Records
Can Washing Machines Be Stopped Mid-Cycle
Can You Wash Dry Clean Only Curtains
Cleaning Comfort Room Safety Precautions To Be Observed
Cleaning Pet Urine From Carpet
Cleaning Stainless Steel Fridge
How Technology Is Remodeling The Cleaning Industry
How To Get Rid Of Cigarette Smell In Car
How To Get Self Tanner Out Of Carpets
How To Make Your House Smell Like Laundry Detergent
How To Prepare Your Home For A Deep Cleaning Service
How To Prevent Allergies With Cleaning
How To Remove Carpets DIY Guide
How To Replace Carpets By Yourself
Magic Eraser To Spot Cleaning Walls
Open Windows To Deodorize Home
Removing Bleach Smell From House

Removing Bleach Smell From House
Cleaning with bleach will leave your home sparkling clean, but the strong smell can linger long after the job is completed. Many of us have experienced that overwhelming, potent smell that lingers after cleaning with bleach. Here are some practical tips on how to refresh your space and breathe easily.
From natural odor neutralizers to simple ventilation techniques, the ideas on this list will make your home feel welcoming once again.
Easily Remove Bleach Smell From Your Home With These Simple Tips
Here Are Effective Ways To Remove Bleach Smell From Your House
Cleaning with bleach can be quite rewarding. Until it shines, everything is scrubbed, cleaned, and disinfected. However, the potent bleach smell might linger long after the cleaning is done, turning your once-clean and fresh home into a chemical-scented space. You're not alone if you've ever wondered how to eliminate the lingering scent of bleach! I'm here to provide you some helpful tips on how to eliminate the bleach smell in your house so you can breathe easier because I've been there too.

Let Fresh Air Into Your Space By Ventilating It
Let your home breathe. Open all of the doors and windows to create airflow, so it will not be suffocating. Strong smells can be greatly diluted by exposure to fresh air. You will immediately notice an improvement if you let the fresh air in for a few hours on a nice day.
If it's raining or extremely cold, use the fans to circulate fresh air. In order to force out the stale air and allow fresh air to circulate outside, try installing a fan on the open window. This is sufficient to lessen the bleach odor in your house.
Use Baking Soda For Smell Absorption
One of those common household items that can do wonders for odor neutralization is baking soda. Sprinkle some baking soda on the floors or countertops where the odor persisted after cleaning with bleach. Before vacuuming or sweeping it away, let it sit for fifteen to twenty minutes. Baking soda can also be placed in open containers throughout your home to gradually absorb any unpleasant odors. It is incredibly inexpensive, efficient, and a great way to breathe new life into your space!
When essential oils and baking soda are used for sprinkling on different surfaces, it is always an added boost. After cleaning the surfaces, it not only absorbs different smells but also releases a refreshing scent. After adding a few drops of your preferred essential oil to baking soda, carry on as usual.
Vinegar As A Natural Odor Neutralizer
If baking soda isn't cutting it for you, then vinegar might be the lifesaver. Place a bowl of white vinegar in the spot where the bleach smell is worst. Although vinegar does have an odor, it fades fast, taking the smell of the bleach with it.
Use equal parts water and vinegar in a spray bottle, misting very lightly over the areas to be treated. It doesn't only neutralize odor but also moistens up the air if your home feels dry after cleaning.

Using Essential Oils To Freshen Your Home Fragrance
Essential oils are great for people who prefer a more pleasant scent than what vinegar or baking soda can offer! For a simple do-it-yourself air freshener, add a few drops of your preferred essential oil, such as lemon or lavender, to a diffuser or combine them with water in a spray bottle. Any lingering bleach odor can be covered up by misting your house with this mixture, which also adds a pleasant scent that makes your room feel warm and inviting. Fragrant perfume sachets can also be made by packing the perfume and dried herbs into tiny cloth bags.

Use Coffee Grounds As An Unusual Remedy
Coffee grounds can absorb odors too. Place in bowls to absorb all those stinking smells in the house as well as bleach odour. Not only can coffee grounds help get rid of odors but it has some coffee smell which many say is so comfortable, thus resembling having a small café-like affair right at home.
For greater effectiveness, try this by putting some coffee grounds along with baking soda in bowls, throughout your house. Such a mixture might make the product an even more powerful odor absorber.
Activated Charcoal Can Be Your Secret Weapon
You can get at a home goods store, online, or elsewhere activated charcoal that you put around wherever you determine the smell of the bleach is the strongest because it will absorb it over time.
It keeps particles inside it. It removes very strong smells a lot of times. It can be applied on closets or under sinks where odor tends to deposit.
Tips To Avoid Bleach Smell While Cleaning
To avoid the awful smell of bleach the next time you clean, here are some tricks you might find useful:
If the concentration is diluted to any of the formulas suggested, it is not as pungent and not as trying to handle.
You don't have to go for bleach all the time. There are very good cleaning agents that won't hurt your nose.
If you’re going with bleach, use some odorless or less-odor products to mix things up and reduce the strong smell while allowing you to be relieved from the same routine.
Proper ventilation changes the game. Open windows, switch on an exhaust fan, or do both for getting the air flowing during time spent cleaning. Even this little airflow can make a lot of difference in keeping stink at bay.
These tips and tricks eliminate the stinky smell from your home, which makes it a much more pleasant place to hang around in as well. Everyone loves their home when clean, but nobody loves going through the doorway into a chemical factory! The next time you reach for that bottle of bleach, remind yourself of these strategies. Your nose—and any guests you invite into your home—will thank you! Clean with a smile!

All-in-One Cleaning Guide for a Fresher, More Comfortable Home
Step-by-Step Tips to Clean, Organize, and Maintain Every Part of Your Space
Best Way To Clean Gold Earrings
Best Way To Clean MacBook Screen
Best Way To Clean Vinyl Records
Can Washing Machines Be Stopped Mid-Cycle
Can You Wash Dry Clean Only Curtains
Cleaning Comfort Room Safety Precautions To Be Observed
Cleaning Pet Urine From Carpet
Cleaning Stainless Steel Fridge
How Technology Is Remodeling The Cleaning Industry
How To Get Rid Of Cigarette Smell In Car
How To Get Self Tanner Out Of Carpets
How To Make Your House Smell Like Laundry Detergent
How To Prepare Your Home For A Deep Cleaning Service
How To Prevent Allergies With Cleaning
How To Remove Carpets DIY Guide
How To Replace Carpets By Yourself
Magic Eraser To Spot Cleaning Walls
Open Windows To Deodorize Home
Removing Bleach Smell From House

Cleaning Stainless Steel Fridge
Cleaning a stainless steel refrigerator regularly will keep it shiny and functional. Keeping your fridge on a regular basis makes it look better but also hygienic. First, clean the exterior with a light dish soap solution diluted into warm water, taking care to always wipe in the direction of the grain on the steel so as to avoid discolorations. To remove stubborn stains, using a white vinegar solution is quite effective. Wipe with a microfiber cloth, patting not rubbing, to avoid water stains. Apply a small amount of baby oil or olive oil for a polished surface to help avoid fingerprints. Also, remember to clean the inside regularly: remove foodstuffs and use a mild cleanser to wipe down shelves. By following these easy steps, your stainless steel refrigerator will remain a handsome centerpiece in your kitchen for years to come.
The Cleaning Guide You Need For A Sparkling Stainless Steel Fridge
Easy Steps To Keep Your Fridge Looking New
Stainless steel appliances’ beautiful style and durability make them a favorite in modern kitchens; however, due to their tendency towards fingerprints, smudges, and streaks, maintaining their luster can prove challenging. To keep your stainless steel fridge as a beautiful focal piece in your kitchen, we will discuss effective cleaning methods in this blog post.
Understanding Stainless Steel

What is Stainless Steel?
Iron constitutes a large percentage of stainless steel, as well as a minimum of 10.5% chromium content. Stainless steel’s properties of resistance against corrosion as well as its shiny unique finish owe a lot to this composition. The chromium produces a passive film of chromium oxide on its outer coating that prevents the metal from corroding or darkening.
Why Choose Stainless Steel?
Stainless steel prefers use in kitchens for a number of reasons:
Aesthetic Appeal: It is complemented by a host of kitchen designs by its modern looks.
Durability: Stainless steel will tolerate the strains normal use will throw its way as it resists rust as well as corrosion.
Easy Maintenance: Stainless steel appliances can keep looking wonderful for decades if maintained correctly.
The Significance of Routine Cleansing
Benefits of Keeping Your Fridge Clean
Your stainless steel refrigerator needs frequent cleaning due to hygienic as well as aesthetic factors. These are some of the primary benefits:
Hygiene: Germs and mold could not grow where it is clean.
Longevity: The lifespan of your appliance can be prolonged by regular maintenance.
Aesthetic Attraction: A clean refrigerator enhances your kitchen’s looks.
Typical Problems with Stainless Steel
Smudges and fingerprints: A burden that cannot be avoided in busy areas.
Scratches: Surface scratches can be caused by incorrect cleaning methods.
Streaks: Unpleasant streaks can be a consequence of employing the wrong cleaning materials.

All-Purpose Cleaner Sprays
Pet-Friendly Cleaning Products
Microfiber cloths: Good at removing dirt without causing scratches and kind to surfaces.
Mild dish soap: A convenient method to clean your fridge on a regular basis.
White vinegar: Good natural cleanser that dissolves oil nicely.
Baking soda: Great for removing pesky stains and odors.
Olive oil or baby oil: To shine after a clean.
Avoid These Products
Harsh chemicals: Do not use cleansers that contain ammonia or bleach since they can damage the finish.
Abrasive pads or steel wool: Could leave scratches on the surface of your refrigerator.
Step-by-Step Cleaning Schedule
Tips for Daily Maintenance
Clean off handles: Remove smudges and fingerprints by wiping with a wet microfiber cloth.
Spot spills: Remove spills immediately if you don’t want discoloration.
Deep Cleaning Your Stainless Steel Fridge
Step 1: Get Your Work Area Ready
Take everything off the refrigerator top once a day.
Make sure you have everything you need for cleaning.
Step 2: Vacuuming and Dusting
Dust the exterior of the refrigerator with a soft brush or a microfiber cloth attachment.
Step 3: Use Water and Soap to Clean
In a basin, mix some drops of gentle dish soap with warm water.
Dab a microfiber cloth in the solution and wring it until wet but not flooded.
To avoid streaks, clean the whole refrigerator down the direction of the grain.
Step 4: Clean and Pat Dry
To remove any soap deposit, rinse your towel under clean water and wipe the fridge once more.
Prevent water spots: Dry immediately with a clean microfiber towel.
Step 5: Use Baking Soda or Vinegar to Remove Stains
Vinegar technique: Spray the stain with white vinegar, leave it for a minute, then wipe clean with a cloth.
Baking soda paste: Mix baking soda with water into a paste. Apply on the stain, leave 5–10 minutes, then wipe softly with a towel and flush away.
Step 6: Polish It Up-Shine
Dab a small amount of baby oil or olive oil on a clean microfiber cloth.
To restore shine and create a fingerprint shield, buff the area gently in a circular motion.
Specific Points to Remember
Cleaning Inside Your Refrigerator
Empty your fridge: Take out all the foodstuff before you can clean.
Wash shelves and drawers: Wash with warm soapy water, rinse, and dry before reinstalling.
Wipe down surfaces: Use a solution of vinegar and water for the interior surfaces.
Dealing with Rust Spots
Wash the area gently with fine-grade steel wool (only if necessary).
Wipe clean with soap and water afterward to remove any residue.

Preventive Measurements
Tips for Keeping Your Stainless Steel Fridge Clean Longer
Use magnetic covers on handles to reduce fingerprints.
Follow a regular maintenance schedule: monthly deep cleaning, weekly speedy cleanings.
Avoid harsh cleaners: never use products that dull the finish.
Educate family members: ensure everyone knows how to clean and maintain the fridge properly.

Shine On Your Fridge
It doesn’t need to be hard to keep your stainless steel fridge clean. You can help your appliance stay a beautiful focal point in your kitchen for years to come by following these guidelines and incorporating regular maintenance as part of your routine.
You can keep things clean in your home with high standards without sacrificing aesthetic value as well as practicality with a small amount of effort. It’ll keep its shine longer if you learn how to maintain stainless steel just right. It’s an investment that’s worth protecting!
All-in-One Cleaning Guide for a Fresher, More Comfortable Home
Step-by-Step Tips to Clean, Organize, and Maintain Every Part of Your Space
Best Way To Clean Gold Earrings
Best Way To Clean MacBook Screen
Best Way To Clean Vinyl Records
Can Washing Machines Be Stopped Mid-Cycle
Can You Wash Dry Clean Only Curtains
Cleaning Comfort Room Safety Precautions To Be Observed
Cleaning Pet Urine From Carpet
Cleaning Stainless Steel Fridge
How Technology Is Remodeling The Cleaning Industry
How To Get Rid Of Cigarette Smell In Car
How To Get Self Tanner Out Of Carpets
How To Make Your House Smell Like Laundry Detergent
How To Prepare Your Home For A Deep Cleaning Service
How To Prevent Allergies With Cleaning
How To Remove Carpets DIY Guide
How To Replace Carpets By Yourself
Magic Eraser To Spot Cleaning Walls
Open Windows To Deodorize Home
Removing Bleach Smell From House

Cleaning Bathroom Mold
Cleaning bathroom mold is crucial not only for aesthetic reasons but also for the health of individuals using the space. Mold thrives in damp environments, making bathrooms particularly susceptible to growth. Understanding the causes of mold, such as high humidity and poor ventilation, is essential for effective prevention and cleaning.
How To Clean Bathroom Mold Effective Strategies For A Mold Free Space
Understanding Bathroom Mold Causes, Risks, And Prevention Tips Bathrooms Are Notorious Breeding Grounds For Mold.
Bathrooms are known to breed mold due to their wet and damp environment. The appearance of mold is also unappealing, and it can cause serious health issues, especially for allergic and respiratory patients. Knowing how to clean and how to prevent mold in a bathroom is crucial for having a healthy living space.preserving a healthy living space Because bathrooms are constantly moist and humid, they are well-known for being mold breeding grounds. Where moisture builds up, mold grows and can cause unattractive stains, disagreeable smells, and even health hazards.

Understanding Bathroom Mold: Causes, Risks, and Prevention Tips
Understanding Bathroom Mold: Causes, Risks, and Prevention Tips
What causes bathroom mold?
Mold likes warm, moist environments and bathrooms would be an area in which it prospers. Some of the reasons for bathroom mold include:
High Humidity: Moist vapor from taking showers and baths produces high humidity. Unless ventilation in the bathroom is maintained, it encourages mold growth by leaving behind this moisture.
Poor Ventilation: Bathrooms with no windows or exhaust fans retain humidity. In still air, spores deposit and propagate to surfaces.
Leaky Pipes: Any leak in faucets or pipes can allow moisture into walls and floors, making them a perfect habitat for mold.
Condensation: Mirrors and tiles have cold surfaces on which condensation occurs, mainly during the cold winter months, and leads to mold.
Health Hazards Posed by Mold
Allergens and irritants from mold may lead to health problems. Some of the health concerns include:
Allergic reactions: Most people are allergic to mold. They react with such allergic symptoms as sneezing, running nose, and rashes on the skin. Respiratory Problems: The sufferers can get an attack of asthma or pneumonia. Toxic Effects: Some of these molds tend to produce mycotoxins that are harmful when inhaled or touched.

Best Practices for Mold Prevention
Preventing mold is often easier than removing it once it's established. Here are some effective strategies:
Control Humidity Levels Indoor humidity should be at or below 50%. A dehumidifier can be used, especially in rooms prone to dampness.
Improve Ventilation: Install an exhaust fan that vents outdoors and use this both during and after showers. When possible, make use of windows for ventilation.
Regular Cleaning: Clean your bathroom with water and vinegar or a commercial cleaner marketed as mold-fighting each week.
Seal Grout Lines: Seal the grout lines of tiled surfaces to prevent moisture from penetrating into the grout.
You should consider using mold-inhibiting paint on walls and ceilings. Prevent the retention of moisture also by using mold-resistant drywall and insulation.
An Effective Cleaning Solution for Bathroom Mold
Several effective solutions exist to help you in cleaning bathroom mold when it is the time for it:
1. Bleach Solution
The most common household cleaning chemical for the killing of mold on non-porous surfaces is bleach.
How to Use: Mix one part bleach with three parts water in a spray bottle. Spray it directly on the area containing mold. Let it sit there for 10-15 minutes before scrubbing with a brush or sponge. Rinse afterward with clean water.
Caution: Bleach always wears rubber gloves and also a good ventilation system since it emits harmful fumes.
2. Vinegar
How to Use: Pour undiluted white vinegar into a spray bottle. Directly mist the affected regions. Give it at least an hour to sit with the solution. Next, scrub with a towel or brush. washed with water.
Benefits: Since vinegar is safe for most surfaces and non-toxic, it's a great choice for homes with young children or pets.
3. Making Soda
It deodorizes the space in addition to cleaning it.
How to Use: Create a paste by mixing with water. After applying to the moldy surface and allowing it to dry, use a brush or sponge to scrape out any remaining residue.
Benefits: Baking soda is gentle on surfaces and effective at getting rid of moderate mold stains.
How to Use: Follow the manufacturer’s instructions carefully for application and safety precautions.

Signs That Mold Needs Attention
Being proactive about checking for signs of mold can help you address issues before they escalate:
Visible Discoloration: Dark spots or patches on walls, ceilings, or grout lines are often indicators of mold growth.
Musty Odor: A persistent musty smell in your bathroom may suggest hidden mold growth behind walls or under fixtures.
Water Stains: Stains on walls or ceilings may indicate leaks that could lead to moisture accumulation.
Increased Allergic Reactions: If you notice more frequent allergic symptoms among household members when using the bathroom, this could signal a mold problem.
Comprehensive Guide to Cleaning Bathroom Mold: Causes, Solutions, and Prevention Strategies
The bathroom should be kept free of mold for both aesthetic and health reasons. It can be accomplished by determining the factors that lead to this issue and by using the strategies that work well for bathroom cleaning. In essence, this is constant maintenance along with preventative actions to ensure that nothing unwanted enters. In order to educate the reader about bathroom mold removal, including preventive measures and appropriate cleaning methods, this extended guide should be highly educational.
All-in-One Cleaning Guide for a Fresher, More Comfortable Home
Step-by-Step Tips to Clean, Organize, and Maintain Every Part of Your Space
Best Way To Clean Gold Earrings
Best Way To Clean MacBook Screen
Best Way To Clean Vinyl Records
Can Washing Machines Be Stopped Mid-Cycle
Can You Wash Dry Clean Only Curtains
Cleaning Comfort Room Safety Precautions To Be Observed
Cleaning Pet Urine From Carpet
Cleaning Stainless Steel Fridge
How Technology Is Remodeling The Cleaning Industry
How To Get Rid Of Cigarette Smell In Car
How To Get Self Tanner Out Of Carpets
How To Make Your House Smell Like Laundry Detergent
How To Prepare Your Home For A Deep Cleaning Service
How To Prevent Allergies With Cleaning
How To Remove Carpets DIY Guide
How To Replace Carpets By Yourself
Magic Eraser To Spot Cleaning Walls
Open Windows To Deodorize Home
Removing Bleach Smell From House

What To Clean Leather Car Seats With?
Leather car seats add style to any car, but they need special maintenance to last. For efficient cleaning, it's important to know the type of leather you have. To keep them looking beautiful, use the right products, such as pH-neutral conditioners and cleaners. Frequent care keeps the seats comfortable and guards against UV and dirt damage.
Effective Methods For Cleaning And Protecting Leather Car Seats
Tips And Techniques For Keeping Leather Seats At Its Best
As part of your car's interior maintenance, leather car seats need to be cleaned. If you want your car to look new and inviting, you should know how to clean leather seats. It's not as difficult as it seems, and you can maintain the excellent appearance of your seats for many years to come if you have the correct equipment and methods. Let's start by discussing all you need to know about cleaning leather car seats.
Understanding The Different Types Of Leather
Let's first determine the type of leather we will be working with before getting into the specifics of cleaning. The majority of cars have either pigmented or aniline leather.
Aniline leathers have a natural appearance and are soft. Their coloring is derived from transparent dyes, so the hide's texture and all other characteristics are retained. Although this makes them look very appealing, they are prone to stains and are easily impacted by sunlight.
Pigmented leather is a type of leather that is protected by a coating, which increases its resistance and ease of cleaning. Although it might not feel as rich as aniline leather, it can withstand spills better.
Selecting the appropriate cleaning supplies and techniques will be made easier if you know what kind of leather you own.
Gathering Your Cleaning Supplies
Now that you know what type of leather you're working with, let's gather the supplies you'll need for cleaning:
Look for a cleaner specifically designed for leather. A pH-balanced formula is ideal because it won't harm the leather.
Microfiber cloths are gentle on leather and effective at picking up dirt without scratching the surface.
A soft bristled brush can help remove dirt from crevices without damaging the leather.
Leather conditioner helps to keep the leather supple after cleaning.
Always use distilled water to keep away minerals that might damage the leather if tap water is used instead.
Preparing Your Car For Cleaning
Before getting started with the cleaning, prepare your car first:
Pick a spot where your car will not be exposed to direct sunlight. This way, any cleaning products will not dry out too quickly.
Take out any trash or personal belongings from your car seats.
Use a vacuum cleaner with a soft brush attachment to remove the dust, crumbs, and debris from your seats. Be sure to pay special attention to the seams and crevices since these are areas where dirt collects.

A Simple Guide To Cleaning Leather Car Seats
1. Apply Leather Cleaner
Dip your microfiber cloth into the chosen leather cleaner. Don't let it soak; just enough water will do. Then clean the seat area by area, using circular motions. Lifting the dirt off gently without causing tears is an efficient way of cleaning the leather.
If you have a particularly dirty spot, use a little more cleaner and let it sit for about a minute before wiping it away.
2. Utilize Your Soft-Bristled Brush
If you have some serious stains or dirt that just refuses to budge, get out your soft-bristled brush.
Gently scrub the area with the brush in circular motions. This lifts dirt without scratching or damaging the leather.
Pay special attention to seams and stitching since those are often the most fragile.
3. Wipe Down With A Dry Cloth
After cleaning each area, take a dry microfiber cloth and wipe away any excess cleaner.
This is important because remaining cleaner will attract dirt over time and be extra work later on.
4. Condition Your Leather
Once everything is clean and dry, it's conditioner time for your seats.
Using another clean microfiber cloth, apply the conditioner evenly across each seat. This helps keep the leather soft and prevents cracking or fading with time.
Let the conditioner soak in for at least 15 minutes before using your car again.
Regular Maintenance Tips For Leather Car Seats
To keep your leather seats looking their best, consider these simple maintenance tips:
Regular vacuuming helps prevent dirt buildup that can lead to scratches over time.
If you tend to eat or drink in your car often, seat covers can provide an extra layer of protection against spills and stains.
Whenever possible, park in shaded areas or use sunshades in your windows to protect against fading caused by UV rays.

Why Cleaning Is Important
Keeping your leather seats clean isn’t just about aesthetics; it also plays a significant role in maintaining their value. Leather can crack or fade if neglected, leading to costly repairs down the line. By taking just a little time each month to clean and condition your seats, you’ll enjoy a comfortable ride while keeping your car looking its best.
Enjoy Your Clean Leather Seats
All the elbow grease that you get to clean your seats up, you'll be looking at just how good it looks. There is satisfaction in getting into a clean, fresh leather car. The time from running errands to your weekends with friends will be worth it for every drive.

Accepting Responsibility For Your Leather Car Seats
Maintaining the leather car seats clean isn't difficult at all. In just a few products and with some techniques, you will be enjoying the fresh look for a number of years. Frequent cleaning and conditioning, aside from giving you the nice ride, also extend your car's life to a higher worth.
The next time you go riding in your car enjoy that those beautiful leather seats are well taken care of. Enjoy every ride, knowing you have done that which makes your car look its absolute best. Maintaining your car doesn't just keep the car fine; it's also about being a part of the time when driving in the vehicle!
All-in-One Cleaning Guide for a Fresher, More Comfortable Home
Step-by-Step Tips to Clean, Organize, and Maintain Every Part of Your Space
Best Way To Clean Gold Earrings
Best Way To Clean MacBook Screen
Best Way To Clean Vinyl Records
Can Washing Machines Be Stopped Mid-Cycle
Can You Wash Dry Clean Only Curtains
Cleaning Comfort Room Safety Precautions To Be Observed
Cleaning Pet Urine From Carpet
Cleaning Stainless Steel Fridge
How Technology Is Remodeling The Cleaning Industry
How To Get Rid Of Cigarette Smell In Car
How To Get Self Tanner Out Of Carpets
How To Make Your House Smell Like Laundry Detergent
How To Prepare Your Home For A Deep Cleaning Service
How To Prevent Allergies With Cleaning
How To Remove Carpets DIY Guide
How To Replace Carpets By Yourself
Magic Eraser To Spot Cleaning Walls
Open Windows To Deodorize Home
Removing Bleach Smell From House

How Often Should You Clean Air Ducts
A healthy home environment depends on keeping the air ducts clean. Most professionals will recommend cleaning your air ducts every three to five years, although several factors might alter this timeline. Homes with pets, high dust, or homes where residents have allergies may need more frequent cleanings. In addition, the duct system may admit dust and debris from recent renovations and thus may need a complete cleaning shortly after. Besides, homeowners should consider signs that cleaning becomes necessary: accumulation of dust around the vents, unpleasant odors, or uneven airflow. In addition to improving indoor air quality, periodic maintenance of air ducts increases the efficiency of HVAC systems and, eventually, reduces energy costs while offering a more comfortable living environment.
What Every Homeowner Needs To Know About The Air Duct Cleaning Frequency
Find Out The Best Schedule To Keep Your Air Fresh And Healthy
Any homeowner owes a healthy indoor environment, and air duct cleaning is one often overlooked aspect of home maintenance. The clean, pollutant-free air that flows around your home relies on these hidden passageways. Keeping air quality up where it counts, boosting the efficiency of your heating and air system, and ultimately creating a healthier home can be attained by knowing when to clean your air ducts.

The Significance Of Air Duct Cleaning
Ducts for air are a significant part of your dwelling’s HVAC system. They will handle air conditioning delivery for your house. However, with passing years, contaminants such as dust, dirt, mold spore particles, and pet dander can jam these ducts. This accumulation may cause a number of issues:
Poor indoor air quality: Air pollutants in the airducts in your house can trigger allergies and breathing disorders.
Reduced HVAC Effectiveness: Dirty ducts may restrict air movement so that your HVAC system will have to operate more than it ought to do so, increasing energy expenses.
Bad Smells: Moldy or stale smells that envelop your living space might be a result of garbage built up.
Increased Risk for Mold Growth: Mold development can be fostered by moisture in the ducts, thus deteriorating indoor air quality.
In light of these prospective issues, regular air duct cleaning is necessitated by a healthy home atmosphere.
Recommended Frequency For Air Duct Cleaning
The National Air Duct Cleaners Association (NADCA) recommends that a majority of homes need air ducts washed every three to five years. This interval allows enough cleaning without over-acquiring dust and allergies. Nevertheless, various factors can influence how often you ought to schedule this service.

Factors Affecting Cleaning Regularity
Household Size: Bigger homes with more individuals might need more regular cleanings due to heavier accumulation of dust particles and dirt.
Pets: Consider having your ducts cleaned once every two or three years if you have pets that make dander or hair.
Asthma or Allergies: More regular cleanings, once every two to three years, can be helpful for homes that contain members with breathing ailments or allergies.
Recent Upgrades: Dust and particles that settle in the ducts could be resuscitated by home upgrades. It’s a good idea to get your ducts cleaned after home upgrades as soon as you can.
Smoking: In a household where a smoker exists, the ducts can get dirtier with a filmy residue more frequently than in a non-smoking household.
Environmental Factors: Increased duct cleaning could be required for dusty or pollen-high areas’ homes.
Indications That Your Ducts Should Be Cleaned
Visible dust buildup after a clean session
Stale or musty vent smells
Increase in allergy symptoms in family members
Mold visible within or on the ducting
Uneven airflow across rooms

Advantages Of Routine Air Duct Cleaning
Better Indoor Air Quality: Regular cleaning keeps allergens and contaminants out of circulation.
Enhanced Energy Efficiency: Clean duct systems improve airflow and reduce pressure on heating systems, lowering energy costs.
Long HVAC Life: Prevents dust buildup and subsequent wear on moving components.
Reduced Clean Time: Less dust accumulation on household surfaces.
Improved Living Conditions: Reduces allergens and asthma irritants for healthier air.
DIY Versus Professional Cleaning
Even if you might consider trying the task yourself, professional services are always recommended as a precaution against thoroughness. Pros use advanced equipment to safely and systematically clean every corner of your HVAC system.
Professional Cleaning Process
Ductwork inspection
Utilizing powerful vacuum cleaners to remove dust particles and debris
Cleaning grilles and registers
Cleaning surfaces if necessary
Checking for mold or other issues that could require extra attention
Cost Considerations
The length of your home and condition of your ductwork are two factors that can influence expert duct cleaning costs. To do a complete job, homeowners can expect to pay between $300 and $500 on average.

Clean Ducts To A Healthy Home
It’s healthy to keep your home clean by knowing how often you need to clean your air ducts. Though it’s typically recommended every three to five years, your specific schedule will depend on factors such as household size, if you own pets, allergies, recent construction or remodeling, and climatic factors.
Home owners can improve indoor air quality, increase energy efficiency, and maintain a healthier living space by keeping air duct cleaning as a regular task. Pay attention to signs that your air ducts need professional cleaning and don’t hesitate to consult with heating engineers if you feel uncertain about their condition. It pays for yourself by keeping your family healthy and well; it’s not just a comfort issue.
All-in-One Cleaning Guide for a Fresher, More Comfortable Home
Step-by-Step Tips to Clean, Organize, and Maintain Every Part of Your Space
Best Way To Clean Gold Earrings
Best Way To Clean MacBook Screen
Best Way To Clean Vinyl Records
Can Washing Machines Be Stopped Mid-Cycle
Can You Wash Dry Clean Only Curtains
Cleaning Comfort Room Safety Precautions To Be Observed
Cleaning Pet Urine From Carpet
Cleaning Stainless Steel Fridge
How Technology Is Remodeling The Cleaning Industry
How To Get Rid Of Cigarette Smell In Car
How To Get Self Tanner Out Of Carpets
How To Make Your House Smell Like Laundry Detergent
How To Prepare Your Home For A Deep Cleaning Service
How To Prevent Allergies With Cleaning
How To Remove Carpets DIY Guide
How To Replace Carpets By Yourself
Magic Eraser To Spot Cleaning Walls
Open Windows To Deodorize Home
Removing Bleach Smell From House
How Often To Clean Litter Box
Keeping your cat's litter box clean is crucial for their health and comfort, as well as for maintaining a pleasant home environment. Regular cleaning not only minimizes unpleasant odors but also helps prevent the spread of harmful bacteria and parasites. Cats are naturally clean animals, and a dirty litter box can lead to behavioral issues, such as avoiding the box altogether.
How Often Should You Clean Your Litter Box? A Complete Guide
The Importance Of Regular Litter Box Maintenance
It becomes very significant for cleanliness and health of your home. Cats being clean creatures innately, so it becomes important that you provide a clean area where they can relieve themselves. It deterrence smells that we do not get on nicely with, chance of disease, and will make your pet a comfortable place.
In this complete guidebook, we will inform you on how frequently you need to clean your litter box, why you need to clean it often, and much more useful advice on keeping your litter box clean.

Regular Maintenance of the Litter Box
A clean litter box can literally imply that your cat would be hungry for natural cleanliness and could significantly influence her behavior. A cat will instinctively shun a dirty litter box; this will, however, lead to improper elimination everywhere in the house, something that may not sit too well with your pet owners as that could require some further trainings or modifications.
Maintenance prevents the spreading of bacteria as well as parasites that could potentially harm the pet as well as you. In it can contain pathogenic material hazardous for both human beings as well as cats equally towards the gastrointestinal system. It minimizes fumes of ammonia released off urine and creates a healthier place for everyone.

Recommended frequency of cleaning for different types of litters
Know how often to clean your litter box according to the type of litter you use in order to keep it on its best form.
Twice-Daily Dos
It must be shoveled once a day at a minimum.
Scooping clears away clumps of feces as well as any hard feces that could be on the bottom.
Daily tasking prevents the smells as well as keeping the box more appealing to your cat.
You need to shovel two times a day if you own multiple cats as a means of being clean.
Trash Replacement
How many to replace the litter rely on the kind you use:
Clumping Litter: Completely change every two to three weeks with clumping litter. Clumping litter must absorb moisture, clump when wet, and become easy-scooped mess removal trash. Despite this, clumping litter becomes soaked with stench after a period of use and no longer works.
Non-Clumping Litter: For non-clumping litter since it will absorb moisture but not clump will need to be replaced weekly. Non-clumping litter retentives odor more than the clumping types, so replacement on a regular basis is a must.
In the event that you possess more than a single cat that shares a box, you will need to replenish litter frequently; it could potentially be weekly or potentially a day after a day.
Box Cleaning
This aside from litter change, is extremely important; boxing itself regular cleanings, as much as possible using water and soap as soft perhaps even vinegar-based. And thus if these smells just linger that you don’t notice actual stains you’re going to have a cleaner if you clean earlier.
To Turn the Box
Empty the Box: Remove all trash and rubbish.
Soap Suds: Warm water with soft dish soap or vinegar.
Cleaning: Clean all areas with a sponge or scrub brush.
Rinse: Rinse under warm running water and remove all soap residue.
Dry: Let it dry thoroughly before adding on fresh litter.

Indications Your Litter Box Needs Urgent Attention
Strong Smells: If smells of feces or ammonia are strong in the cage, then she needs a thorough cleaning overdue.
Visible Clumps or Trash: Visible clumps of trash or solid wastages need to be taken action upon without delay if they haven’t gone in a day.
Reluctance by Your Cat: In case your cat will hesitate in the use of the litter box or will show unwillingness upon seeing it, then they find it dirty or uncomfortable.
Tips for Effective Cleaning and Maintenance of Waste Boxes
Offer Quality Litter: Choose litter that is of quality and ideally absorbent so that your kitty will pick it out. Some kitties like clumping litter since they can be in charge of the smells.
Use an Appropriate Scoop: An easy-scrubbing scoop makes cleaning a matter of course; it needs slotted-in style, allowing clean litter to drop through as clumps of droppings stay in it.
Self-Cleaning Litter Box: It will automatically scoop the poop out by this kind of device, saving so much time on litter box maintenance.
Keep Supplies Near: Keep your cleaning supplies close by the litter box so you can grab them when it’s clean-up time.
Wash Your Hands After Cleaning: Never forget to wash your hands after coming in contact with cat droppings or clean the litter pan for cleanliness reasons.
Keep an Eye on Your Cat’s Health: Abnormalities in the regular bathroom behavior of your cat can be a sign of some serious health issues. More than normal number of urination and urinating hassle need a visit to your vet.
Creating a Healthy Environment for Your Cat: The Importance of Regular Litter Box Cleaning
These guidelines on how often to clean your litter pan give you the ability to make a healthy living space for your cat yet stay fresh and odorless in the dwelling space. Maintenance is comfort for your kitty cat, but it also produces a wholesome healthy space around your pet.
Good care and attention keep so a kitty cat has a place clean they can relax and feel comfortable every day. Now this lengthy blog pops out with particulars yet never off subject regarding the correct manner in which a litter box ought to be cleaned up.
All-in-One Cleaning Guide for a Fresher, More Comfortable Home
Step-by-Step Tips to Clean, Organize, and Maintain Every Part of Your Space
Best Way To Clean Gold Earrings
Best Way To Clean MacBook Screen
Best Way To Clean Vinyl Records
Can Washing Machines Be Stopped Mid-Cycle
Can You Wash Dry Clean Only Curtains
Cleaning Comfort Room Safety Precautions To Be Observed
Cleaning Pet Urine From Carpet
Cleaning Stainless Steel Fridge
How Technology Is Remodeling The Cleaning Industry
How To Get Rid Of Cigarette Smell In Car
How To Get Self Tanner Out Of Carpets
How To Make Your House Smell Like Laundry Detergent
How To Prepare Your Home For A Deep Cleaning Service
How To Prevent Allergies With Cleaning
How To Remove Carpets DIY Guide
How To Replace Carpets By Yourself
Magic Eraser To Spot Cleaning Walls
Open Windows To Deodorize Home
Removing Bleach Smell From House

Best Way To Clean LVP
LVP flooring is easy to clean and only needs a few basic actions to keep looking beautiful. To avoid scratching, start with a regular sweeping or vacuuming routine to get rid of dust and dirt. Use a moist microfiber mop and a pH-neutral cleanser or a straightforward solution of warm water and white vinegar for more thorough cleaning. Dirt is effectively lifted by this mild solution without causing any surface damage. Spills should be cleaned up right away using a gentle cloth to avoid discoloration. For more stubborn stains, the area can be gently scrubbed using a paste made of baking soda and water. Steer clear of steam mops and aggressive chemicals as they might damage the finish. Your LVP flooring will continue to add to the attractiveness of your house for many years to come if you adhere to these easy guidelines.
Your Guide To Achieving A Beautiful Shine On Luxury Vinyl Plank
Smart And Simple Ways To Keep Your LVP Looking Like New
Homeowners frequently choose Luxury Vinyl Plank (LVP) flooring because of its ease of upkeep, durability, and visual appeal. However, using the right cleaning methods and supplies is necessary to keep it in immaculate shape.

Understanding LVP Flooring
Luxury Vinyl Plank flooring offers improved durability and water resistance while simulating the appearance of hardwood. It has several layers, including a wear layer that guards against stains and scratches. Understanding LVP's composition is essential for choosing the appropriate cleaning techniques and preventing damage.
Benefits Of LVP
Durability: Able to withstand wetness, dents, and scratches.
Aesthetic Variety: Comes in a range of finishes and styles.
Simple Installation: It may be put over the majority of flooring that is already in place.
Low Maintenance: Needs less maintenance than carpet or hardwood.
Daily Cleaning Schedule
Regular cleaning is necessary to maintain LVP flooring's appearance and stop dirt accumulation. Here are some tips for creating a productive daily cleaning schedule:
Required Tools
To remove loose dirt and debris, use a dust mop or broom.
Vacuum cleaner: To remove tiny particles without causing damage to the floor, use one made specifically for hard surfaces.
Microfiber Mop: Effective in removing dirt while being kind to surfaces.
Solution for Cleaning: A pH-neutral cleaner designed especially for vinyl floors.

Steps For Daily Cleaning
Sweep or Vacuum: To start clearing the floor of dust, grime, and debris, sweep or vacuum it. Keep an eye out for areas where dirt can collect, such as beneath furniture and in corners.
Mop with Warm Water: Use a pH-neutral cleanser or a moist microfiber mop with warm water. Steer clear of too much wetness since it can harm seams.
Spot Clean as Needed: Clean up spills right away by absorbing liquids with a microfiber towel. It might be essential to gently scrub sticky materials with a moist cloth.
Methods Of Deep Cleaning
Even the best-maintained floors may eventually need intensive cleaning to get rid of tough stains and bring back their luster. Here's how to do a comprehensive cleaning:
Essential Deep Cleaning Supplies
Bucket: Used to combine cleaning agents.
Soft-Bristled Brush: Perfect for removing stubborn dirt without causing scratches.
Cleaning Solution: White vinegar (1 cup per gallon), warm water, and a few drops of dish soap are a great combination.
Steps For Deep Cleaning
Prepare the Cleaning Solution: To make the cleaning solution, combine one gallon of warm water, one cup of white vinegar, and one or two drops of dish soap in a bucket. Despite being gentle on your vinyl flooring, this method works well.
Vacuum Completely: To prevent any loose particles from scratching the floor when cleaning, vacuum the floor thoroughly before beginning.
Mop Carefully: Mop the floor in sections after dipping your microfiber mop into the cleaning solution and completely wringing it out. To prevent streaks, always mop in the direction of the plank grain.
Rinse and Dry: To get rid of any remaining cleaning solution residue, mop the floor once more after using the cleaning solution. Rinse your mop in clean water. If required, use a fresh towel to dry the floor.
Handling Stains And Scuffs
Knowing how to clean stains quickly might help avoid long-term harm when accidents happen.
Common Stain Solutions
For General Stains: Most stains can be softly removed without scratching with a paste made of baking soda and water.
For Grease or Oil Stains: These can be removed by directly applying a small amount of dish soap, letting it stay for a few minutes, and then gently wiping it off with a soft cloth.
For Scuffs: Use a soft-bristled brush moistened with mineral spirits or soapy water. Always start your tests in a discrete location.

Tips For Prevention
To reduce the amount of stains:
To catch dirt before it gets to your floors, use mats at entryways.
To avoid scratches, use furniture pads underneath heavy objects.
Spills should be cleaned up right once to prevent discoloration.
Suggested Cleaning Supplies
Maintaining your LVP flooring requires the following product selection:
Safe Cleaners
Vinegar Solution: For routine cleaning without harsh chemicals, a solution of vinegar and water works well.
pH-Neutral Floor Cleaners: Avoid products that remove protective coatings; instead, look for ones that are expressly labeled as safe for LVP flooring.
Avoid Harsh Chemicals: Avoid using abrasive cleansers, bleach, or ammonia since these can harm your flooring's surface quality.

Keep LVP Gleam
By following these tips, cleaning luxury vinyl plank flooring doesn't have to be difficult. You can maintain your LVP looking brand new for many years to come by implementing a regular maintenance schedule, using safe cleaning supplies, and quickly clearing up spills. Keep in mind that prevention is essential; making little changes now will save you time and work later! Thus, adopt these habits and let your floors sparkle!
All-in-One Cleaning Guide for a Fresher, More Comfortable Home
Step-by-Step Tips to Clean, Organize, and Maintain Every Part of Your Space
Best Way To Clean Gold Earrings
Best Way To Clean MacBook Screen
Best Way To Clean Vinyl Records
Can Washing Machines Be Stopped Mid-Cycle
Can You Wash Dry Clean Only Curtains
Cleaning Comfort Room Safety Precautions To Be Observed
Cleaning Pet Urine From Carpet
Cleaning Stainless Steel Fridge
How Technology Is Remodeling The Cleaning Industry
How To Get Rid Of Cigarette Smell In Car
How To Get Self Tanner Out Of Carpets
How To Make Your House Smell Like Laundry Detergent
How To Prepare Your Home For A Deep Cleaning Service
How To Prevent Allergies With Cleaning
How To Remove Carpets DIY Guide
How To Replace Carpets By Yourself
Magic Eraser To Spot Cleaning Walls
Open Windows To Deodorize Home
Removing Bleach Smell From House
Best Way To Clean Vinyl Records
Cleaning your vinyl records is crucial for preserving their sound quality and ensuring a long lifespan. Dust, dirt, and grime can accumulate in the grooves of your records, leading to unwanted pops and clicks during playback. In this guide, we explore the best practices for cleaning vinyl records effectively, allowing you to enjoy the rich, warm sound that vinyl is known for.
How To Clean Vinyl Records Best Practices For Preservation And Performance
Understanding The Importance Of Cleaning Your Vinyl Records
This is very important since cleaning the vinyl records will both help them to have good quality and ensure that the vinyl record has a longer life. Dust, grime, and dirt will thus pile up in your records' grooves. This will lower playback quality and probably spoil your turntable's needle. On this page, we'll learn the ways of how to clean the vinyl record and keep maintaining their good sound quality and protect our collections.

Learn About Cleaning Your Vinyl Records Significance
Vinyl records attract dust, grease, and other dirt which significantly degrades audio quality but brings forth rich sound reproduction. It is due to the following reasons that they need thorough cleaning for good quality sound performance:
They develop pops, clicks, and distortion during playback due to dust and dirt. Good clear sound is maintained once cleaned to promote listening.
Longer Lifespan: The grime buildup develops scratches and degradation with time. Maintaining allows you to prolong the integrity of your vinyl for a long period.
Less Needles Wear: A clean record minimizes the wear on your turntable needle, thus saving you on new needles and repair costs.
Equipment and Materials Required to Clean Vinyl Records
Before you begin cleaning your vinyl records ensure that first collect all these equipment and materials:
Record Cleaning Brush: soft, anti-static brush to dust the surface of the vinyl records without scratching the vinyl record.
Cleaning Solution: There are several choices, like vinyl record cleaning solution, or mild surfactants such as Tergitol added to distilled water. Solutions including isopropyl alcohol dissolve the coating on the vinyl.
Microfiber Cloths: Dry your records carefully without leaving behind lint.
Vacuum Record Cleaner (Optional): If truly going deep with cleaning, then do think about getting a vacuum powered record cleaner which removes dirt deeply into grooves.
Step-by-Step Ways to Clean Vinyl Records
Here are three dependable ways in cleaning your vinyl record.
Method 1: Cleaning with Brush and Solution (Manual Cleaning)
1. Clean the Record: Use a record cleaning brush to sweep away surface dust. Grooves have to be swept to avoid scratching.
2. Prepare the Cleaning Solution: Take a few drops of your cleaning solution and put this in a bowl mixed with distilled water.
3. Apply the Solution: Dip your microfiber cloth in the solution. Make sure that the cloth is not soggy. Gently clean your record in circular motions following the grooves.
4. Rinse: Wipe away remaining cleaning solution with another damp cloth with distilled water.
5. Dry: Gently pat dry record with a clean microfiber or let it air-dry entirely before storing.
Method 2 Vacuum Record Cleaner
1. Setup: Place your record on the turntable of your vacuum cleaner according to manufacturer instructions.
2. Clean: Turn on the vacuum and let it suck dirt and dust out of grooves without touching the record surface.
3. Check: Look for debris in the grooves after cleaning and repeat if needed
Method 3: Spin-Clean Record Washer
1. Fill Washer: Fill the Spin-Clean washer with distilled water up to the marked line, add a few drops of cleaning solution.
2. Insert Record: Insert your record between the brushes in the washer with no pressure.
3. Spin: Turn the handle to wash both sides of the record completely.
4. Rinse: Remove the record and rinse it under distilled water to remove all trace of cleaning solution.
5. Dry: Dry with a microfiber cloth or air dry completely.
Common Mistakes to Avoid When Cleaning Your Vinyl Records
To not ruin your records when cleaning, follow these tips:
Never Use Harsh Chemicals: Never use any of the home cleaning solutions or products that contain alcohol since they will break down the protective coatings.
Do Not Over-Saturate: Any extra moisture will warp your vinyl records. Clean with damp cloths instead of soaking them.
Always Handle Your Records with Care: You must always hold records by their edges to avoid printing your fingerprints on the grooves.
Tips on Taking Care of Your Vinyl Records After Cleaning
Store your vinyl collection in the best condition after cleaning by:
Storing Properly: Use anti-static inner sleeves to prevent dust and static buildup from damaging your records.
Keep Records Vertical: Store your vinyl records upright to prevent warping or bending.
Regular Maintenance: Clean your records regularly, especially before playing them, to ensure sound quality.

Essential Care and Maintenance Tips for Your Vinyl Record Collection
As these are the best sources to find quality sound as well as record life, keeping clean and maintaining your vinyl records in time is essential. It includes keeping your records dust-free and free from dirt and grime through best practices based on this guide. So, you will enjoy completely the rich, warm sounds of vinyl. Proper cleaning improves your listening experience and protects your investment in your record collection.
All-in-One Cleaning Guide for a Fresher, More Comfortable Home
Step-by-Step Tips to Clean, Organize, and Maintain Every Part of Your Space
Best Way To Clean Gold Earrings
Best Way To Clean MacBook Screen
Best Way To Clean Vinyl Records
Can Washing Machines Be Stopped Mid-Cycle
Can You Wash Dry Clean Only Curtains
Cleaning Comfort Room Safety Precautions To Be Observed
Cleaning Pet Urine From Carpet
Cleaning Stainless Steel Fridge
How Technology Is Remodeling The Cleaning Industry
How To Get Rid Of Cigarette Smell In Car
How To Get Self Tanner Out Of Carpets
How To Make Your House Smell Like Laundry Detergent
How To Prepare Your Home For A Deep Cleaning Service
How To Prevent Allergies With Cleaning
How To Remove Carpets DIY Guide
How To Replace Carpets By Yourself
Magic Eraser To Spot Cleaning Walls
Open Windows To Deodorize Home
Removing Bleach Smell From House

Best Way To Clean Bong
A smooth and enjoyable smoking experience may be guaranteed with a clean bong. Resin and accumulation over time can have an impact on flavor and overall health. Disassembling your bong into its component parts is essential to keeping it in peak condition. Coarse salt and isopropyl alcohol work wonders together to get rid of tough residue. Soak the bowl and downstem separately for optimal results. To get rid of any accumulation, swish the cleaning solution about the main chamber and then give it a thorough rinse with warm water. This needs regular upkeep; clean it quickly to avoid accumulation, and replace the water after every usage. By taking these easy precautions, you can always maintain your bong clean and ready for new hits.
The Ultimate Cleaning Guide For A Crystal-Clear Bong
Enjoy A Cleaner Smoking Experience

In the view of bong enthusiasts, a bong is not just a tool for smoking but instead an important element of the experience. But then, for one to be able to appreciate what his or her bong has to offer, it is recommended that the device is clean. With a clean bong, hits will be smoother, the flavor will be better, and the smoke will be noticeably healthier for the body. This article serves as a complete guide, demonstrating how to clean a bong and avoid its contamination with resin.
Why Cleaning Your Bong Matters
Health Considerations
Medical reasons are always the top concern for people who want to know the importance of a bong cleaning. Dirty bong water can harbor bacteria and mold over time. If you use a filthy bong, the danger of inhaling bacteria with every breath and having lung problems is quite high. Regular tidiness helps to ease these threats and helps in creating a cleaner smoking environment.
Flavor Enhancement
Flavors are also influenced by how a bong has been used and most bongs have numerous uses. Wastes that might have been generated in the past use of the bong may contribute to very nasty tastes, that are not appealing to the smoker. If you want to maintain the maximum taste of your weed, it’s important to get a bong cleaning now and then.
Improved Functionality
A clean bong does its job quite well. Resin builds up with time and obstructs any air passages, making the filtration system a little less effective. There should be regular cleaning of the place so that it maintains its degree of efficiency which ultimately assures better hits and filtrations for the user in use.

The Essential Tools For Cleaning Your Bong
In the course of preparing the things you are going to need before the actual cleaning of the bong takes place, you will be taking necessary items for its service. You are going to need:
Isopropyl Alcohol: It is one of those aggressive solvents that can take in some thick grime and resin.
Coarse Salt: Some coarse salt fragments serve as good abrasives. These are used to scrub off strong residuals quite efficiently.
Pipe Cleaners or Brushes: These can be used for reaching inside the bong in areas where cleaning has tighter space. For such cases, either a pipe cleaner or a brush will be suitable.
Cotton Swabs: These are helpful in places where you have very minute components that may require detailed cleaning.
Warm water: Cleaning solutions used and residues after soaking have to be washed out.
Plastic Bags or Containers: The petty pieces can also be subjected to utter boredom, bowls, and down stems.
Gloves: This is because some people have different kinds of making, so wearing gloves is recommended so as not to irritate when dealing with cleaning chemicals.
A Comprehensive Guide to Bong Cleaning
1. Take Your Bong Apart
Carefully disassembling every component that can be removed is the first step in cleaning your bong. This covers the downstem, bowl, percolators, and any other accessories. You can reach every part that needs cleaning by disassembling.
2. Get your cleaning solution ready.
Combine equal parts isopropyl alcohol and coarse salt in a bowl or right in the bong. While the salt works as an abrasive to remove tough accumulation, the alcohol will dissolve resin.
3. Make Every Component Clean
Bowl and Downstem
Give these ingredients a half-hour soak in the cleaning solution. After soaking, scrub away any leftover residue with brushes or pipe cleaners. The interior of the bowl should receive particular attention because this is where resin tends to build up.
Main Chamber
Fill the bong's main chamber with the alcohol-salt mixture. For approximately five minutes, shake vigorously while covering all openings with your hands or a cloth. This will assist in removing any tough dirt that has become lodged inside.
4. Rinse well.
Empty your bong's contents into a sink after shaking it, then give every part a good rinse with warm water. Make sure that no salt or alcohol residue remains, as they can alter the flavor of your smoking.
5. Dry Before Reassembly
Before putting your bong back together, let everything air dry fully. By taking this procedure, moisture that may otherwise cause mold growth is kept out of the inside.

Pro Tips to Keep Your Bong Fresh And Free Of Resin
Keeping your bong clean in between deep cleanings is just as important as doing thorough cleaning now and then. Here are some expert tips:
Change Water Often
Change out the water in your bong every time you're done smoking with it. It's a simple move that does so much. The old water develops a smell and taste that contributes to how one smokes.
Use screens or filters
Just think of placing screens inside your bowl to catch all the bits before they ever hit the water. In the process, it gives less resin that could build up your bong for cleaning.
Quick Rinse After Use
After every use, rinse your bong with warm water to remove the loose stuff. This simple step reduces buildup over time.
Store It Right
When not in use, keep your bong stored away in a cool, dry spot out of direct sunlight. The more light that reaches it, the more the materials might degrade over time; meanwhile, any dampness invites mold to develop.
Other Ways to Clean
If you prefer the use of natural options or do not have rubbing alcohol, here are some alternatives you could consider:
Vinegar and Baking Soda
Mix equal parts of vinegar and baking soda in your bong; the bubbling action will help dislodge some grime. Let it sit for about 30 minutes, then wash it thoroughly with warm water.
Lemon Juice
The reason lemon juice shines in resin build-up dissolving is due to the juice's acidity. Mix this with hot water to soak your bong and leave a fresh smell afterward.
Store-Bought Bong Cleaners
There are a great deal of bong cleaners available on the market. These cleaners usually contain particular ingredients for resin buildup that do not damage the glass or other materials.
Tackling Typical Bong Cleaning Issues
Cleaning a bong may prove to be difficult if one has allowed much time to elapse or the designs and percolators have become very intricate. The following are some tips for handling several common problems.
Difficult Resin Build-up
If resin resists regular cleaning, soak the affected parts in an isopropyl alcohol solution or vinegar solution overnight and scrub again.
Spots That Are Hard to Reach
Pipe cleaners or small brushes will help with those nooks and crannies for the more intricate bongs and/or those with multiple percolators.
Smells that persist after cleaning
If, after a good cleaning, you can still feel odors, then on your next use, place some activated charcoal in the water chamber—it helps to soak up unwanted odors.
Advantages Of Regular Maintenance
Frequent maintenance greatly improves your smoking experience overall and goes beyond simply keeping your bong clean:
Consistency: Without the influence of outdated residues, periodic cleaning guarantees that your herbs will have constant flavor profiles.
Longevity: A properly cared-for bong lasts longer; frequent cleaning stops resin buildup from wearing down components.
Satisfaction: Every session is made more enjoyable when you get smooth hits from a clean piece.

Enhance Your Smoking Experience With Clean Bong
Enjoying smooth hits and staying healthy while smoking depends on keeping your bong clean. You can make sure that every session is flavorful and fresh by using regular maintenance procedures and adhering to this thorough tutorial on how to clean your bong.
In addition to improving your smoking experience, making the effort to properly care for your cherished piece will increase its lifespan. So get your cleaning tools ready and provide your bong the respect it merits! Keep in mind that happier sessions result from a clean bong—savor each hit!
All-in-One Cleaning Guide for a Fresher, More Comfortable Home
Step-by-Step Tips to Clean, Organize, and Maintain Every Part of Your Space
Best Way To Clean Gold Earrings
Best Way To Clean MacBook Screen
Best Way To Clean Vinyl Records
Can Washing Machines Be Stopped Mid-Cycle
Can You Wash Dry Clean Only Curtains
Cleaning Comfort Room Safety Precautions To Be Observed
Cleaning Pet Urine From Carpet
Cleaning Stainless Steel Fridge
How Technology Is Remodeling The Cleaning Industry
How To Get Rid Of Cigarette Smell In Car
How To Get Self Tanner Out Of Carpets
How To Make Your House Smell Like Laundry Detergent
How To Prepare Your Home For A Deep Cleaning Service
How To Prevent Allergies With Cleaning
How To Remove Carpets DIY Guide
How To Replace Carpets By Yourself
Magic Eraser To Spot Cleaning Walls
Open Windows To Deodorize Home
Removing Bleach Smell From House

Can I Clean On New Year’s Eve?
Cleaning on New Year's Eve can be a meaningful way to welcome the new year while setting intentions for growth and renewal. Many cultures embrace this tradition as a way to clear out negative energy and make space for positivity in the coming year. Whether you choose to do a thorough clean or simply tidy up, each action contributes to creating a fresh and inviting environment. By balancing cleaning with celebration, you can enjoy a festive atmosphere that reflects hopefulness for the year ahead.
Finding The Perfect Balance Between Cleaning And Celebrating On New Year's Eve
Advantages Of Cleaning On New Year's Eve
As midnight nears, parties and fireworks excite many people on New Year's Eve. Confetti, parties, fireworks, laughter, and fun fill the night. But even during the celebration, some still wonder about the idea of cleaning during the celebrations. For some, cleaning disrupts the festive mood. For others, it feels like a great chance to start fresh in the new year. Why do people think about this?

The Story Behind Cleaning Before The New Year
In many cultures worldwide, cleaning before the new year is an important tradition. It symbolizes a fresh beginning and the removal of last year's negative energy. In several Asian cultures, people clean their homes thoroughly. They believe this helps sweep away bad luck. It also creates space for good fortune in the new year. This tradition reflects strong beliefs about cleansing.
If you are thinking of cleaning on New Year’s Eve, consider what is for you. Are you looking to clear out clutter to make space for new opportunities? Or you want to create a welcoming environment for friends and family as you welcome the new year together? Whatever it may be, cleaning can be a good way to transition into a new chapter.
Balancing Cleaning And Celebrating On New Year’s Eve
Whether to clean or not during New Year’s Eve is still up for a debate. Some people thinks that cleaning takes away the joy of welcoming a new year. But, some look at it as new beginning. Finding balance between them is important to ensure you are enjoying both of it.
You can set a specific time limit for cleaning before the celebrations begin. Setting up a specific time can help you stay focused and efficient.
Identify and prioritize areas of your home that need attention most urgently. Focus on high-traffic areas like the living room or kitchen because it where the guests will gather.
If you are hosting a gathering, make sure to ask for help of your friends or family members. Turning cleaning into a group activity or playing music can make it more enjoyable and fun.
If you ever find that cleaning before midnight feels rushed and overwhelming, maybe setting aside some time after celebrations is okay for you. In this way, you can enjoy the celebration without distractions.

The Psychological Benefits Of Cleaning
Cleaning offers psychological benefits that really improve your well-being. A tidy room probably reduces stress. A clean space increases productivity. A spotless room creates a calm atmosphere. This peacefulness aids in clear thinking. Clear thinking helps you set goals and resolutions for the new year.
Moving your body while cleaning releases endorphins. Endorphins really lift your mood. As you sort and organize, feelings of accomplishment appear. You become prepared for new challenges. Face the new year with confidence.
Living Simply
A new year is about to arrive. Many are looking at their belongings, thinking of living with fewer things. Cleaning on New Year's Eve is an excellent opportunity to see which items really bring joy and value. Take time to sort your stuff. Ask yourself if each item is useful or has a special meaning. Give away things that don't make sense in your life or things you have not handled for months. Giving away will give you space in the house. And letting go allows you emotional space because now you have let go of connections to those things. Freedom might make you feel refreshed.
Defining A New Start
New Year's Eve cleaning is not really that tough. It makes positive energy come into your house. A clean place welcomes people with open arms. Light candles, put some fresh flowers, or put on soft music while cleaning. These are things that will make your house feel all warm and fuzzy. Pay attention to little things, such as dishes and wiping off surfaces. These chores make all the difference when visitors come. Little efforts amount to coziness and pleasure. There is nothing compared to cleanliness.

Cleanliness As A New Year's Resolution
You can make it one target to clean up on New Year's Eve for the next year or as an annual New Year's resolution. It will help keep your benefits all around getting cleaned regularly. Schedule at least an hour or two a week, possibly more. Over time, you will find it completely changed dramatically.

Setting Your Intentions
Cleaning can be helpful in setting your intentions. It is possible that you are not only cleaning but also setting the tone for the year that is about to come. Cleaning can be personal. It allows you to look back on the last year that you just left and prepares you for what to come. This will free both your body and mind. Remember that each step you take gets you closer to your ultimate goal of refreshing and welcoming atmosphere. It is acceptable to enter a home that displays excitement and joy for the new chapter of life that awaits you before you get to celebrate the new year and spend time with your loved ones.
New Beginnings
You can clean on New Year's Eve. It’s all up to you. Cleaning can be a sign of a new start and create an environment of excitement. It could be the whole place or a small portion before the celebration; it depends on you. Be proud of your new beginning as midnight approaches and fireworks light up the sky. Get ready and prepare to rejoice over a new beginning.
Everything You Need to Know About Cleaning and Home Care
From Quick Daily Fixes to Full Deep Clean Guides, All in One Place
House Cleaning Made Simple With These Must-Know Tips
The Smart Way to Deep Clean Your Home and Save Money
How to Deep Clean Your Home One Room at a Time
New Year’s Eve Cleaning Superstitions and Facts
Street Cleaning Efforts That Make a Big Impact
Simple Ways to Cleanse Negative Vibes From Your Space
The Truth Behind the Egg Ritual for Aura Cleansing
Cleaning Routines Designed for Your Busy Life
Can Rain Really Help Clean City Streets
How an Egg Cleanse May Affect You Spiritually and Physically
Time-Saving House Cleaning Tips That Actually Work
Daily Cleaning Habits That Keep Your Home Looking Great
Why Cleaning Your Home May Help You Sleep Better
The Mental Health Benefits of a Clean and Clutter-Free Space
How Quezon City Measures Up in Cleanliness
Is the Philippines Taking Steps Toward a Cleaner Future
How to Maintain a Clean Home Without Harsh Chemicals
Keep Your Home Sparkling All Year With These Simple Tricks
What’s the Difference Between Spring Cleaning and Deep Cleaning
The Benefits of Regular Strata Cleaning for Property Management
Why Disinfecting High-Touch Surfaces Is Key to a Healthy Home
How Deep Cleaning Improves Your Health and Home Environment
The Link Between Deep Cleaning and Fewer Allergy Symptoms
Why Cleaning Can Help You Feel Calmer and Happier
The Best Way to Keep Your Home Clean Week After Week
Everything You Need to Know About Spring Cleaning